How to turn off automatic updates in Windows 10
The quickest and the easiest ways to avoid unwanted updates.

Windows 11 review: what we think of the new OS
How to install Windows 11: safe and secure install
What you need to know before upgrading: things to note before downloading the latest OS
Windows 11 TPM requirements: Microsoft's strict security policy
Microsoft has come a long way with its automatic update systems, which it refers to as quality updates or cumulative updates. It hasn't all been plain sailing, and there have been updates that have brought machines to their knees along the way, but it's hard to recall the last time things went really bad with an update. Automatic Updates are generally fine.
Still, if you're running on older hardware and you're happy with the state of your machine, or you simply don't want to upset things with a potential buggy update, then you can turn automatic updates off. Either temporarily or permanently.
It's easy to postpone any updates within the Update settings screen for anything up to 35 days. If you want to go for longer than that, then the Registry is the place to go.
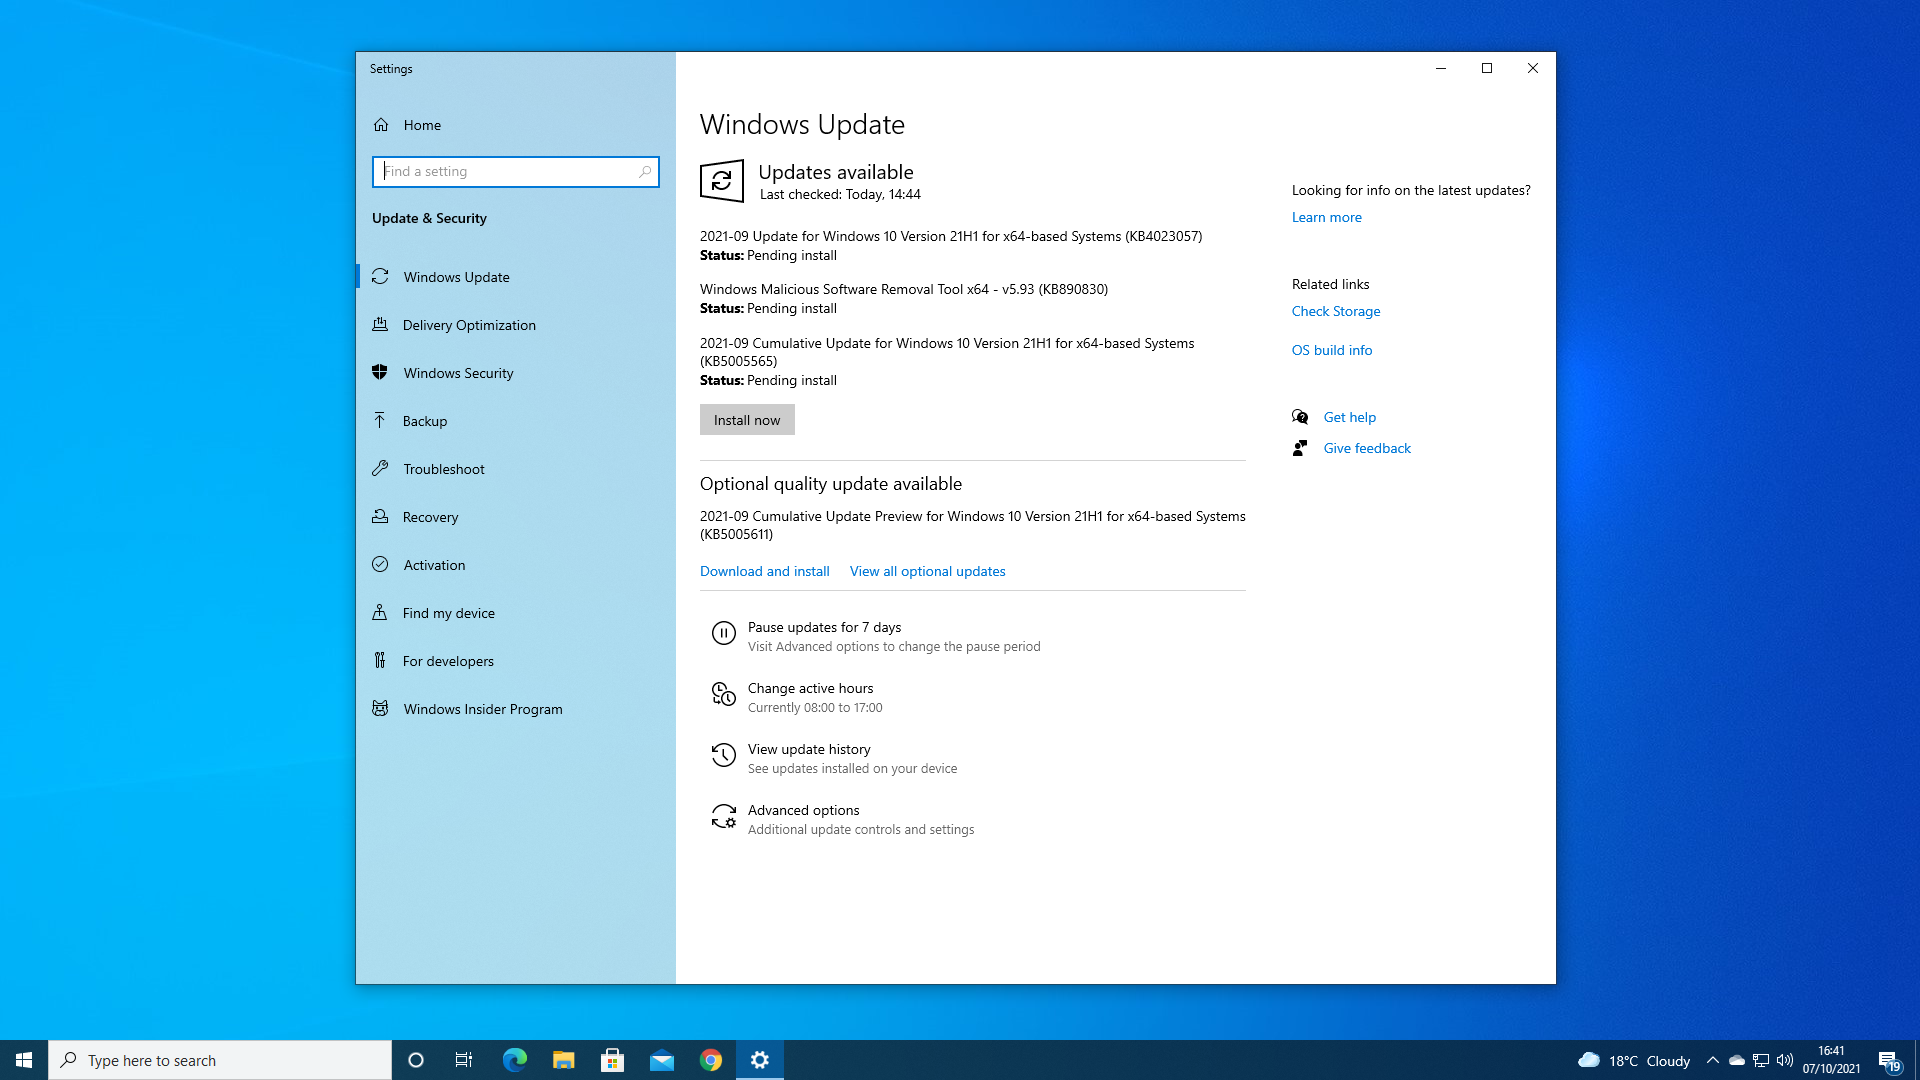
For a temporary pause to automatic updates, hit the Windows key and then type Update into the box and hit return. This will take you to the Windows Update settings screen.
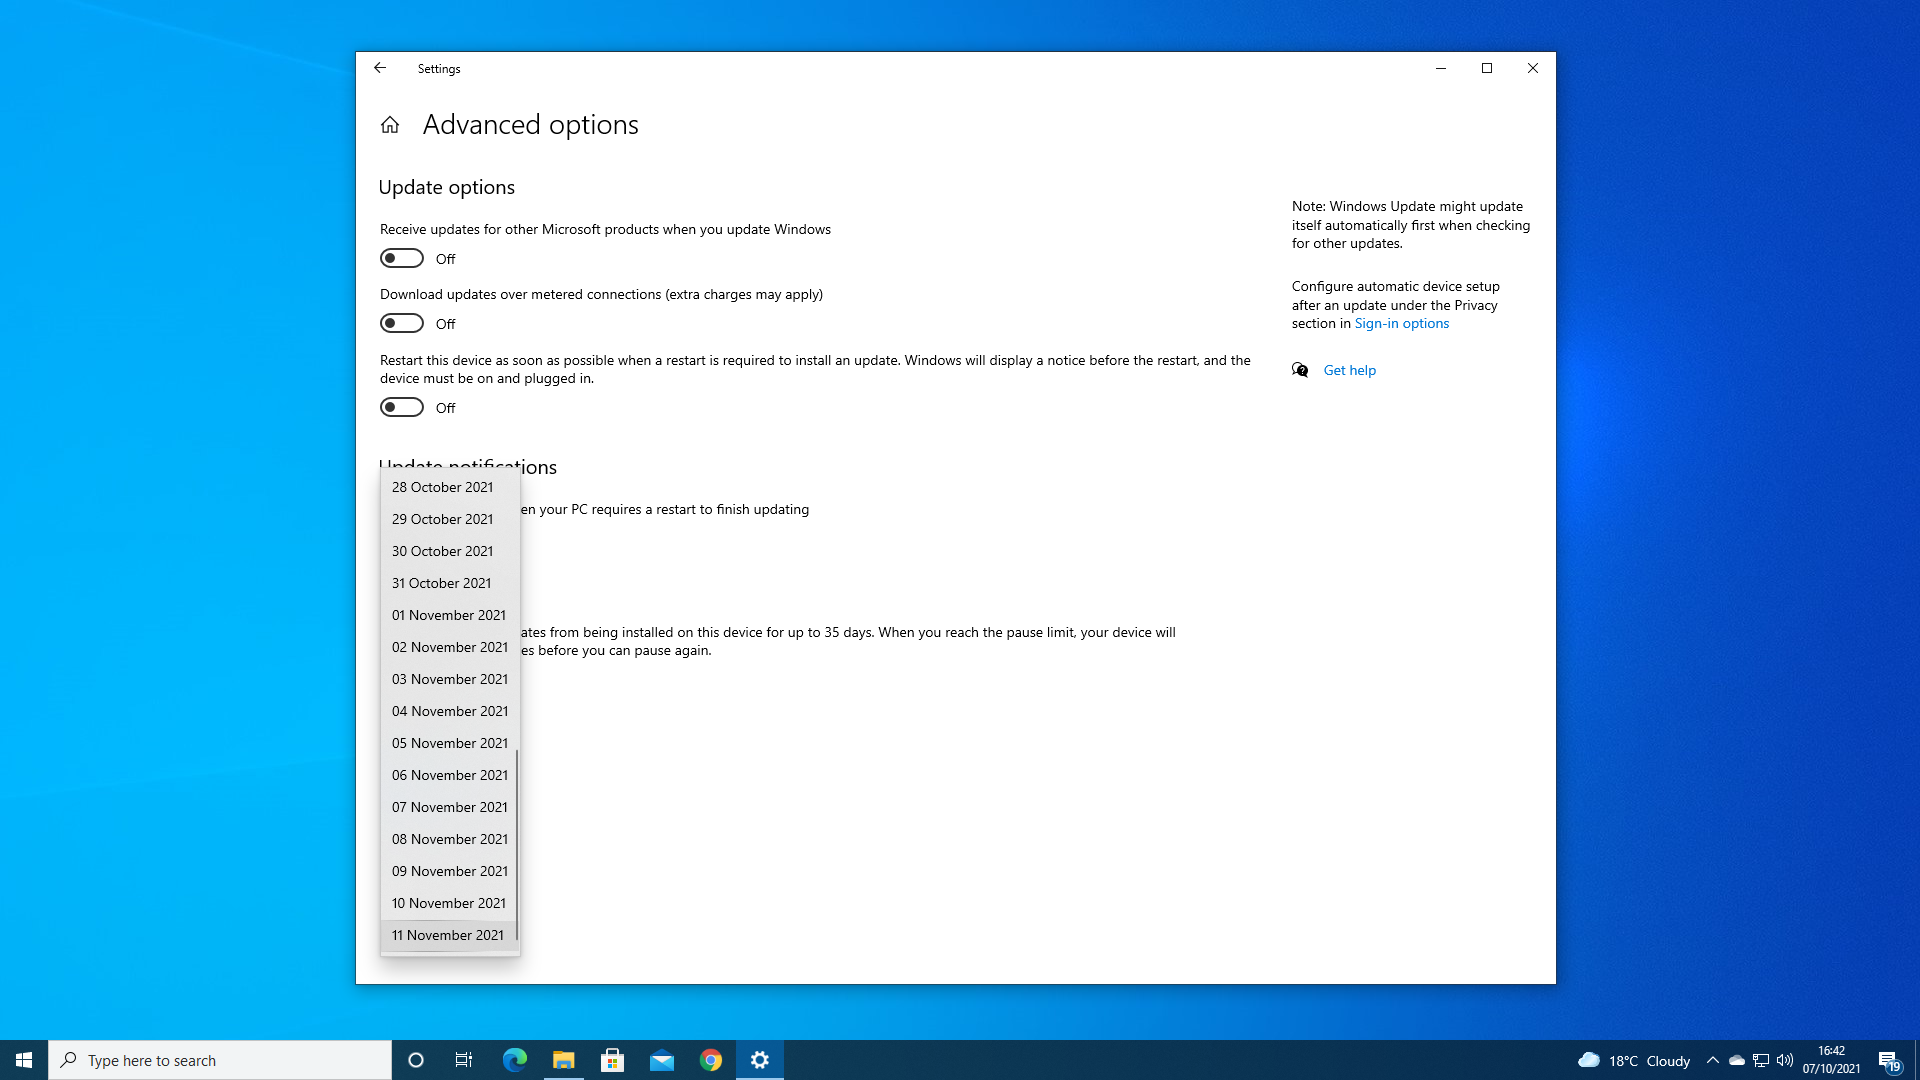
You'll find an option in the lower half of the screen to 'Pause updates for up to 7 days' but if you want more than that, you're going to want to hit the Advanced options entry at the bottom of the page.
On this screen, you will see the option of pausing the updates for up to 35 days. Just pick the date that you want updates to resume.
If you want to hold off updates for longer than that, you're going to need to pop into the Registry.
The biggest gaming news, reviews and hardware deals
Keep up to date with the most important stories and the best deals, as picked by the PC Gamer team.
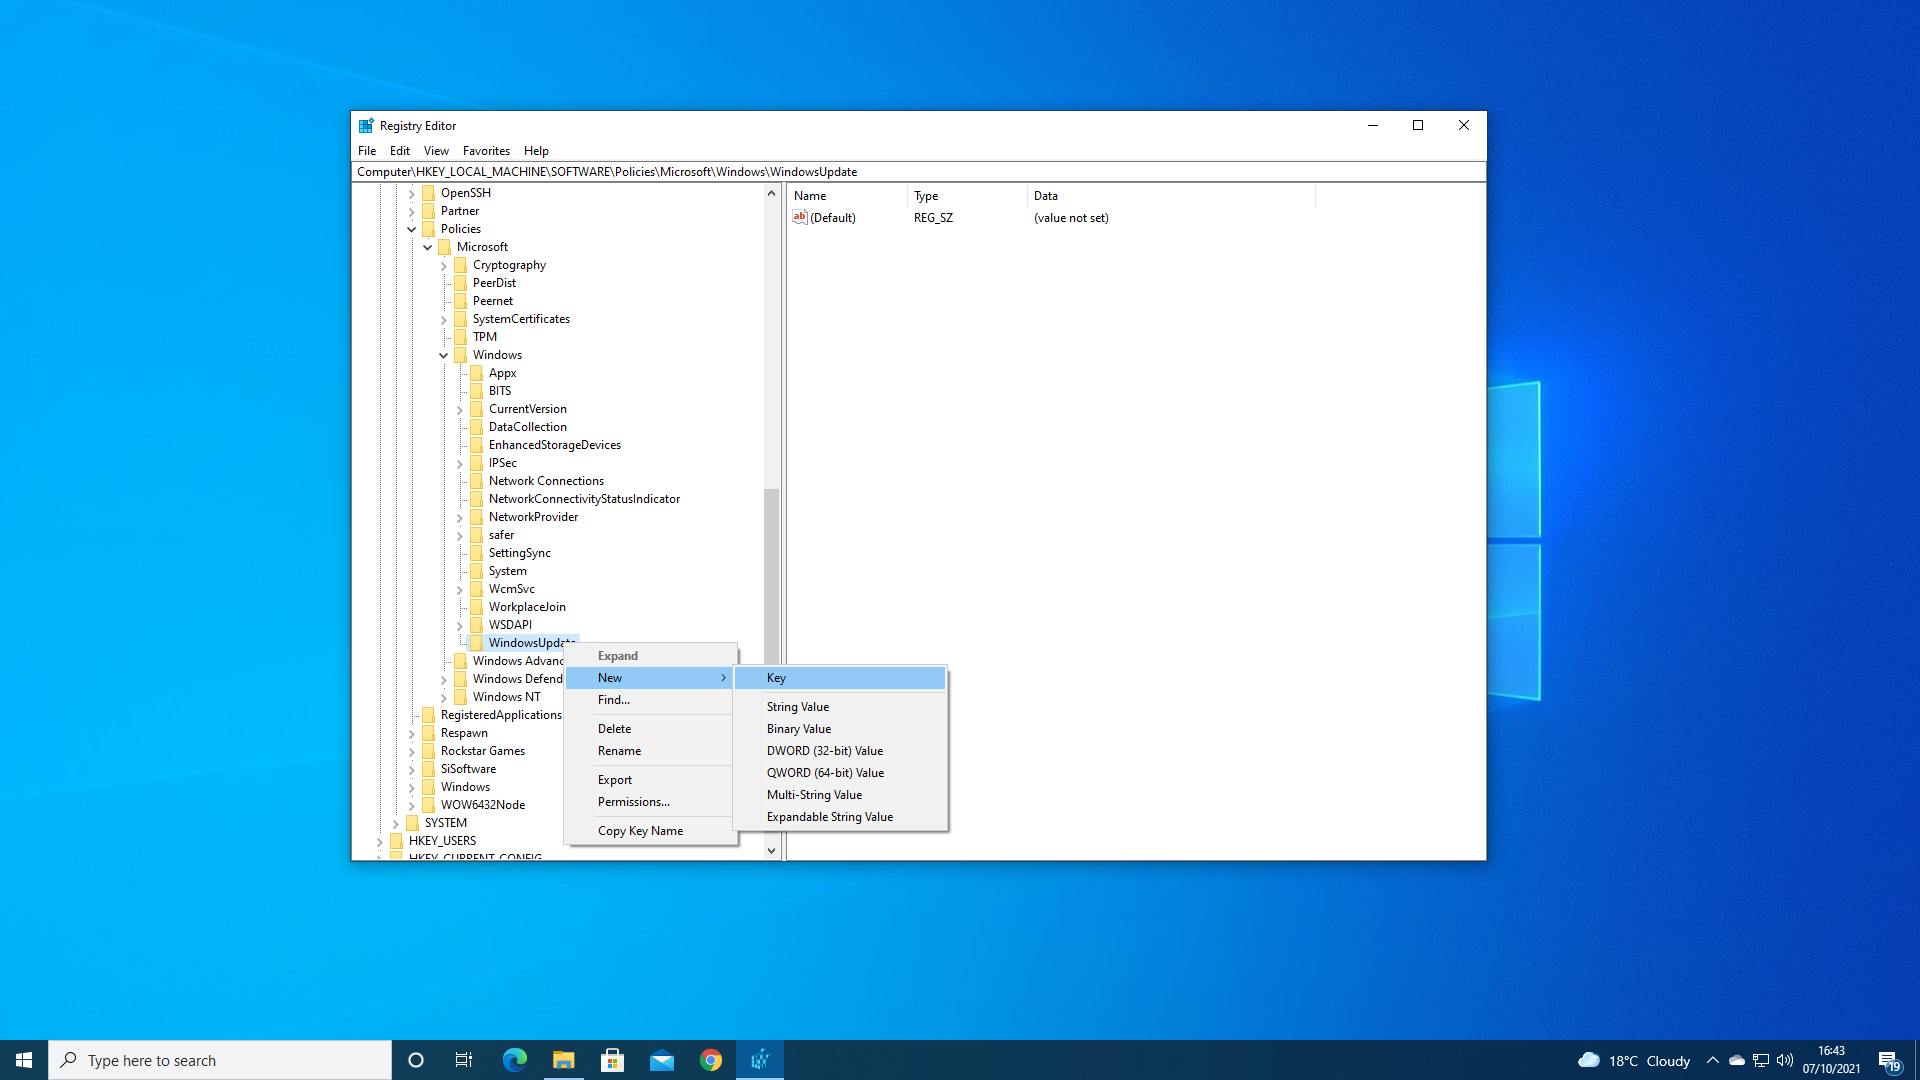
Hit Win+r and enter regedit into the run command box. Make your way to HKEY_LOCAL_MACHINE/SOFTWARE/Policies/Microsoft/Windows and then right-click the right-hand panel, clicking New and then Key.
Name this key WindowsUpdate and hit return.
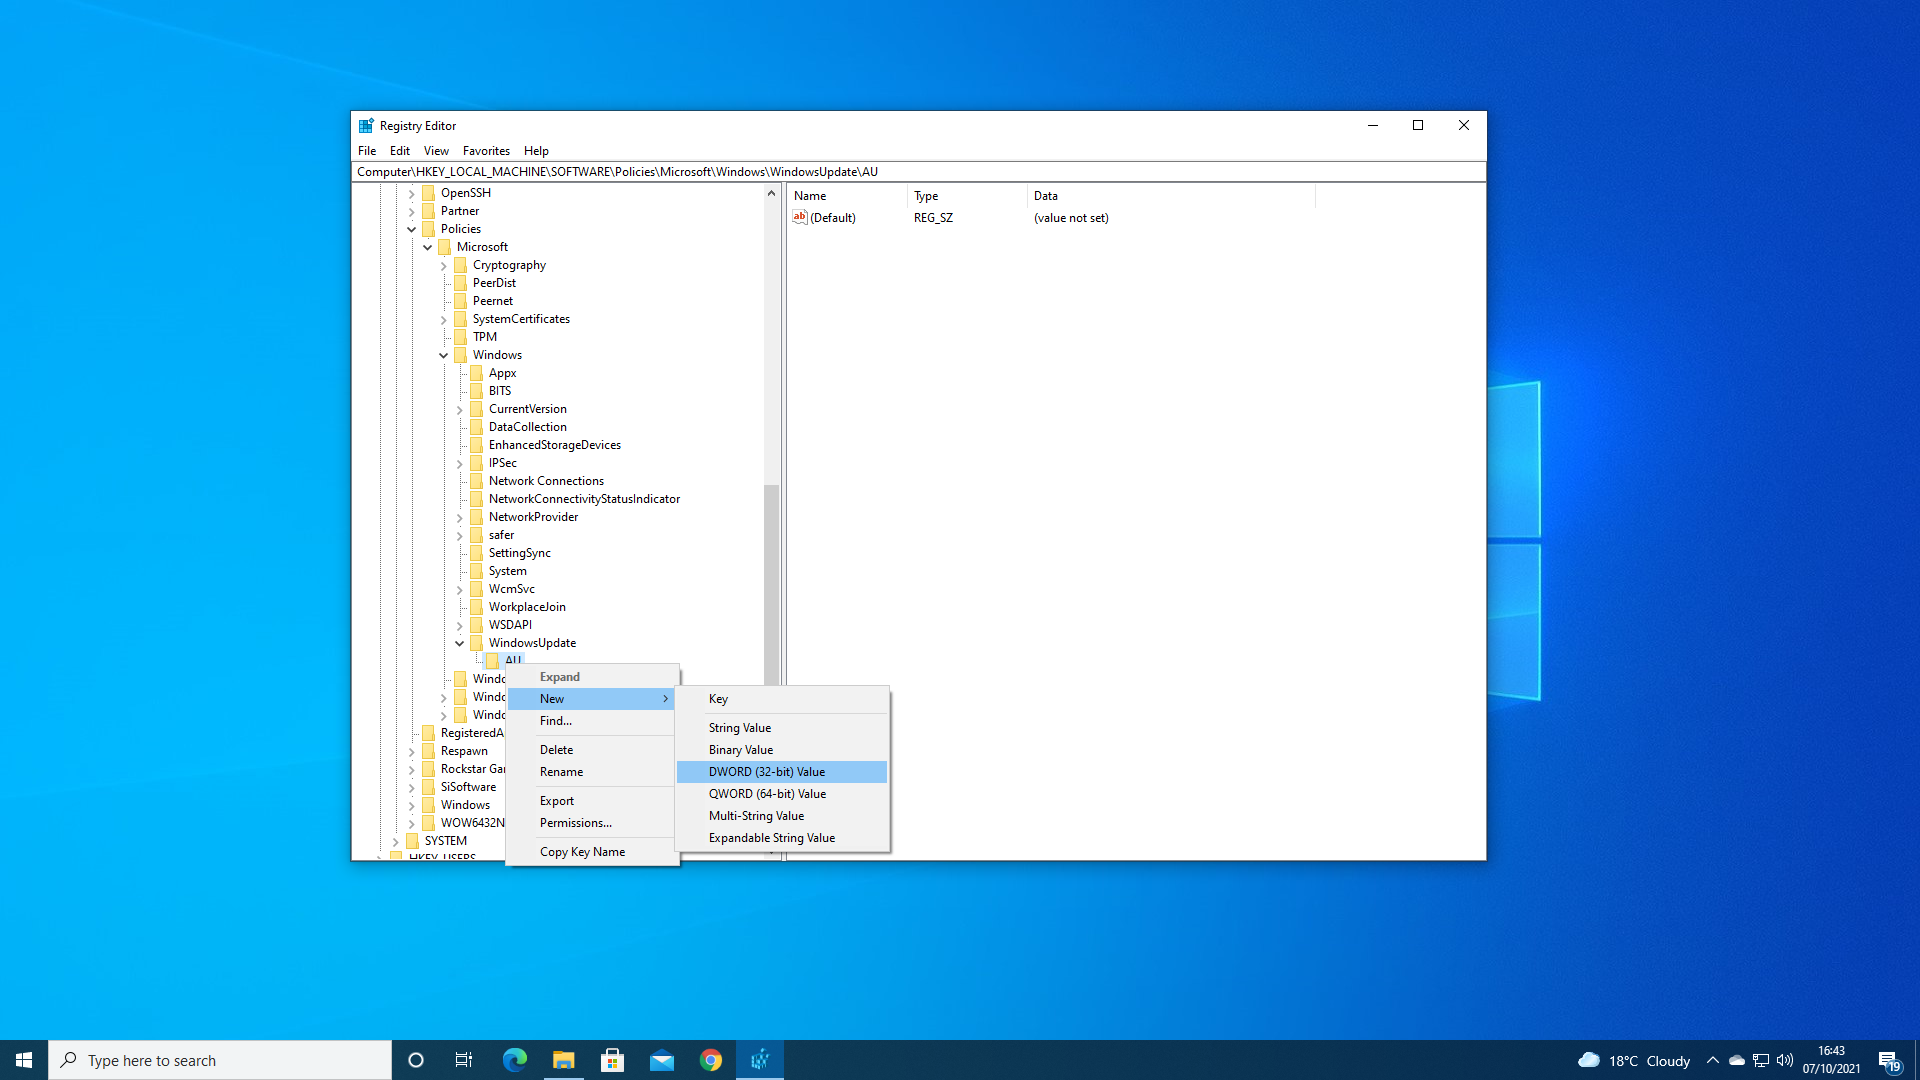
Right-click this key and create a key inside it called AU.
Right-click this AU key and create a new DWORD (32-bit) Value entry called NoAutoUpdate. Double click this entry and set its value to 1.
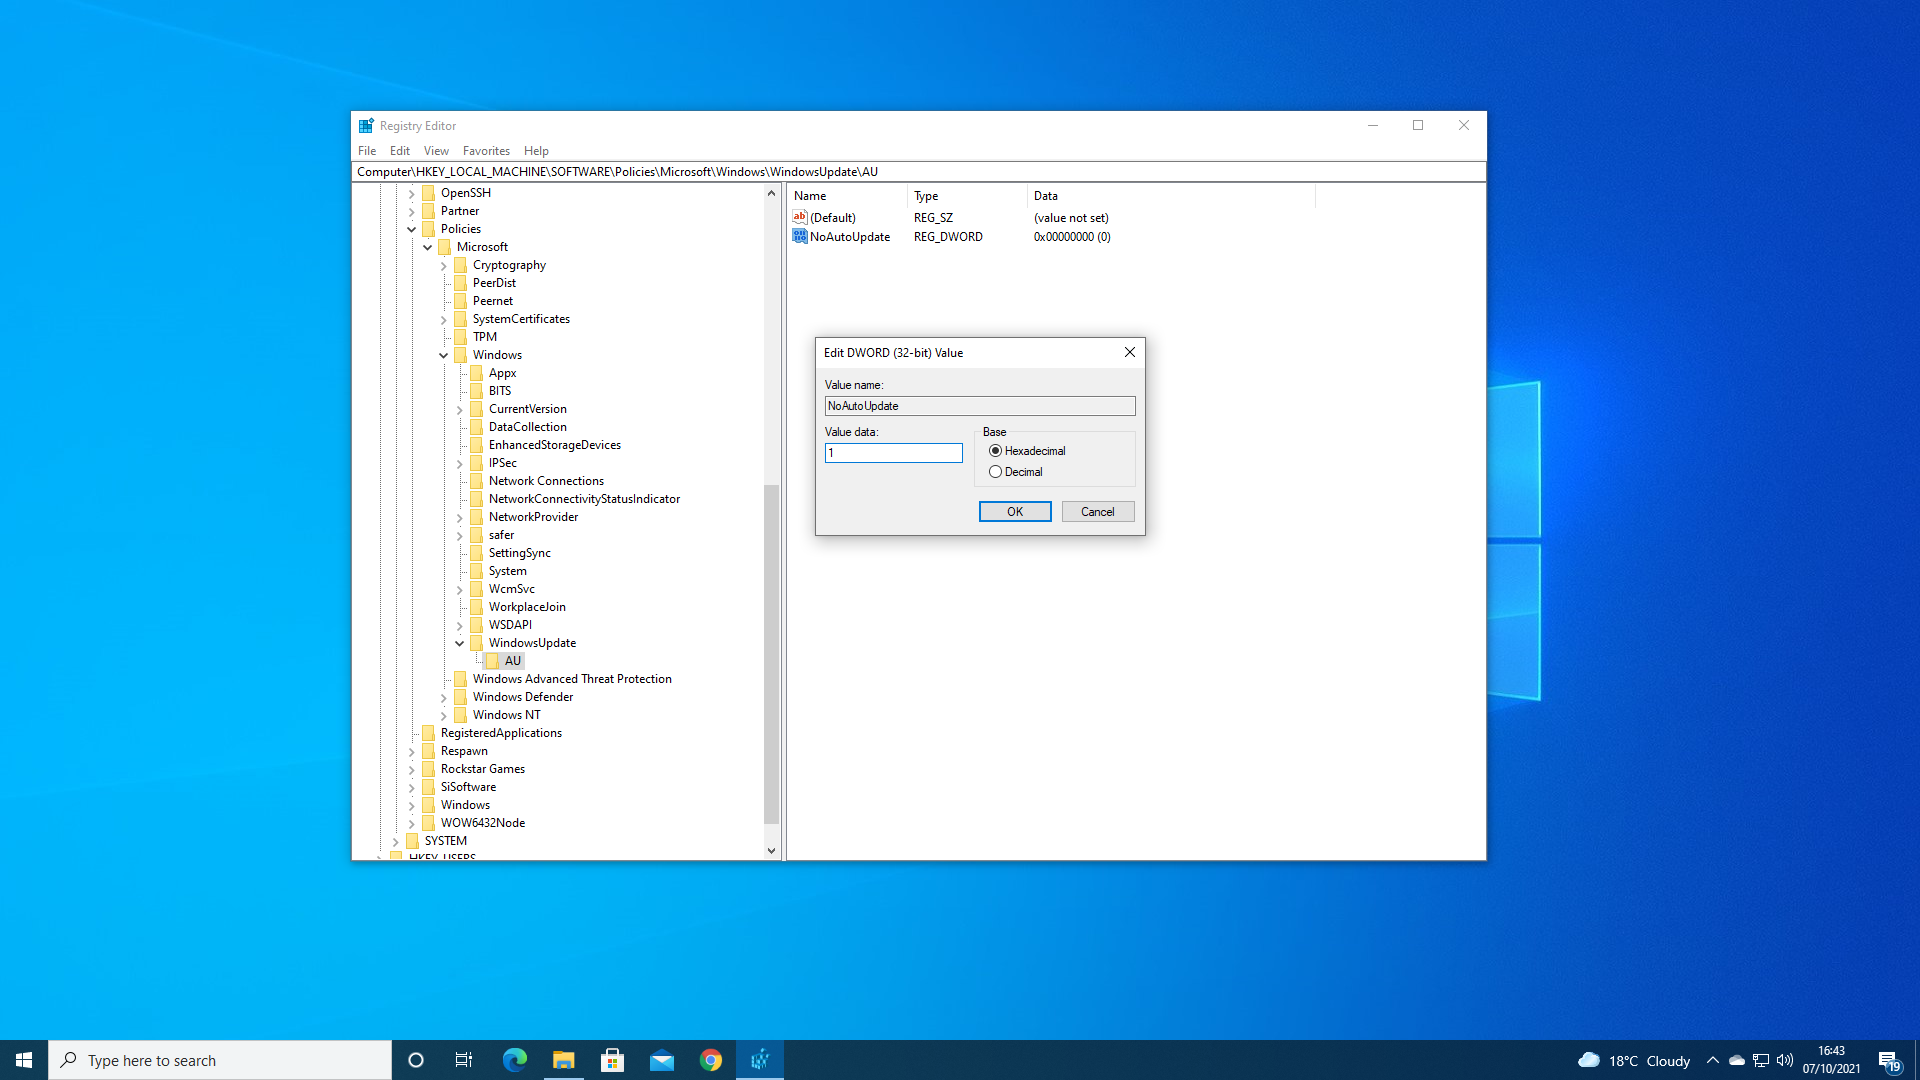
Exit the Registry Editor, and then restart your machine.
Once you've rebooted you'll find that Windows 10 will no longer update automatically. If you want updates from this point on, you're going to have check for and install them manually. Or delete the keys you've just created.
Alan has been writing about PC tech since before 3D graphics cards existed, and still vividly recalls having to fight with MS-DOS just to get games to load. He fondly remembers the killer combo of a Matrox Millenium and 3dfx Voodoo, and seeing Lara Croft in 3D for the first time. He's very glad hardware has advanced as much as it has though, and is particularly happy when putting the latest M.2 NVMe SSDs, AMD processors, and laptops through their paces. He has a long-lasting Magic: The Gathering obsession but limits this to MTG Arena these days.


