Blackout map guide: The best drop locations in Black Ops 4 battle royale
Based on our time with the beta, these are the places we recommend starting out in CoD's new battle royale mode.

Squint just right, and you’ll notice the majority of named areas piecing together the map in Call of Duty: Black Ops 4’s Blackout mode are recreations of some of the most popular multiplayer and Zombies maps from Treyarch’s CoD games. Loot abundance feels just as generous as the speedy movement iconic to Call of Duty—as observed by our resident BR players—so choosing where to wingsuit over like a tactical sugar glider isn’t as tough a decision as PUBG’s feast-or-famine locations. Still, some spots stand above the rest for their reliable bounties or location for a less-intense drop. Here’s some of the choice areas to start a Blackout round off right.
1. Nuketown Island (B5)

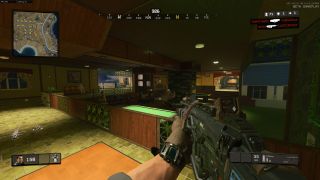
The T-shaped avenue of ruined homes lining this island’s surface on the western edge of Blackout’s map hosts plenty weapons and armor, so expect guaranteed close-quarters action if you choose to land here. The island’s true prize sits underground: a sprawling bunker complex accessible via concrete hatchways dotting the surface (such as at the end of the southern street).
Coupled with the relative safety of the bunker’s straight passageways—you only need to check ahead and behind you for enemies—is an increased likelihood for quality gear such as the rarer, kitted-out gold variant for weapons. Devote enough time for exploration, and you can often exit the bunker as a fully decked BR god within the early stages of a round. Use caution when departing the island, as the northeastern and southeastern bridges are typically watched by snipers.
2. Asylum (G4)

Nothing quite screams, “Hey, check out the zombies we put in Blackout” as the Halloween-postcard Asylum perched atop the hills at the map’s eastward end. You’re certain to awaken a horde of the wheezing shamblers as you stomp around the building’s two stories (you can see if a location will have zombies if it has a beam of blue light shooting from it in the distance) or brave the backyard hedge maze, so keep your ears sharp for enemy player footfalls behind all the groans and wails.
You can acquire powerful weaponry from the Black Ops’ Zombies series here, including the Zweihander LMG and Monkey Bomb grenade. The zombies themselves have a chance to drop medical items and arms (the kind you fire) such as the almighty Ray Gun—one shot from its goofy barrel will down or eliminate a non-armored player. The Asylum can also spawn a Mystery Box (usually on the second floor) that can award a handful of consumables or gold variants.
3. Lighthouse (C7)

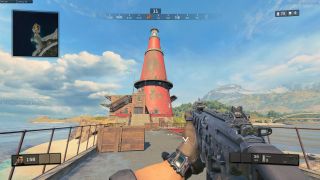
Sitting lonely at the map’s far south is the Lighthouse, a previously unlabeled landmark that Treyarch updated with a callout soon after the beta launched. Landing here represents a more unhurried gear-gathering strategy, as not many players prefer the lengthy travel necessary to either catch up to the circle or find some action further inland. Your odds of a fight right after touching down are consequently low, so scrounging the Lighthouse offers a relatively relaxing early-round gear-up; make sure to ascend the actual tower for a typically consistent level 3 armor spawn near the top. An ATV will often spawn near the end of the lighthouse’s walkway.
4. Fracking Tower (E6)

Check your confidence, because the Fracking Tower is easily one of the busiest hotspots of the entire map. Its location just south of the map’s center makes it a great launch point for other nearby landmarks, and the tower grounds offer piles of gear sitting within its clustered office buildings and cargo containers. Climbing the tower provides a commanding view of the surrounding hilltops, but don’t linger long for the risk of drawing sniper fire. Gauge these advantages against your skill for quick movement and pickups, as you'll almost always land with company of five or more.
The biggest gaming news, reviews and hardware deals
Keep up to date with the most important stories and the best deals, as picked by the PC Gamer team.
5. Neighborhood south of Construction Site (C3)

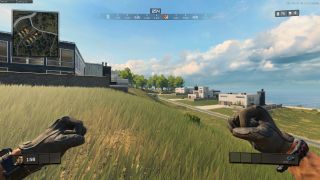
The unnamed areas sprinkled between the map’s major landmarks are often goldmines for nabbing plenty of gear with little confrontation. One such location is the sextet of modern homes just south of the Construction Site. Each house is a trove of high-level armor and passive consumables, and the popular Koshka sniper rifle makes a common appearance here. If you’re being hunted, it’s easy to melt into the treeline to the southeast or drop down to the beach to break sightlines. You’re also in a prime position to ambush travelers pushing northward from the Array or Nuketown Island or try for a lucky snipe across to the Construction Site.
6. Control Center buildings west of Hydro Dam (G2)

A great spot to acclimate your first few rounds, the two large office buildings just west of the looming Hydro Dam host scores of gear, guns, grenades, medicine, and a scant player count due to the proximity to the map’s edge. You’ll find workhorse weaponry in each office’s second floor, including the reliable Rampart-17 and ICR-7 assault rifles. As the Hydro Dam will have likely been looted by the time you’re done with the offices, try picking over the homes lining the westward road. If you’re looking for kills, head southwest to the Train Station.
Omri Petitte is a former PC Gamer associate editor and long-time freelance writer covering news and reviews. If you spot his name, it probably means you're reading about some kind of first-person shooter. Why yes, he would like to talk to you about Battlefield. Do you have a few days?

Activision will send you alarmingly detailed data for every single Call of Duty match you've played in the last 4 years if you ask, and players are using it to figure out their mysterious SBMM rankings

Call of Duty's development budget ballooned by $250 million between 2015 and 2020 to an eye-watering $700 million
Most Popular


