Tom Clancy's The Division – Benchmarks and optimization guide
Settings and Optimization Guide
With the GPU comparisons out of the way, it's now time to discuss the various settings you can optimize. Unlike some games where there are five or so dials to tweak, The Division is packed with graphics options. Some of them will make a noticeable difference in how the game looks, while others will hardly have any visual impact at all; similarly, some will affect frame rates while others can be safely maxed out. We've run tests at various quality settings to separate the important options from the stuff that's just cluttering up the interface.
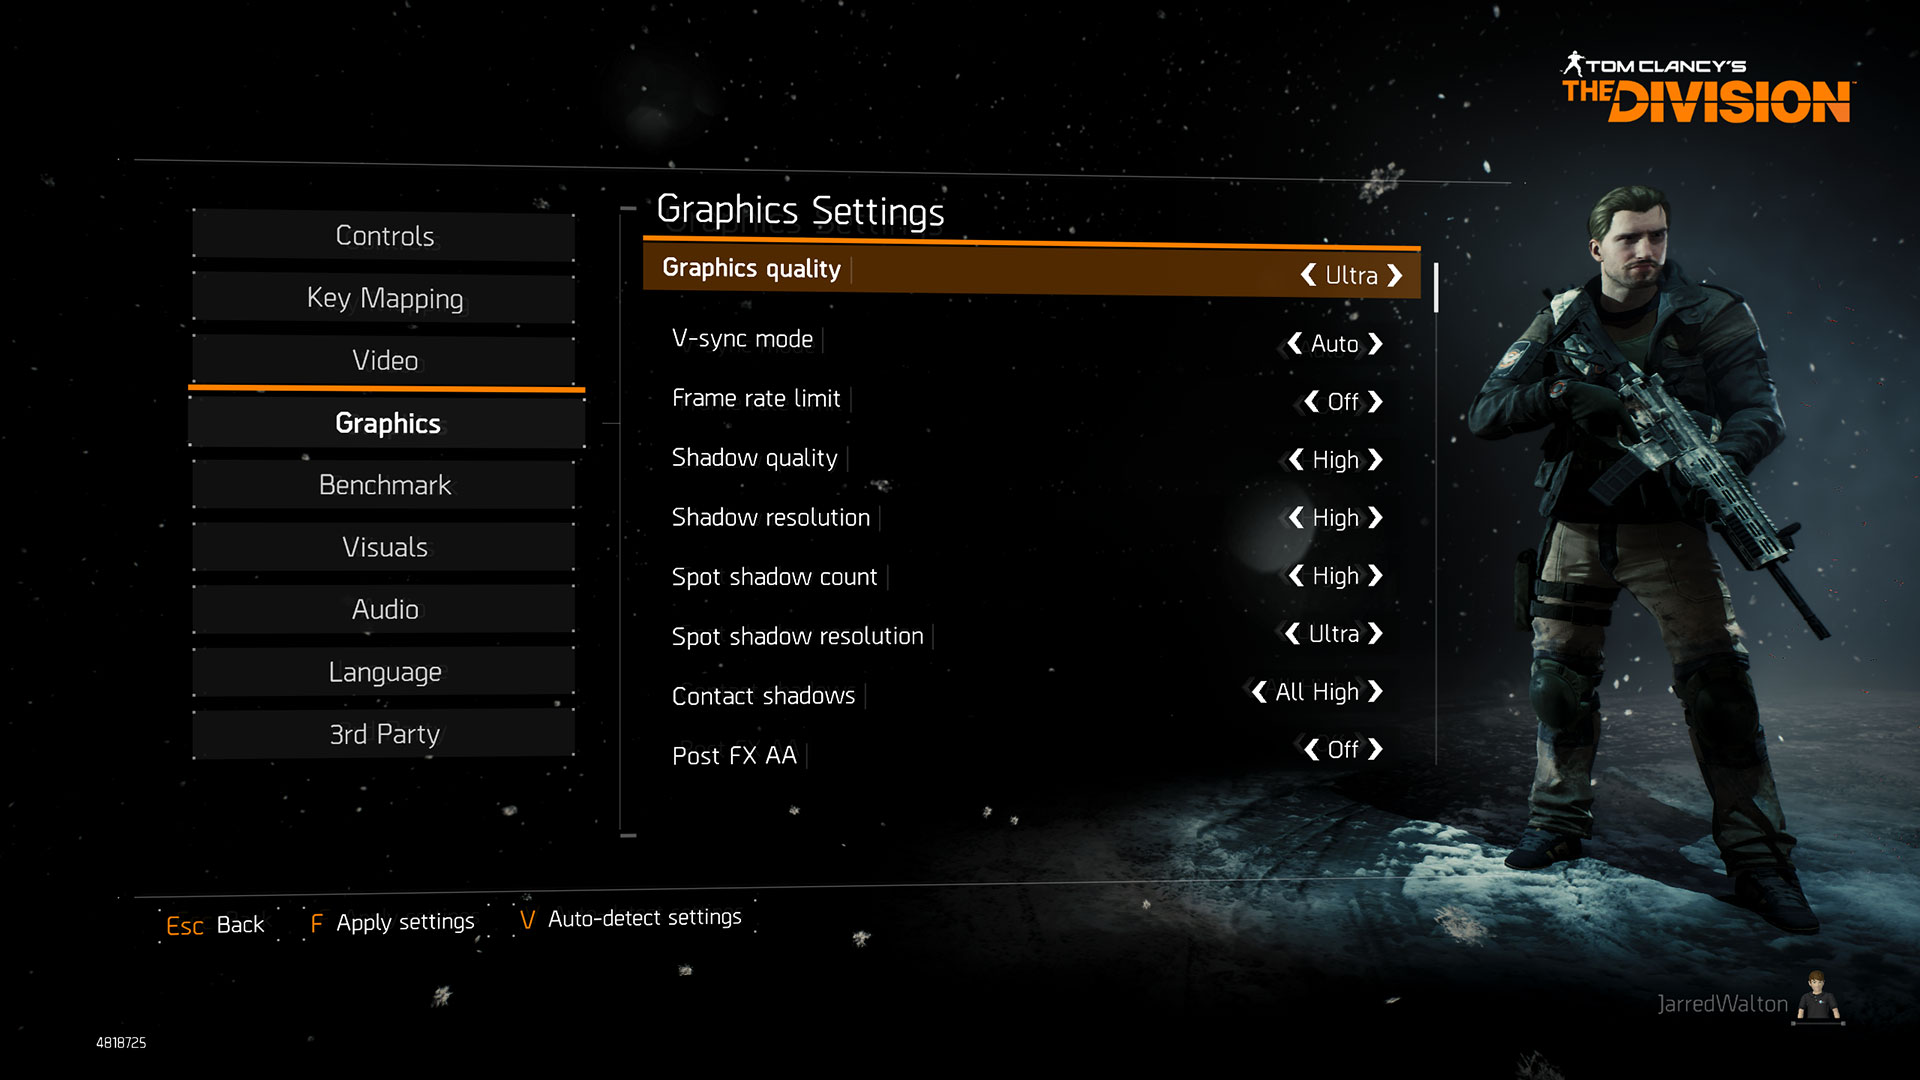
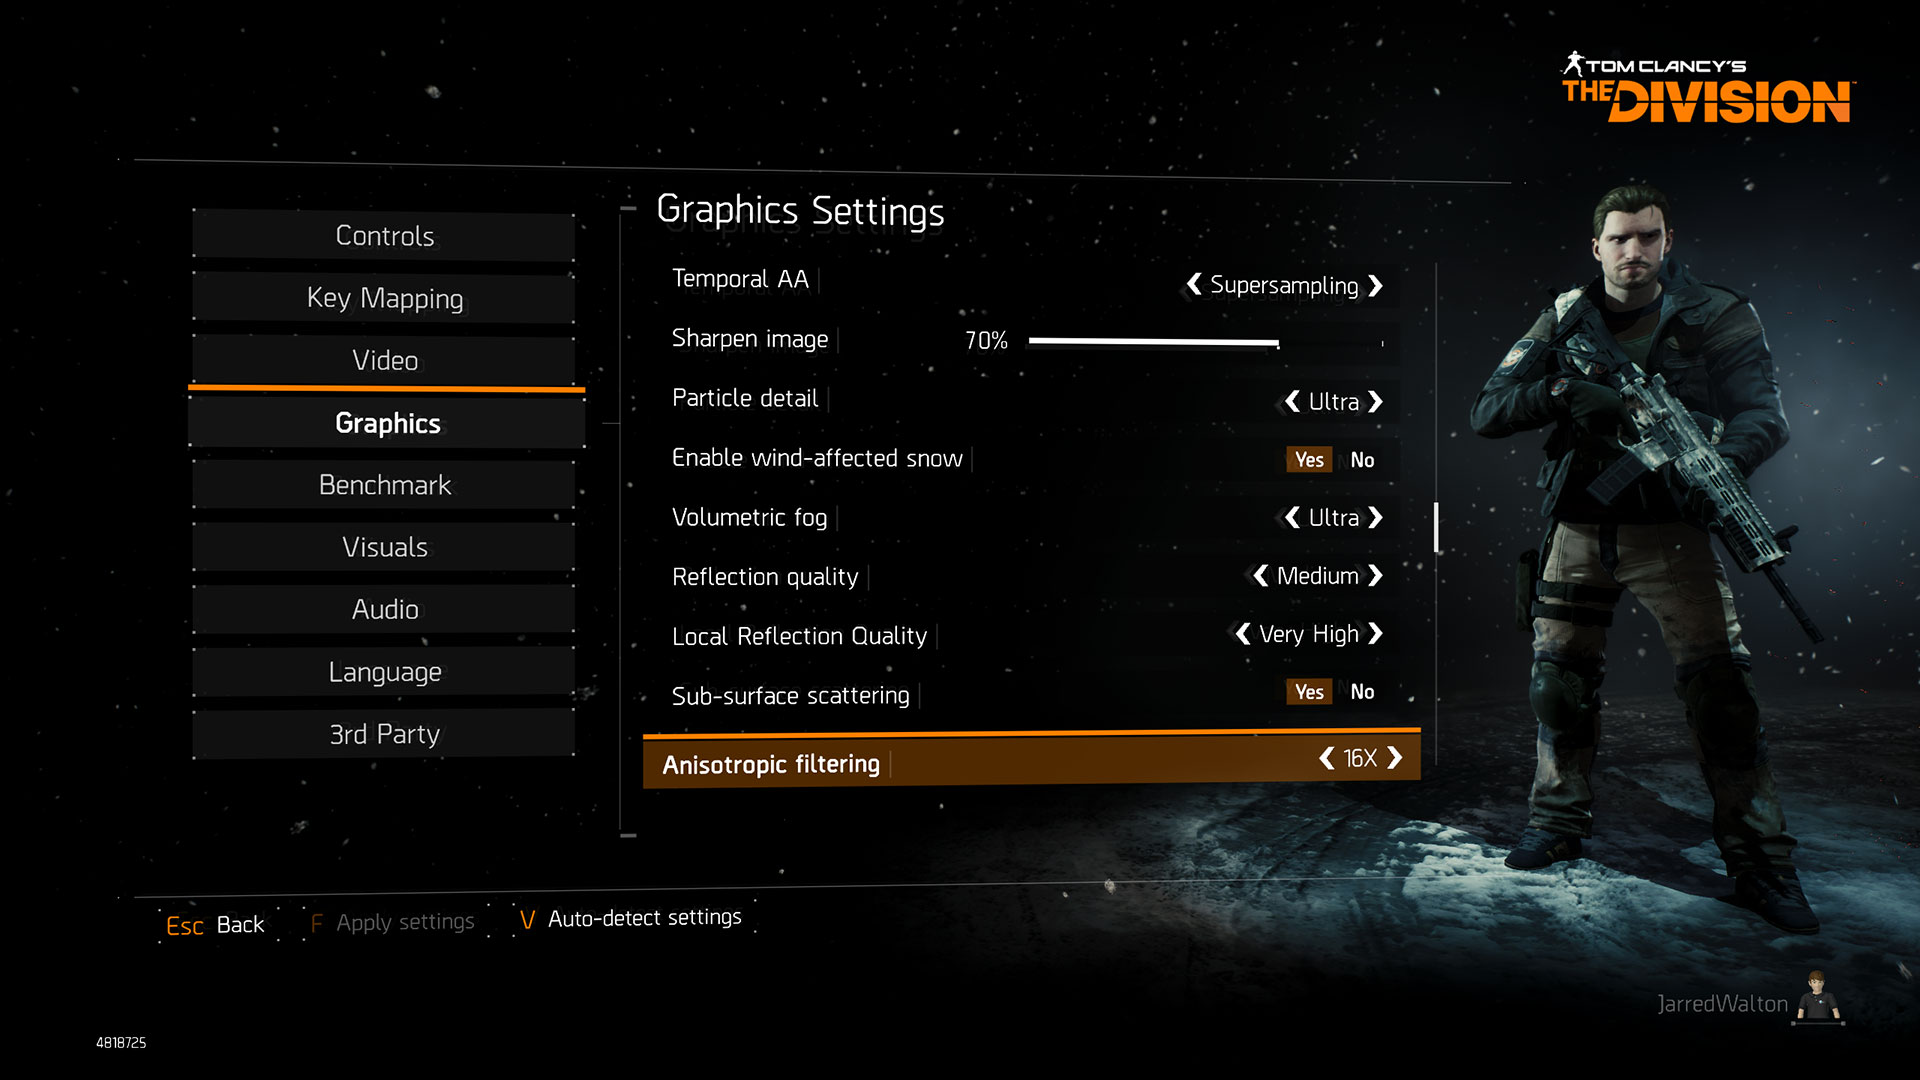
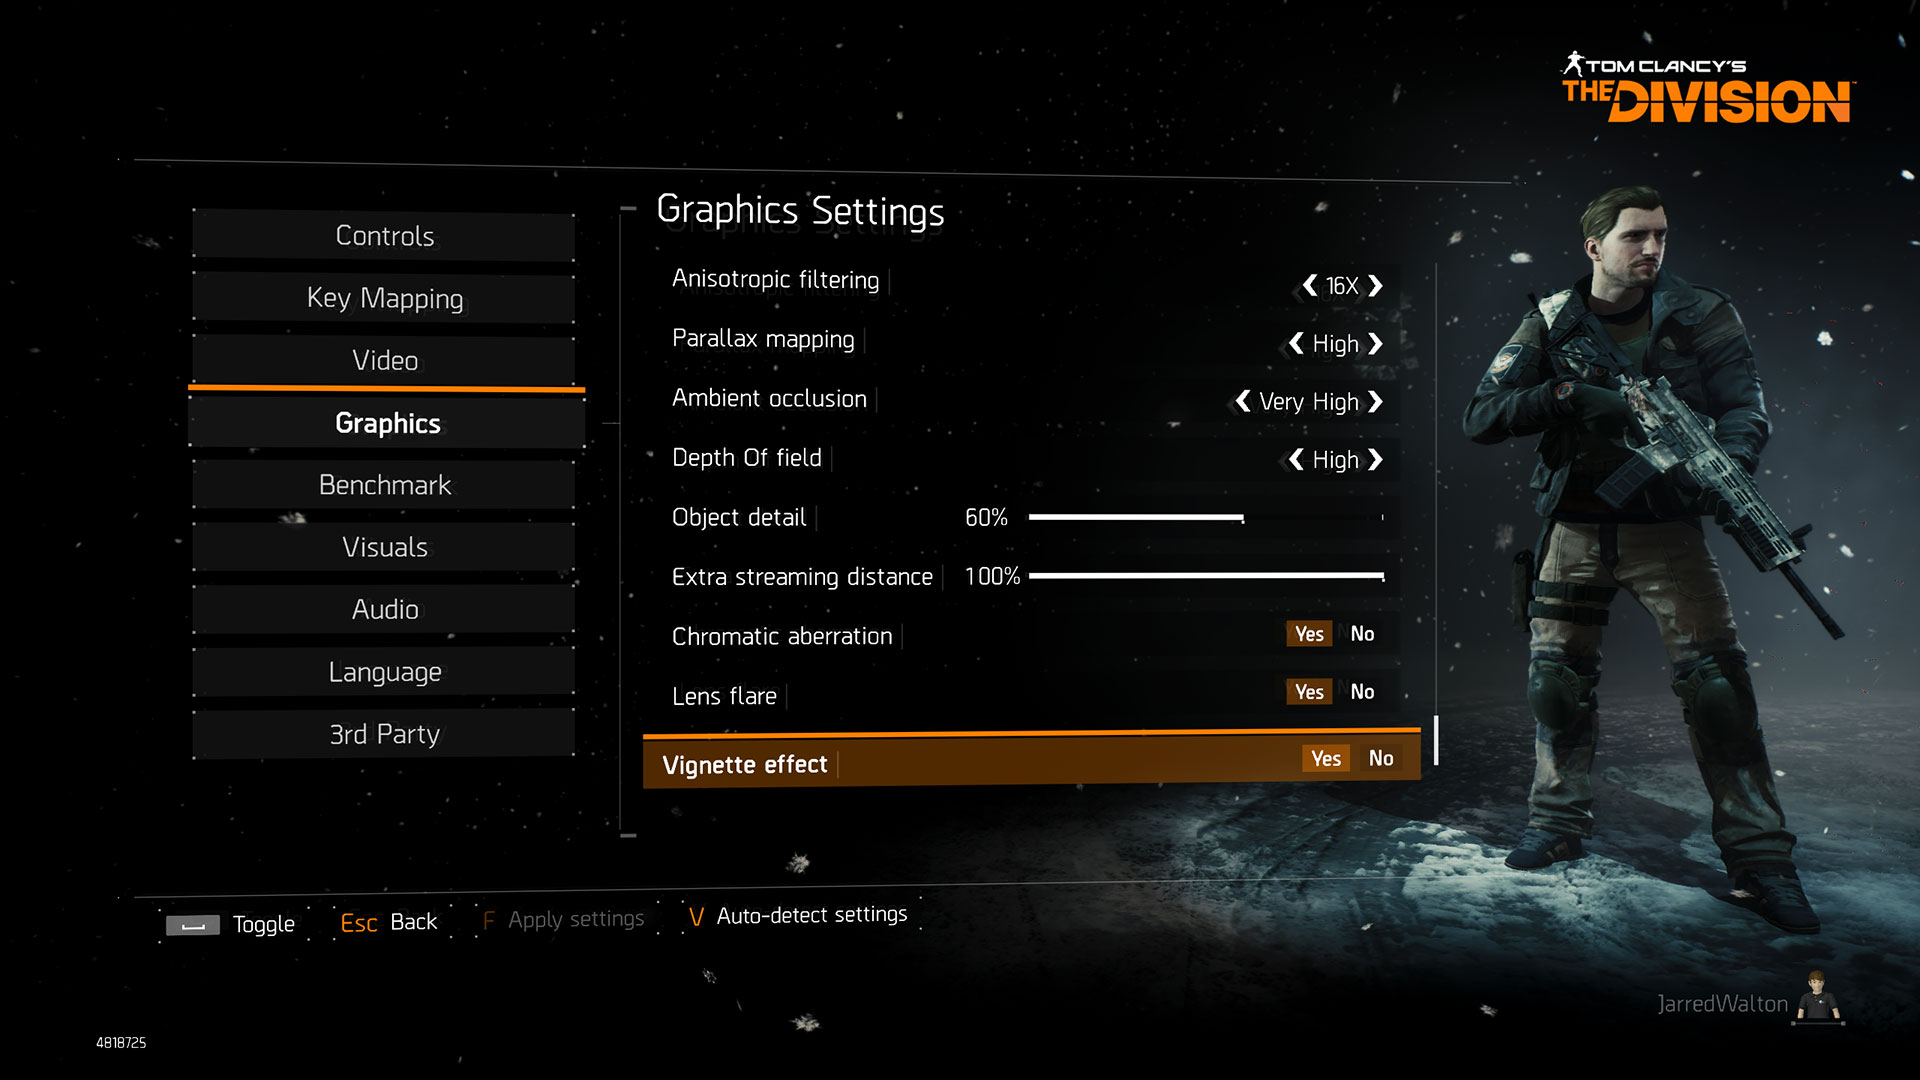
Holy settings, Batman! All told, there are 26 different options to tweak in The Division's graphics menu. Not every setting is critical, but for the uninitiated, it can feel rather overwhelming. The good news is that the presets at least take care of most major items for you, but let's say you have a system that runs well over 60 fps at the High preset but chokes on the Ultra preset—or maybe it falls just shy of 60 fps at High and you want to smooth out game play. What things can you change that will have the most tangible impact on frame rates, hopefully without killing quality? That's what we're going to discuss here.
Of course you could just trust the settings from Nvidia's GeForce Experience, or AMD's Gaming Evolved app (aka Raptr), assuming you have a supported graphics card. That helps to eliminate some of the guesswork, but fundamentally those are just a different sort of preset. People also have varying preferences on where to spend graphics horsepower; some want the best lighting possible, others like anti-aliasing, and some even like less realistic graphics if it means better frame rates and less clutter/distractions. Let's go through the various settings, briefly discussing what each one does and how big of an impact there is on performance.
Given the presence of 26 adjustable settings, it's worth pointing out that there are certain settings that are actually MIA. For years, we've usually seen texture resolution as an adjustable option. The Division says "screw you" to that, and it appears to use its own internal algorithm to dynamically adjust texture quality. The result is a bit odd at times—if you go through the benchmark sequence, you'll often see large sections of the world "pop" as higher resolution textures and object meshes get applied. I'm also not certain how much this texturing affects performance, and at some level I suspect GPUs with different amounts of VRAM at the very least will not produce a 100 percent identical rendering result. But this is the way The Division works, so we'll roll with it.
Note before we begin that some settings can be changed on-the-fly, while others will require you to restart the game before they take effect. That makes testing a bit of a pain, but here are the settings that require a restart. Also note that if you change the settings using a preset, the "you need to restart for this to take effect" prompt doesn't show up. It's not entirely clear if that's because using the presets eliminates that need, but in general we recommend restarting the game if you change any of the following settings (including changing them via a preset):
- Shadow Quality
- Contact Shadows
- Parallax Mapping
- Ambient Occlusion
There's no real order to the settings, other than the last few being mostly non-events. Your specific hardware will play a role, and for our testing, we've gone with the popular GTX 970 as our baseline, using the High preset at 1920x1080. We've tested at both higher and lower settings (where applicable), so we can see how much or little tweaking a setting matters, and we'll underline the High default on each. There are also a few settings in the Video section that are related to graphics—resolution, windowed mode, refresh rate, and monitor—but those are self-explanatory. The Visuals menu likewise has some items that impact the look of the game, but mostly these are related to the HUD (Heads Up Display) and won't affect performance.
All the Graphics Settings Explained
Graphics Quality
Options: Low, Medium, High, Ultra, and Custom
Impact: Massive (-40% to +84%)
Keep up to date with the most important stories and the best deals, as picked by the PC Gamer team.
This is the global preset, and it adjusts all of the settings that follow. We recommend starting here, finding which setting gets you close to your desired frame rate (usually, that would be 60 fps, though if you have a G-Sync of FreeSync display you may be able to get by with ~40 fps), and then start tweaking from there. The Low preset will turn nearly all the setting down to the minimum supported value, while Ultra goes the opposite direction, but even Ultra won't max out everything—certain options require manual adjustment if you want to max out the quality (e.g., Shadow Quality, Post FX AA, and Ambient Occlusion). See the previous page for more details.
V-sync Mode
Options: On, Auto, Off
Impact: Variable (depends on monitor, GPU, and other settings)
V-Sync controls the synchronizing of display updates with the buffer swaps of the GPU. Typically, we test with V-Sync disabled so as not to limit performance, but that can cause tearing so we like to leave it on when we're just playing a game. If your fps is below your refresh rate, enabling V-Sync can cut performance in half, which is why most people try to average more than 60 fps (for 60Hz displays).
Frame Rate Limit
Options: 30 fps, 60 fps, 120 fps, Off
Impact: Variable (depends on other settings)
Limiting your frame rate might seem counter-intuitive, but a game running at a steady 30 fps can actually feel better than a game that fluctuates between 30 and 60 fps due to the inconsistencies and jitter. We leave this off for testing and playing, but if you're a competitive gamer, you may find the 60 setting combined with other adjustments to ensure you're able to run above 60 fps could be desirable.
Shadow Quality
Options: Low, High, Nvidia PCSS+, Nvidia HFTS
Impact: Large (-20% to +2%)
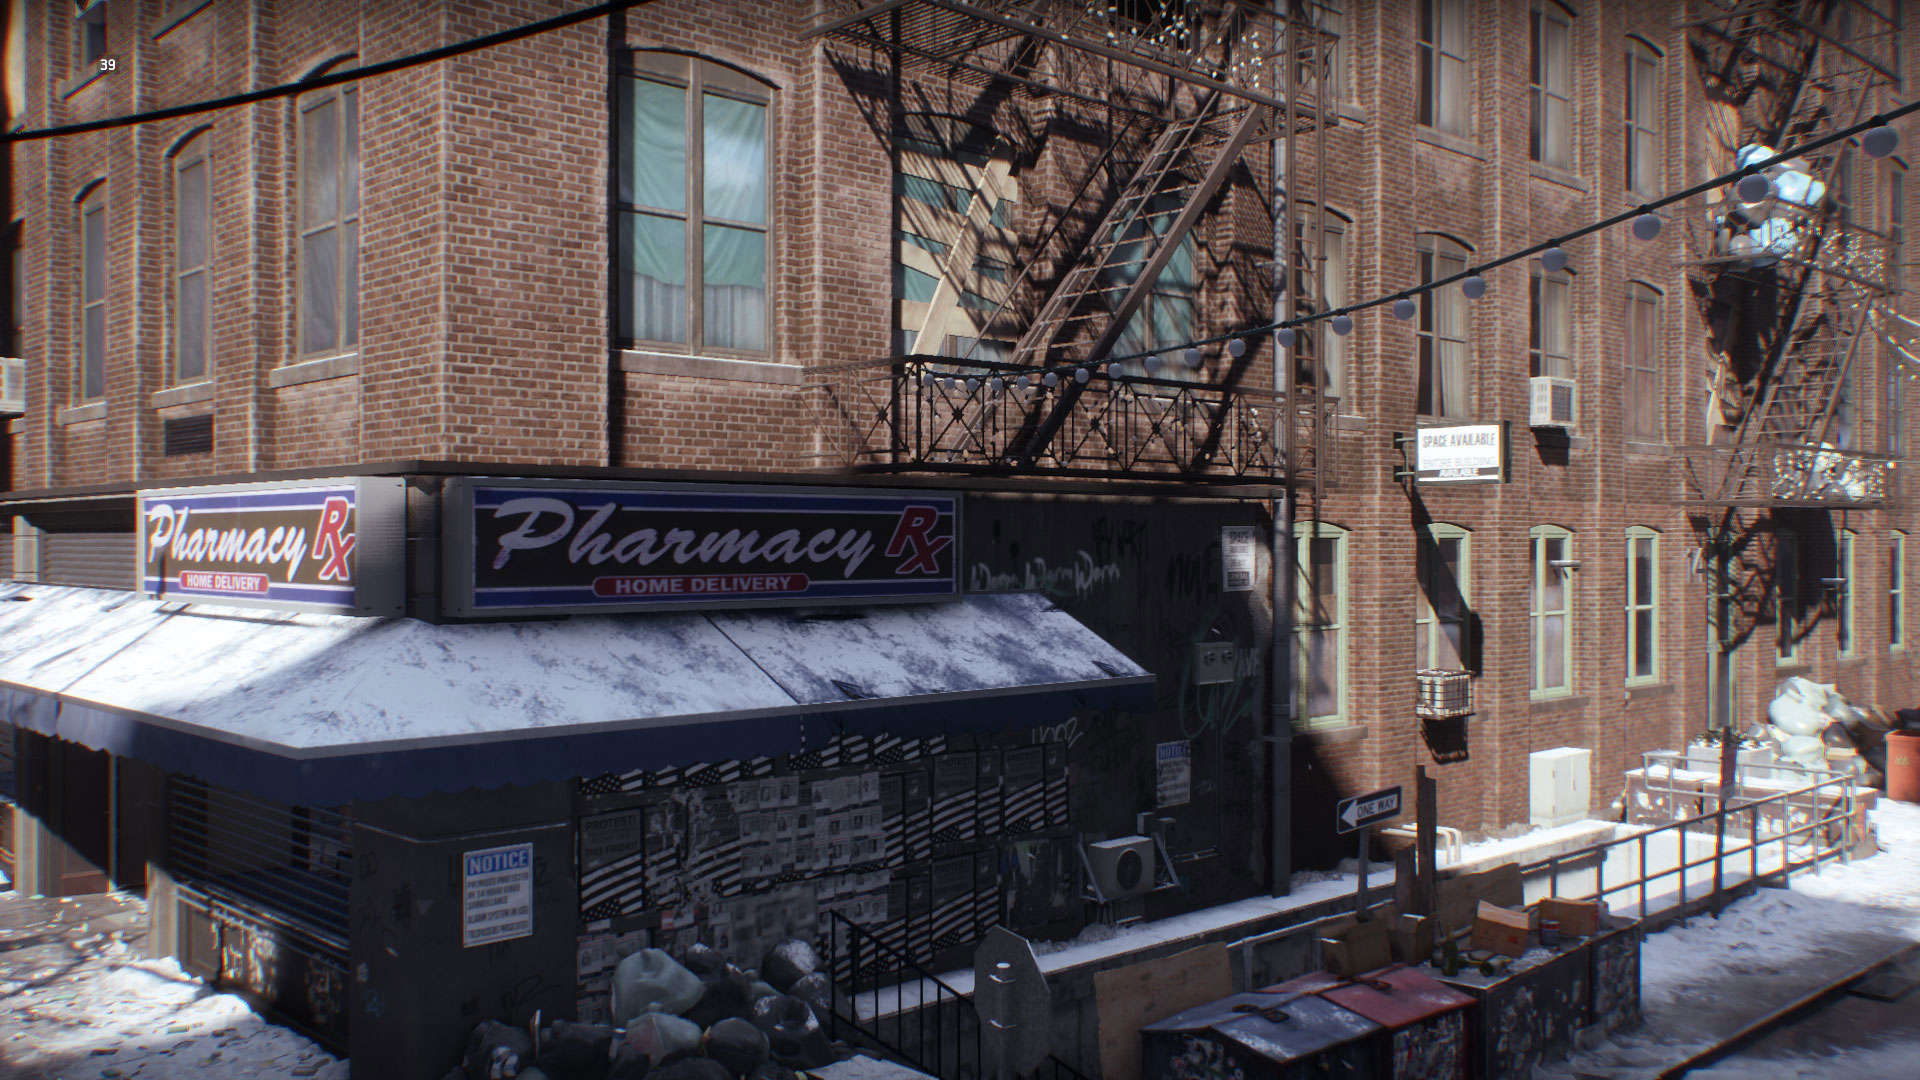
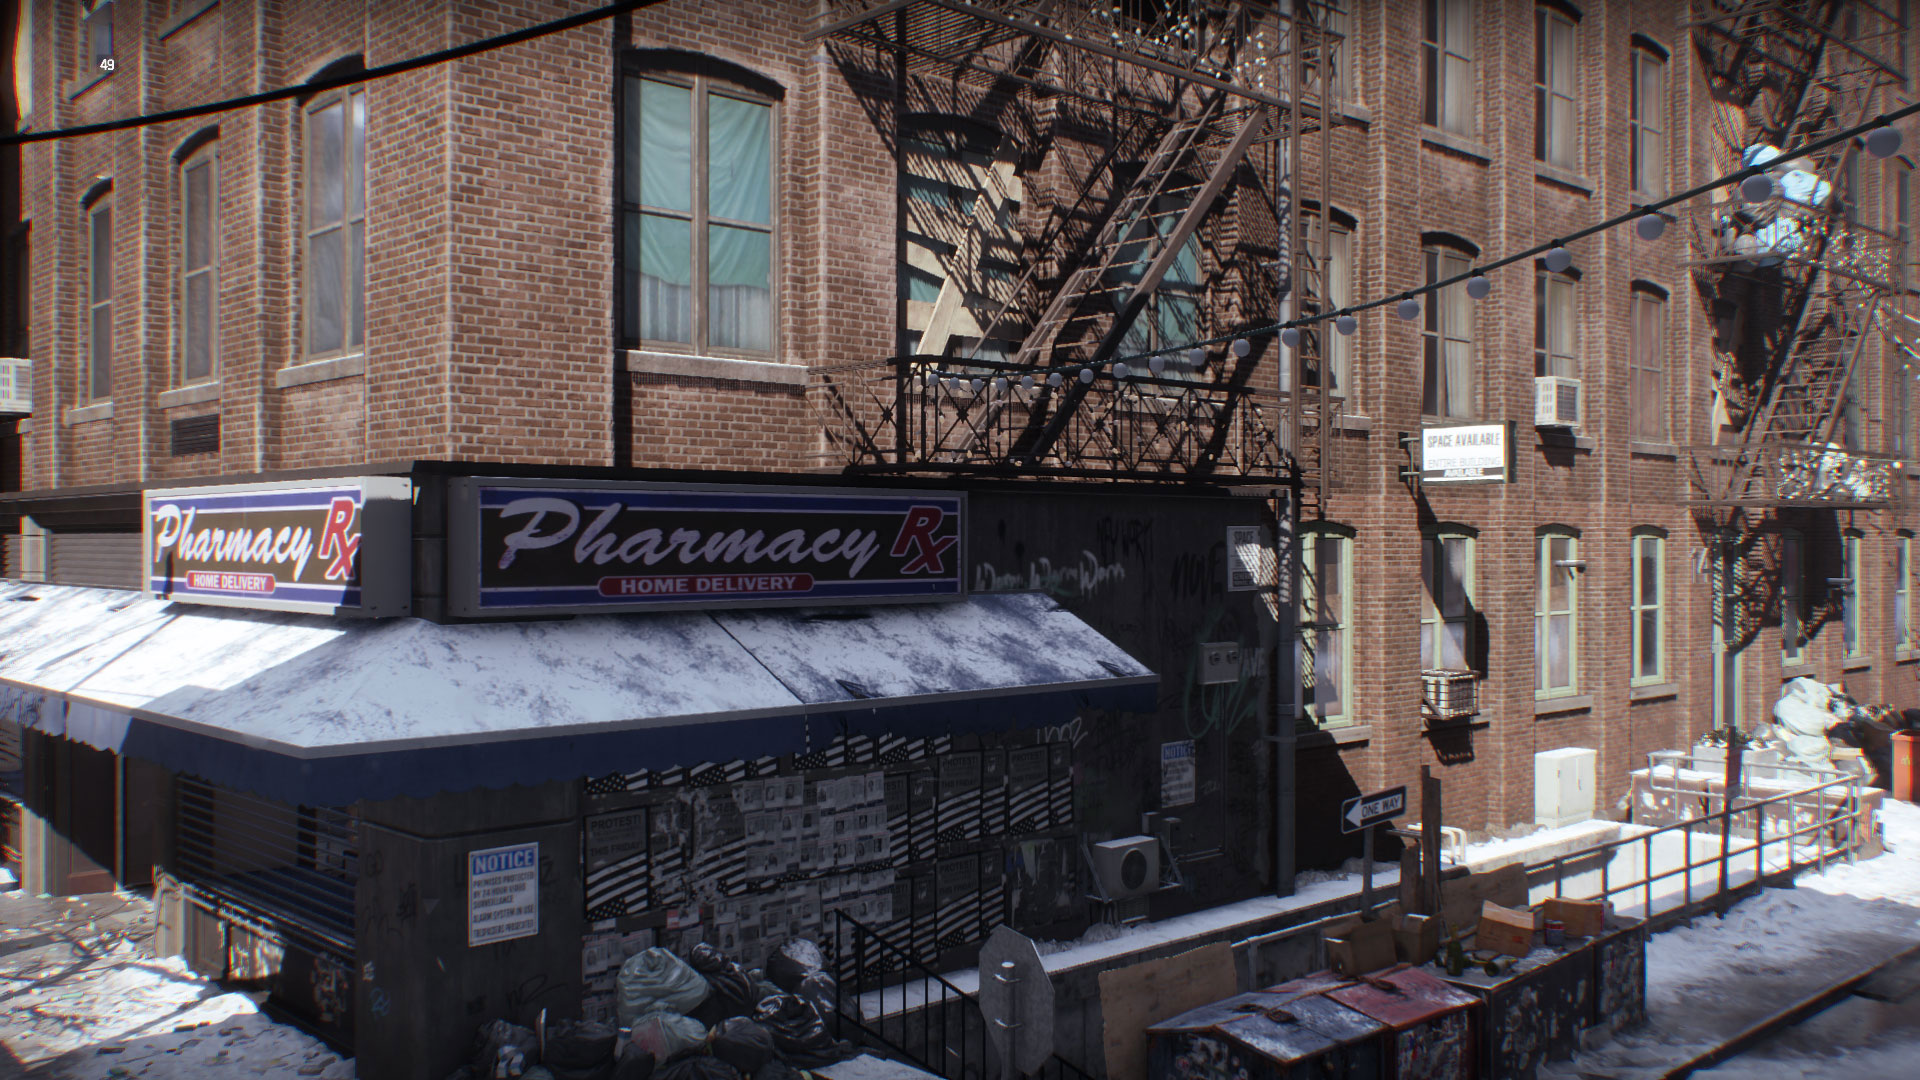
Controls the quality level of shadows for objects, specifically in relation to shadow mapping. The Low and High settings perform nearly the same (within 2%), which there are two Nvidia modes that can dramatically impact shadow quality. PCSS+ stands for "Percentage Closer Soft Shadow" and it makes shadow edges harder or softer depending on the distance between the object and the surface the shadow hits. So if you look at a tree casting a shadow, the high limbs cast almost no shadow while the lower branches and trunk have a well-defined edge. HFTS takes that a step further and is a brand new technology, Hybrid Frustrum Traced Shadows, aka High Fidelity Shadows; we'll go into greater detail with a future article on the technology, but it basically uses a better global lighting model combined with PCSS to create even better shadows. HFTS requires an Nvidia Maxwell 2 (GM2xx) or later GPU, so Kepler and AMD users are out of luck.
Shadow Resolution
Options: Low, Medium, High
Impact: Small (0% to +4%)
Sets the resolution of the shadow maps for non-spotlight (i.e., global) light sources. Dropping this from the High setting can improve fps by 4-6 percent.
Spot Shadow Count
Options: Low, Medium, High
Impact: Small (0% +2%)
Controls the number of spotlight shadows that can appear. The test sequence doesn't use many spotlights, so the impact elsewhere may be greater in some areas, particularly during night sequences.
Spot Shadow Resolution
Options: Low, Medium, High, Ultra
Impact: Small (0% to +5%)
Related to the prior setting, this controls the resolution of spot shadow maps. Again, night sequences can result in a higher impact on performance.
Contact Shadows
Options: Off, Sun Low, All Low, All High
Impact: Negligible (0% to +1%)
Sets the quality for shadows from direct lighting interacting with objects. The impact of this is so slight that there doesn't seem to be a need to use anything other than the "All High" setting.
Post FX AA
Options: Off, SMAA 1x Low, SMAA 1x Medium, SMAA 1x High, SMAA 1x Ultra
Impact: Small (-7% to 0%)
Anti-aliasing can be very taxing in modern games, but it can also be difficult to apply with deferred rendering engines. The pseudo-solution is to do AA via post-processing, which comes in a variety of forms. FXAA has been around a while, but it's not particularly good even though the impact is very low. SMAA (Enhanced Morphological Anti-aliasing) was developed nearly five years ago as a better algorithm; the performance impact is still much lower than MSAA (Multi-Sample Anti-Aliasing) and SSAA (Super-Sample Anti-Aliasing) while the quality is better than FXAA. SMAA uses a form of temporal AA (comparing details from the previous frame), eliminating jaggies but potentially also introducing some blurriness. The performance hit for enabling SMAA is about four percent at the Low setting, and seven percent at the Ultra setting.
Temporal AA
Options: Supersampling, Stabilization
Impact: None (see Post FX AA)
This only affects performance if you're using Post FX AA. It tweaks the temporal aspect of the SMAA algorithm slightly, with the Stabilization setting causing moving objects to "jump" less. The performance difference between the two settings, even with Post FX AA enabled, is nil.
Sharpen Image
Options: 0-100%, in 10% increments (70%)
Impact: Small (0% to +2%)
Another post-processing effect that focuses or softens elements on the screen. You can get about a two percent increase in performance by setting this to off (0%); all other settings appear to perform the same.
Particle Detail
Options: Low, Medium, High, Ultra
Impact: Negligible (0% to +1%)
Controls the quality of particles for some effects (e.g., smoke, explosions, etc.); we saw almost no difference in performance between the default Ultra setting and the minimum Low setting.
Enable Wind-Affected Snow
Options: Yes, No
Impact: None (0%)
Perhaps slower systems may show a benefit, as this could be more of a CPU algorithm, but we didn't see any difference between having this on or off. As the name implies, this controls whether or not wind affects the snow particles.
Volumetric Fog
Options: Medium, High, Ultra
Impact: Large (-13% to +12%)
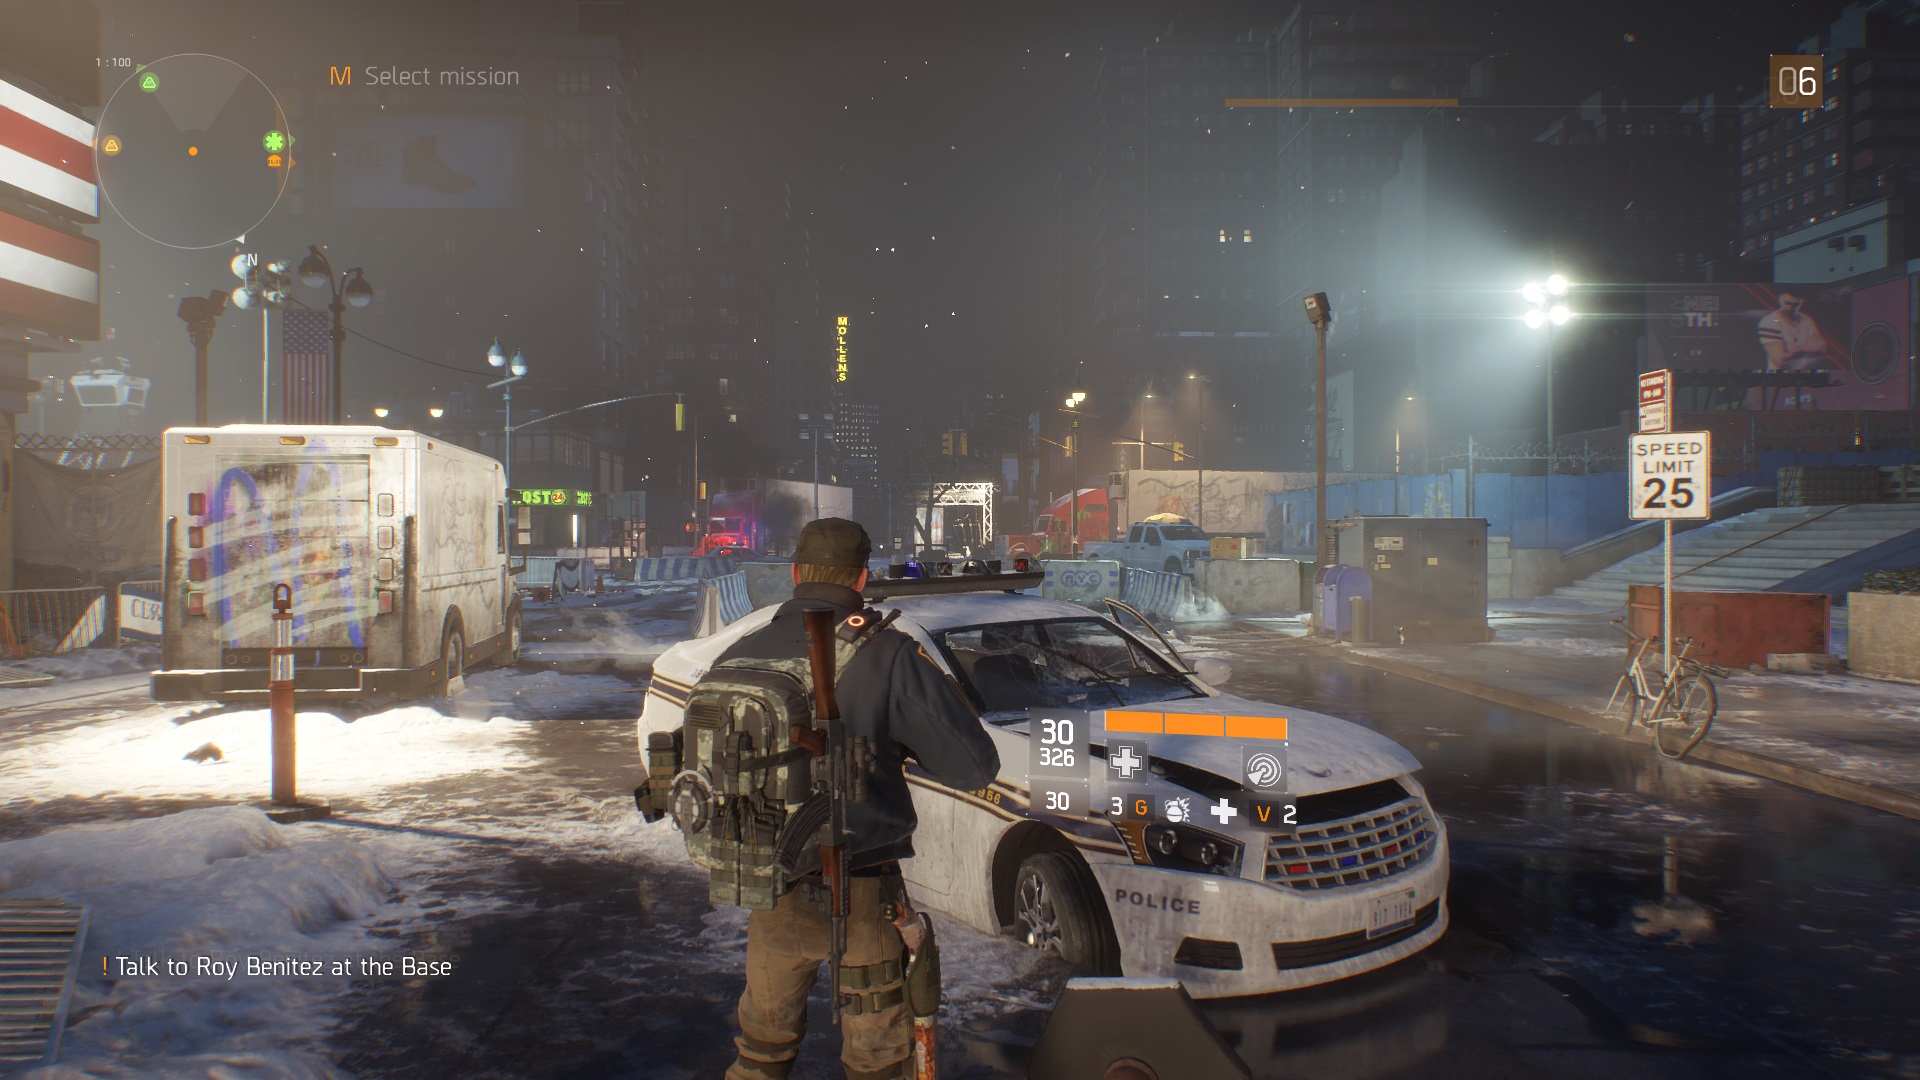
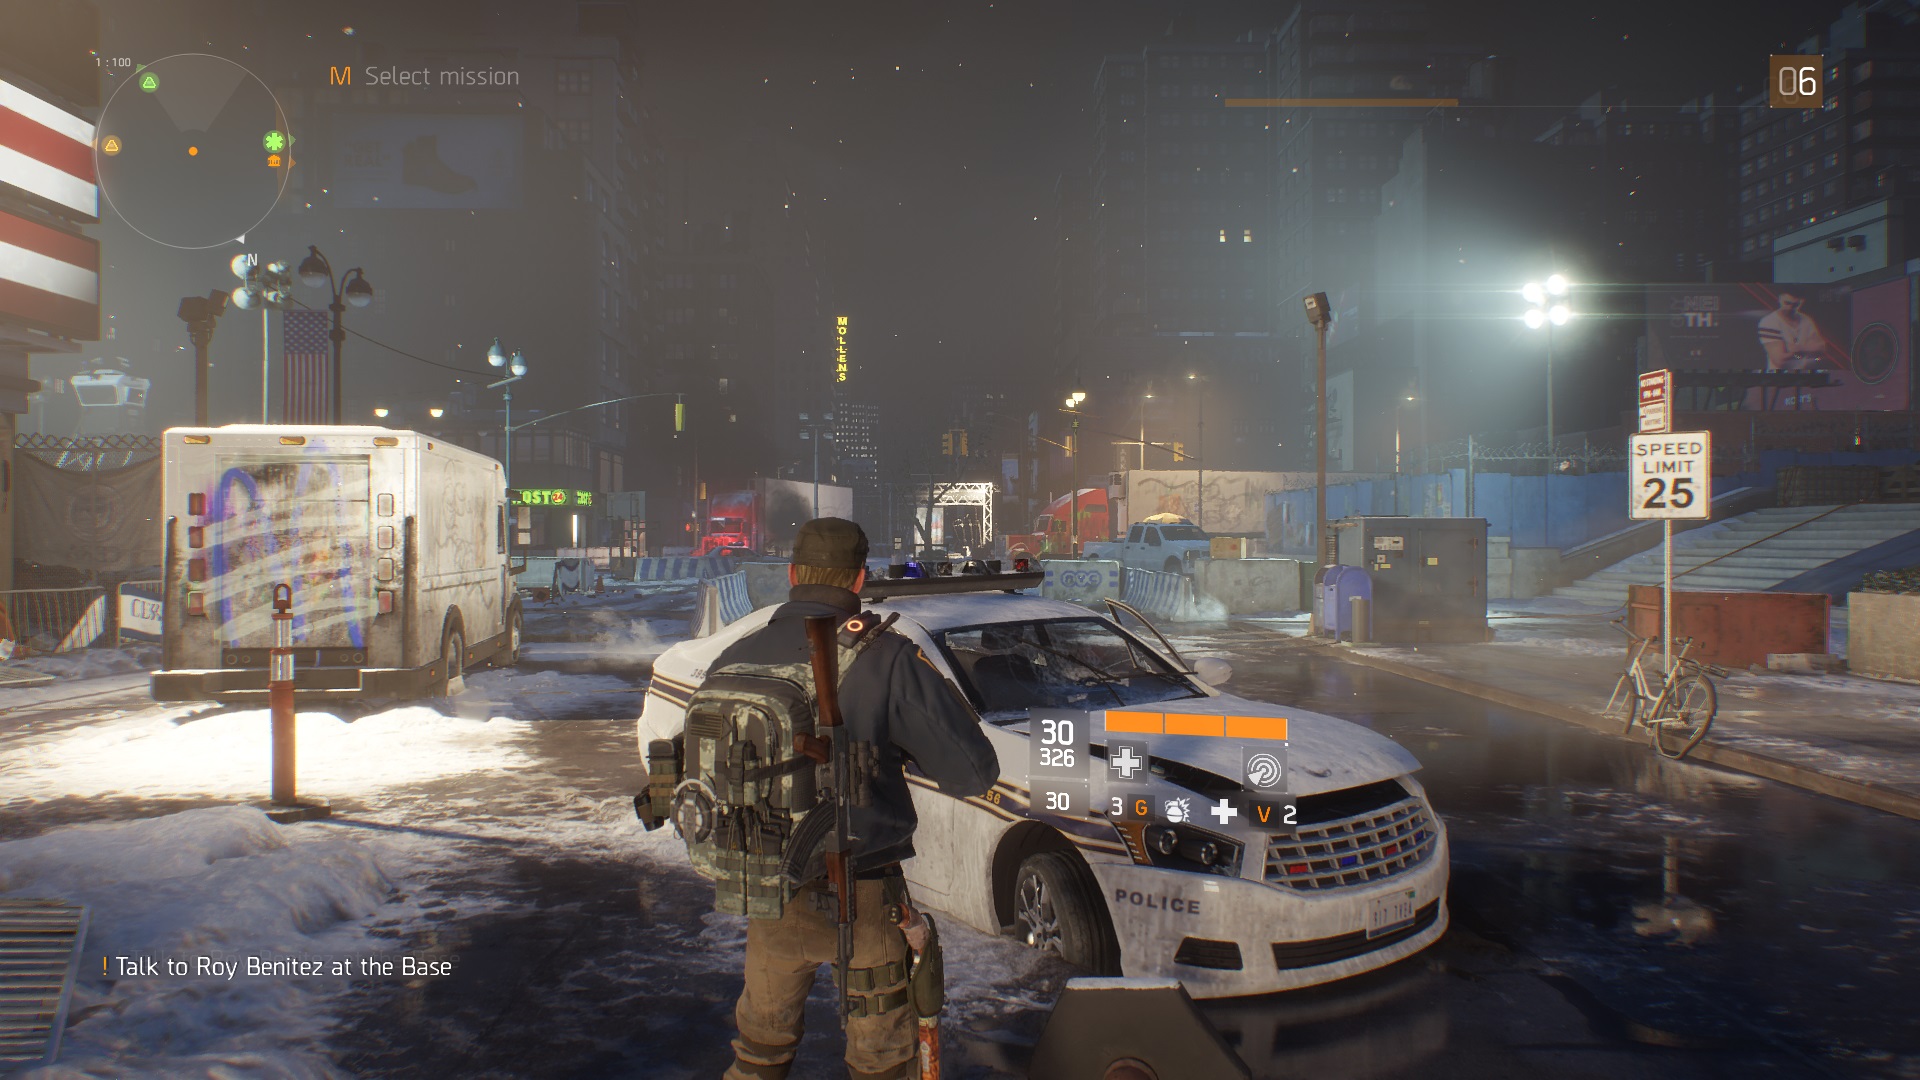
This controls the rendering quality of fog volumes, and it's one of the settings that can dramatically affect performance. The default is High, and turning this up or down can lose or gain about 12 percent fps. If you're struggling for higher frame rates, we recommend dropping this setting.
Reflection Quality
Options: Low, Medium, High
Impact: Negligible (-1% to +1%)
Sets the rendering frequency and resolution of global scene reflections for large objects (buildings, mountains, etc.); we didn't measure any appreciable difference in performance between the settings.
Local Reflection Quality
Options: Off, Low, Medium, High, Very High
Impact: Moderate (-5% to +6%)
Similar to the previous setting, this deals with reflections of smaller, local objects (boxes, cars, people, etc.); it has a more noticeable impact on performance, so it may be worth turning down/off if you have a slower system.
Sub-Surface Scattering
Options: Yes, No
Impact: Small (0% to +2%)
Turns on/off the transmission of light through translucent objects; doesn't appear to have a major impact on performance or overall image quality.
Anisotropic Filtering
Options: 1x, 2x, 4x, 8x, 16x
Impact: Small (-1% to +2%)
Improves the texture quality on surfaces that are at oblique angles to the camera. This used to be an important setting to adjust, but all modern GPUs can handle 16x AF pretty easily, though there's hardly any difference in quality between 8x and 16x either.
Parallax Mapping
Options: Off, Low, High
Impact: None (0%)
Gives textures a sense of depth without adding geometry; this is an improvement over the old bump mapping techniques from ten years back. It's basically a "free" setting on any reasonably powerful GPU, so you can leave it on High.
Ambient Occlusion
Options: Off, Low, Medium, High, Very High, Ultra, Nvidia HBAO+
Impact: Moderate (-4% to +6%)
Sets the quality of self-shadowing from ambient lights for objects and characters in a scene. Things can look decidedly flat if you turn AO off, but the higher quality levels give diminishing returns, so only enable them if you have GPU power to spare.
Depth of Field
Options: Off, Medium, High
Impact: Negligible (-1% to 0%)
Provides a camera-like effect where objects outside the focal range are blurred; used mostly for cinematics AFAICT. There's no real impact on performance in the benchmark sequence, so unless you find the cut scenes struggling, there's no point in disabling this.
Object Detail
Options: 0%-100% in 4% steps (40%)
Impact: Moderate (-7% to +5%)
Adjusts the geometric complexity for objects and scenery. While this can provide a moderate bump in frame rates, we've noticed a lot of "pop" happening where you'll see objects swap out lower quality geometry for higher quality versions. That happens even with this on 100 percent, but it's not nearly as distracting as it is at 0 percent. We recommend keeping it at 40% or higher.
Extra Streaming Distance
Options: 0%-100% in 10% steps (50%)
Impact: Small (-2% to +3%)
Increases or decreases the distance where objects are streamed and loaded; higher settings require more memory. As with Object Detail, we find lower settings here cause more objects to "pop" (noticeably alter appearance), so we prefer to try for 100 percent.
Chromatic Aberration
Options: Yes, No
Impact: None (0%)
Controls chromatic shifts of UI elements, with no effect on frame rates. If you don't like the UI color shifts that sometimes occur, you can try turning this off.
Lens Flare
Options: Yes, No
Impact: Negligible (0% to +1%)
Gives you that oh-so-lovely J. J. Abrams effect, with virtually no impact on performance. Some people think it looks stupid, so you can turn it off in that case.
Vignette Effect
Options: Yes, No
Impact: Negligible (0% to +1%)
A post-processing effect that causes the periphery of scenes to be slightly darker than the center. As with Lens Flare and Chromatic Aberration, this doesn't necessarily improve image quality; it merely changes things slightly.
Summary
Did I mention this game has a crap-ton of settings you can adjust? Now at some level, all of the minor changes in performance are cumulative, so if you gain 10 percent from one setting and another 10 percent from a second setting, in theory you could gain 21 percent more performance. In practice, it doesn't quite work out that way. Mathematically, if we multiply out all the increases/decreases, dropping to minimum quality could potentially improve frame rates by 65 percent. Conversely, maxing out every single setting would potentially drop frame rates by 53 percent. In practice, we did better than both figures with the GTX 970.
At the default High preset, we measured 63.4 fps average frame rates. Dropping to minimum settings everywhere, we hit 116.9 fps, an 82 percent improvement. Meanwhile, at maximum quality, we still hit 37.5 fps, a drop of "only" 41 percent. The reason for the discrepancy is because some of the settings end up being done in a single pass, so turning just one setting off may not help frame rates unless you turn off all the related settings. Similarly, at maximum quality, some things that would otherwise cost extra passes on their own end up having the same performance hit together.
Looking at the bigger picture, The Division is yet another game in a string of recent releases where systems that felt plenty fast just a year ago are now starting to struggle at high quality settings. This time, VRAM doesn't seem to be a huge factor, and everything from 2GB to 8GB cards should be able to find a setting that works reasonably well. AMD and Nvidia cards are pretty evenly matched as well, with AMD generally leading at each price point, but that's with current generation hardware; if you're running last generation hardware, don't be surprised if The Division wants a GPU upgrade before you can properly rescue Manhattan. Whether or not this version of Manhattan warrants rescuing is a different matter.
Jarred's love of computers dates back to the dark ages when his dad brought home a DOS 2.3 PC and he left his C-64 behind. He eventually built his first custom PC in 1990 with a 286 12MHz, only to discover it was already woefully outdated when Wing Commander was released a few months later. He holds a BS in Computer Science from Brigham Young University and has been working as a tech journalist since 2004, writing for AnandTech, Maximum PC, and PC Gamer. From the first S3 Virge '3D decelerators' to today's GPUs, Jarred keeps up with all the latest graphics trends and is the one to ask about game performance.

