PC Gamer's guide to gaming on a Mac
Running Windows games on a Mac
Boot Camp
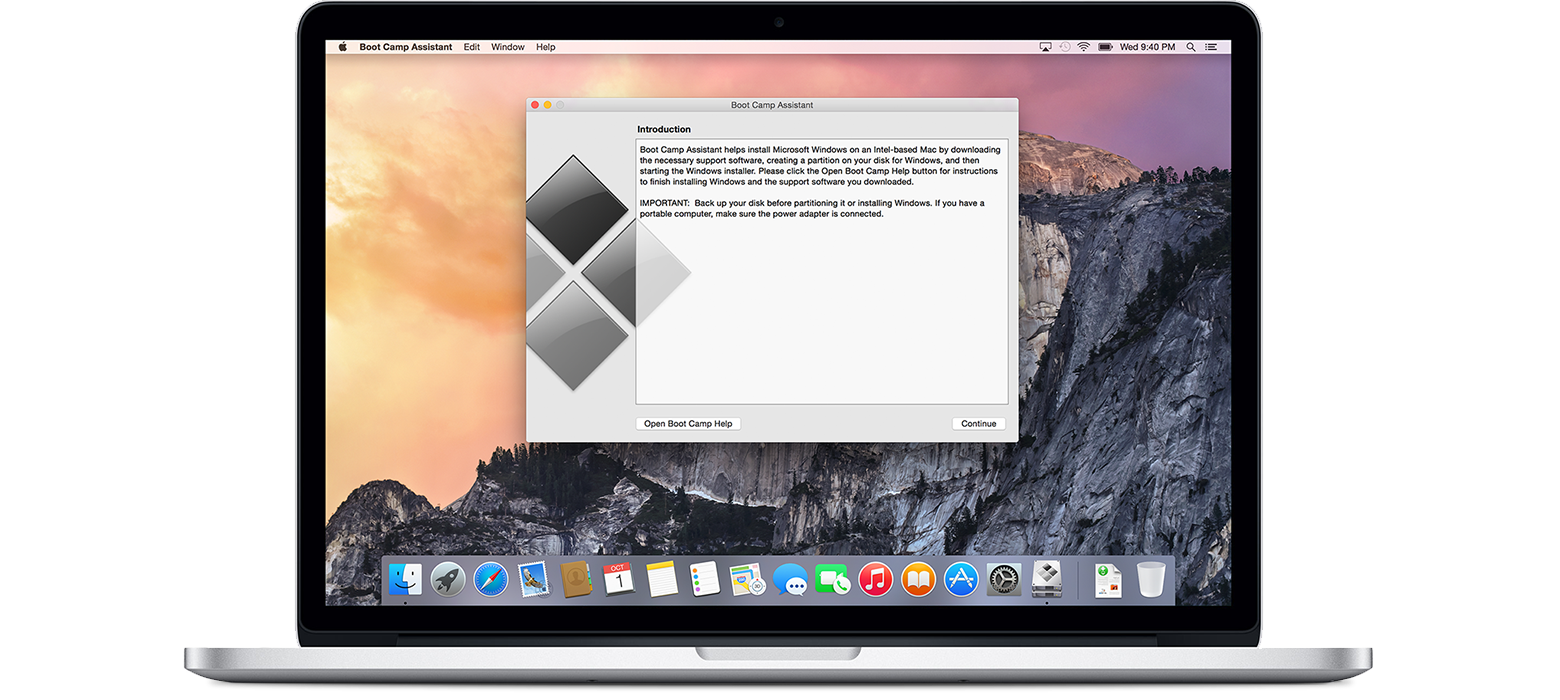
Boot Camp is a familiar friend for veteran Mac users, a feature made possible by Apple’s switch from Power PC processors to Intel a decade ago. As with a PC, a Mac’s storage can be partitioned; running Boot Camp allows you to have Windows on one part of the drive and OS X on the other, letting you boot into either. But unlike a PC, you can’t simply hop into a BIOS, or pop a Windows installation disk into a USB port to install it.
Instead, you have to use Apple’s Boot Camp Assistant tool from within OS X to install Windows. Windows drivers are provided by Apple and before Windows can be installed, you’ll need to download these to a USB hard disk. It’s actually pretty nifty, since it allows you to restore your SSD or hard disk to its previous state with only a single click.
You can install Windows 7, 8.1 or the technical preview of Windows 10 on Mac hardware. Here’s Apple's Boot Camp guide, and an easy-to-follow tutorial on HowToGeek.

If you want to install Windows on an external drive, it’s best to format it with FAT, since Macs can’t write to NTFS drives, and Windows doesn’t work with HFS-formatted disks. Ensure it’s plugged in, and select it at the point in the Boot Camp process where it asks for you to choose a destination. You’ll be able to boot from it in the same way you would choose any alternative OS on a Mac, by holding down the Option (Alt) key after powering it on.
With Windows running on your Mac, you’ll have access to a far better selection of games, and they’ll likely perform better than on OS X. With Sim City on OS X, we had to turn all the graphics details down for smooth performance on the 2013 Retina MacBook Pro we mentioned earlier, but on the same Mac in Windows, the game looked better and ran faster.
But there are some things to be aware of with Boot Camp. You can’t install drivers for your video card or chipset from Intel, AMD or Nvidia, so you won’t get any performance updates that come with new driver releases unless Apple releases with new Boot Camp drivers. And with a Retina display, the Windows desktop needs to be run at a higher DPI for everything to look right. That’s not really a problem for web browsing, but it might be when running games. We had some odd display issues running the Windows version of Civilisation 5, for example, on a Boot Camp partition, which were fixed when we switched to the native OS X code.
Once Boot Camp is set up with whatever version of Windows you want, your Mac behaves and functions pretty much like a PC. You shouldn’t have problems running games, as long as you adjust the resolution and detail settings for performance that matches the hardware you have.
The biggest gaming news, reviews and hardware deals
Keep up to date with the most important stories and the best deals, as picked by the PC Gamer team.

Wineskin and Virtual Machines
There are alternatives to Boot Camp if you want to run Windows software on OS X, but both have their limitations for gaming. A virtual machine requires a portion of the Mac’s resources to be dedicated to it, restricting the amount left for the host, and resulting in potentially choppy performance. With 8GB of memory in your Mac, 4GB for a virtual machine and 4GB for OS X is a good split, but hardly ideal. CPU resources might be easily used up too, affecting performance in both the VM and OS X.
There are a few options for virtual machine software. Virtualbox is free but according to many tests, is the least efficient VM software.
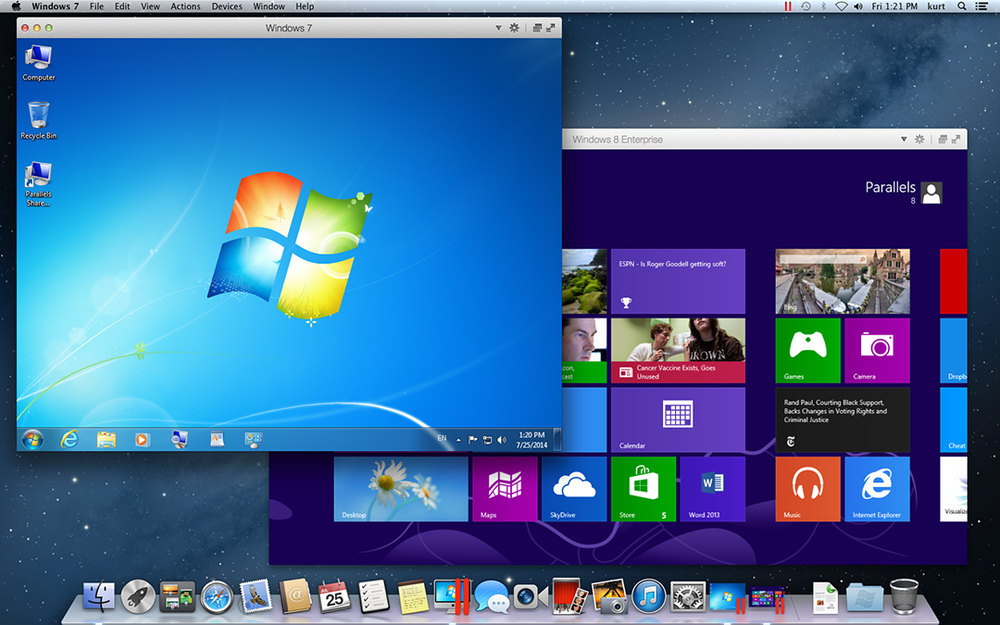
Parallels 10 isn’t free, but is a long-established name for Mac Virtual Machine software. It offers a nifty coherence mode where Windows applications appear in their own window on the Mac desktop, and it performs quite well, although you might want to turn off support for Retina displays. It’s possible to run modern 3D games under Parallels, but performance isn’t going to measure up to what you get from Boot Camp. For older or lighter games, though, it should get the job done.
Another option is VMWare Fusion, which says it offers access to a Mac’s 3D hardware, but once again, I didn’t have much luck running games in a Fusion virtual machine, bar casual titles. Virtual machines really aren’t designed for gaming, anyway. They’re much better for running word processing software or a Windows email client in OS X. So for gaming, I’d recommend just sticking with Boot Camp.
There’s one more option for running PC games within OS X. It’s called Wineskin. Using a collection of open-source software that mimics the Win32 API and Direct X, along with a wrapper that provides a minimal Windows environment to run games in, Wineskin does indeed work, albeit with somewhat reduced performance compared with a Boot Camp Windows installation. Bonus: it’s free.
With the software installed you need to create a wrapper, which is basically a mini virtualised Windows environment. The wrapper creates a folder structure that makes a game think it’s being installed on Windows. You’re faced with the slightly complicated decision of using the right engine for your game, and there are numerous variables to mess about with to improve both compatibility and performance.
I didn’t have much luck with it at first, but eventually managed to get Skyrim installed, although it crashed after a few minutes. That doesn’t mean it won’t work on your Mac, or with other games, but mileage is going to vary and you may have to seek help. Handily, there’s a vibrant community sharing tips and techniques to get specific games working in the support forum.
But like a virtual machine, Wineskin won’t give you the very best performance your Mac is capable of either. Once again, our advice is to just use Boot Camp for Windows games. The only disadvantage to going this route is the storage it uses, and the irritation of having to switch between operating systems.
Page 1: Introduction to Mac gaming
Page 2: Mac hardware and buying advice
Page 3: Mac gaming on OS X
Page 4: Running Windows games on a Mac
Page 5: Keyboards, mice, and gamepads on Mac

