Monster Hunter: World monster list —where to find them and how to beat them
Everything you need to know to hunt even Monster Hunter: World's strongest prey.
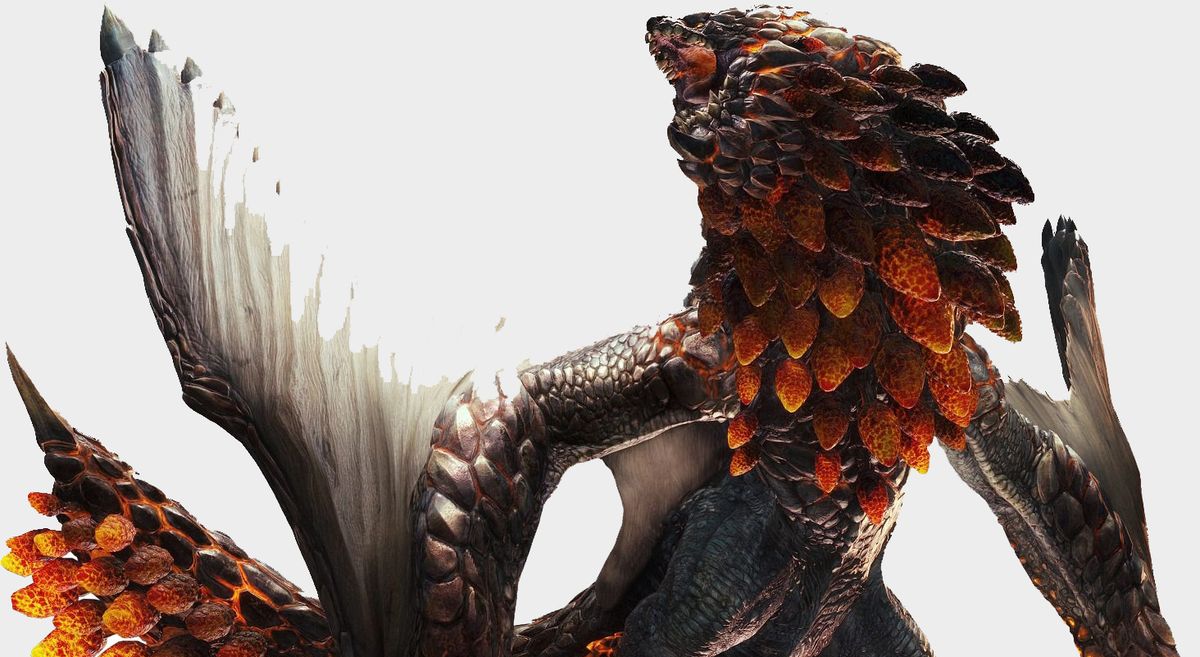
Monster Hunter: World, you may have gathered, is a game about hunting monsters. A few dozen giant monsters, to be exact, all of which have unique personalities and attack patterns. They're prey well worth hunting, so to help you on your way, we've put together a roundup of where to find these beasts, what to bring to the fight, and some basic tips for fighting them. Obviously, if you want to find these monsters and decipher them for yourself, turn back now to avoid spoilers.
For more tips and tricks check out our beginner's guide and our guide to Monster Hunter: World's weapons.
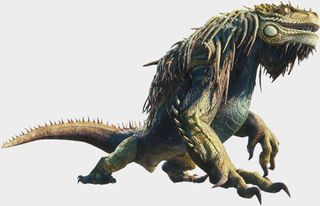
Great Jagras
Areas: Ancient Forest
Elements: none
Ailments: none
Weak to: fire, thunder, ice
Weak points: head and belly
Break points: head, belly, front legs
Bring: nothing special
Great Jagras is the first large monster you'll hunt in the new world, and he's really more of a training dummy. His charge and roll attacks have huge tells and he doesn't hit very hard, so as long as you aren't playing with your feet, you'll do fine. You can speed the fight up by hitting his belly when he's engorged. You'll deal heavy damage, and if you hit him hard enough, you'll force him to vomit his meal, leaving him vulnerable to yet more damage.
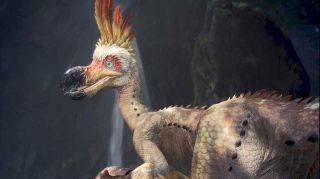
Kulu-Ya-Ku
Areas: Ancient Forest, Wildspire Waste
Elements: none
Ailments: can insta-stun with some attacks
Weak to: all elements, especially water
Weak points: head
Break points: head and forelimbs
Bring: slinger ammo like stones or redpits
Kulu-Ya-Ku is one of World's goofiest monsters. His habit of digging up boulders to use as shields and projectiles is oddly endearing, but it can also be incredibly annoying since you're attacks will bounce off the boulder while he's holding it. Bring some slinger ammo like stones or redpits to shoot that boulder out of his hands.
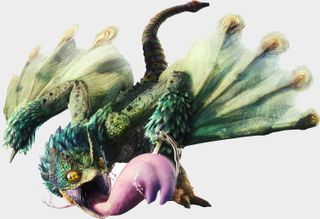
Pukei-Pukei
Areas: Ancient Forest, Wildspire Waste
Elements: none
Ailments: poison
Weak to: thunder, fire, ice
Weak points: head, wings and tail
Break points: head, wings, body and tail
Bring: antidotes or herbal medicines, slinger ammo like stones or redpits
The biggest gaming news, reviews and hardware deals
Keep up to date with the most important stories and the best deals, as picked by the PC Gamer team.
Pukei-Pukei is the first poisonous monster you'll fight. He spits globs of poison all over the place, especially when he's enraged. You can avoid these by staying behind him or to his side, which also lets you hit his weak wings and tail. If you're a hammer user or just want to hit the head, be mindful of his charging tongue attack as well. Pukei-Pukei also has an odd habit of foraging for food in the middle of a fight. Save some slinger ammo for these moments. You can shoot him in the face to stun him temporarily.
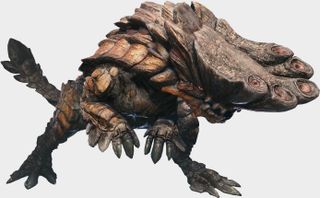
Barroth
Areas: Wildspire Waste
Elements: none
Ailments: waterblight
Weak to: fire, water (when covered in mud), ice
Weak points: forearms, tail, legs
Break points: head, forearms, legs, tail
Bring: nullberries
Barroth is a big hammer-headed behemoth that loves to charge and sling mud everywhere. Focus on stripping his mud armor first, as it will nullify his mud slinging attack and turn it into a huge opening. If you get caught in a mud pile, try to jump out of it before you get run over. Scarf down a nullberry if you get hit with waterblight, otherwise your stamina will be sapped. Small weapons like the sword and shield and dual blades are great for hitting his arms. If you use a larger weapon like the longsword, you'll have an easier time hitting his legs and tail, since you risk bouncing off his head when going for the arms. Barroth is extremely weak to paralysis, and paralyzing him can create a big opening to sever his tail or clean his mud armor. He also roars a lot, so the armor skill Earplugs is nice to have.
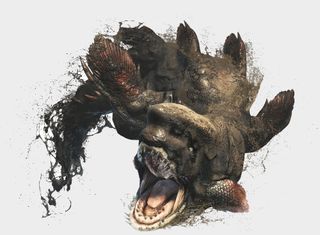
Jyuratodus
Areas: Wildspire Waste
Elements: water
Ailments: waterblight
Weak to: thunder, water (when covered in mud)
Weak points: head, tail tip
Break points: head, back, legs, tail tip
Bring: nullberries, waterproof mantle, immunity mantle
Jyuratodus can be frustrating for two reasons. Firstly, you have to fight him in a watery area which is tough to move in. The waterproof mantle solves that problem temporarily, but the armor skill Aquatic Expert will clear that up entirely and provide a nice evasion bonus. Secondly, Jyuratodus loves to charge randomly, and his charge attack has a short tell but a huge hitbox. If you see him rear back, roll away from him or you'll likely get caught up in it. Luckily he's extremely weak to stun, which makes hammer a great choice here.
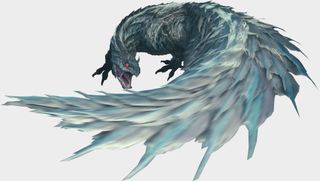
Tobi Kadachi
Areas: Ancient Forest
Elements: thunder
Ailments: thunderblight
Weak to: water, fire, ice
Weak points: head, tail
Break points: head, legs, body, tail
Bring: nullberries, thunderproof mantle, immunity mantle
Tobi Kadachi's tail is a huge threat, but it's also a massive weak spot if you can get after it. Be careful of his thunder attacks. If you get hit with too many, you'll contract thunderblight, which makes you easy to stun. Take a nullberry to cure it. When he does his tail front-flip, he'll stand in place for a moment afterward, which is a good time to lay into him. And when he leaps on trees to prepare for his diving tail attack, you can hit his tail to knock him off and stun him for a good while.
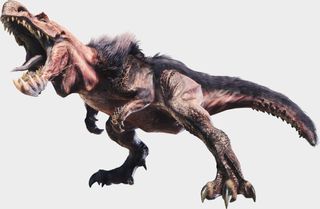
Anjanath
Areas: Ancient Forest, Wildspire Waste
Elements: fire
Ailments: fireblight
Weak to: water, thunder, ice
Weak points: head, tail, spines (when enraged)
Break points: head, legs, tail
Bring: nothing special
Anjanath is tall, so short weapons like the dual blades will have a hard time hitting his head or tail, which are his best hit zones. If you can't quite reach those, focus on his legs to trip him, then lay into his head and tail. Try to hit his head as much as you can. Once you deal enough damage to his head, he'll recoil and create an opening for more damage. And if you his head hard enough while he's enraged, you can knock him out of his enraged state and stun him for several seconds. If you get hit with fireblight, quickly roll a few times to put the flames out.
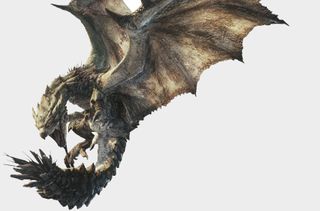
Rathian
Areas: Ancient Forest, Wildspire Waste
Elements: fire
Ailments: poison
Weak to: dragon, thunder
Weak points: head, wings, tail
Break points: head, wings, back, tail
Bring: flash pods, flashbugs, antidotes or herbal medicines
Rathian is known as the queen of the land, but she's pretty fond of flying too. Bring plenty of flash pods to knock her out of the sky, as well as flashbugs to craft more pods out in the field. Sever her tail to limit the range of its poisonous swipes, and when she goes up for a tail flip, have a flash pod ready. When she starts her fireball attack, swing around her and hit her from the side. Rathian is very weak to stun, and her attacks present several openings to hit her head, so hammer users should have no problem knocking her into next week.
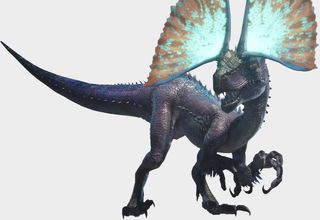
Tzitzi-Ya-Ku
Areas: Coral Highlands
Elements: none
Ailments: can insta-stun with his flash attack
Weak to: thunder, ice
Weak points: head
Break points: head
Bring: nothing special
Tzitzi-Ya-Ku behaves similarly to Kulu-Ya-Ku, with the main difference being his flash attack. This has huge range and will stun you if you're caught in it, though you can block it with any shield. You can also disable this attack entirely by breaking his head. This has the added bonus of turning his flash attack into a huge damage window.
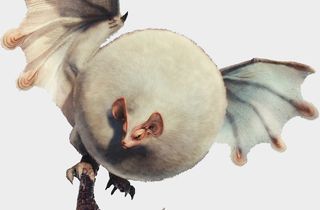
Paolumu
Areas: Coral Highlands
Elements: none
Ailments: none
Weak to: fire, thunder
Weak points: head, neck (when inflated)
Break points: head, legs, tail
Bring: flash pods
Paolumu is so cute that it almost hurts to hunt him, but his neck is such a massive weak spot that it's hard to resist hitting it. Whale on him whenever he inflates his neck, and if he takes to the air, bring him down with a flash pod. This little guy is also incredibly weak to blast damage, so by all means blow him up.
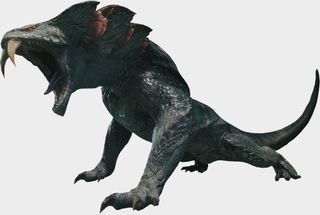
Great Girros
Areas: Rotten Vale
Elements: none
Ailments: paralysis
Weak to: water, fire, ice
Weak points: head, front legs, tail
Break points: head, front legs, tail
Bring: thunderproof mantle, immunity mantle
Great Girros is a pack hunter and will summon hordes of regular girros to nip at your heels throughout the fight. It's worth quickly clearing them out to prevent paralysis build-up, which is also Great Girros' main threat. His fangs and spit attacks deal hefty paralysis damage, and if you get paralyzed in the middle of a group of girros, you're liable to get carted back to camp. Luckily, Great Girros has low health and goes down quick. He's also very weak to sleep, if you're up for some sleep bombing.
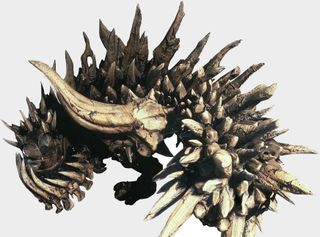
Radobaan
Areas: Rotten Vale
Elements: none
Ailments: none
Weak to: dragon, ice
Weak points: head, legs
Break points: head, tail, bone armor (all over)
Bring: nothing special
Radobaan's massive body makes him weak to piercing rounds from ranged weapons, and his rolling attacks are easily blocked by most shields. Once you break off some of his bone armor—blast weapons are great for this—you can hit him during his rolling attacks to make him crash, creating a big opening for damage. When he digs to renew his bone armor, use the downtime to sharpen or reload your weapon.
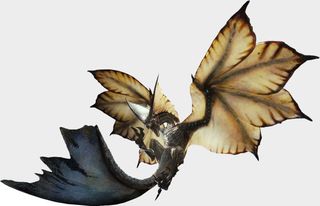
Legiana
Areas: Coral Highlands
Elements: ice
Ailments: iceblight
Weak to: thunder, fire
Weak points: head, wings, tail
Break points: head, wings, tail
Bring: flash pods, flashbugs, nullberries, glider mantle
Legiana is handily one of the prettiest monsters in World, but she can also be one of the most annoying. The iceblight from her frosty attacks will sap your stamina, so bring nullberries to cure it. She also loves to fly, so have flash pods ready to ground her. Ranged weapons are a good match for her, too, since damaging her mid-flight can knock her out of the sky and stun her for several seconds. Bring your glider mantle so you can use the shortcut to her nest. Look for it on the lower, sandy level of the Coral Highlands near her nest, just off the cliffside.
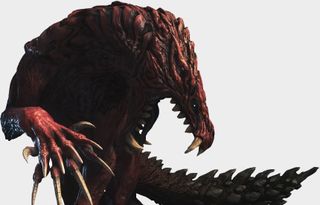
Odogaron
Areas: Coral Highlands, Rotten Vale
Elements: none
Ailments: bleeding
Weak to: ice, thunder
Weak points: head, claws, tail
Break points: head, claws, legs, tail
Bring: Astera jerky
Odogaron is the only monster in the game that causes bleeding, and thank goodness for that, because it's a painful status ailment. You'll take heavy damage over time while bleeding, and the only natural way to cure it is by crouching for several seconds—which Odogaron isn't likely to let you do—so bring some Astera jerky to patch yourself up. Be mindful of his faint attack: sometimes when you 'trip' him, he'll actually counter with a mean bite. He's very weak to paralysis.
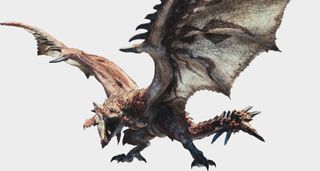
Rathalos
Areas: Ancient Forest
Elements: fire
Ailments: fireblight, poison
Weak to: dragon, thunder
Weak points: head, wings, tail
Break points: head, wings, tail
Bring: flash pods, flashbugs, antidotes or herbal medicines
Rathalos flies all the time, so you're going to want to flash him all the time. Go for his legs when he's on the ground as he's quite easy to trip, then pummel his head. Watch his stomp attack because his claws are poisonous. You'll be fighting him in the Ancient Forest, and he always spawns in his nest at the top of the big tree, so take advantage of the environmental trap located nearby: bait Rathalos into breaking the dam near his nest and he'll get caught up in the resulting flood. He'll go tumbling over the edge and take a big chunk of damage, plus he'll be vulnerable for several seconds.
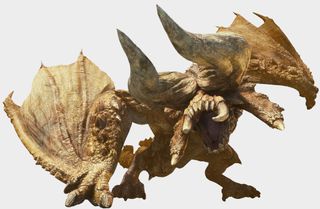
Diablos
Areas: Wildspire Waste
Elements: none
Ailments: none
Weak to: ice, water
Weak points: head, belly, wings
Break points: horns, wings, tail
Bring: screamer pods, flash pods
Diablos loves two things: burrowing and charging. You can exploit his burrow attack by blasting him with a screamer pod, though this will only work when he's not enraged. He'll be stunned and stuck in the ground for a few seconds, giving you easy access to his horns and belly. And when he frees himself, you can flash him out of the sky for another easy stun. As for his charging, I recommend a weapon with a shield. You can avoid the attacks fairly easily, but blocking them head-on can put you in a better position to hit his belly. Otherwise, just stay underneath him as best you can.
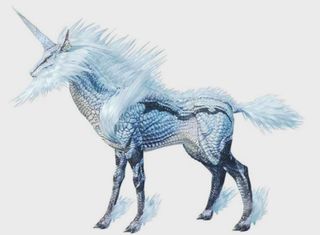
Kirin
Areas: Coral Highlands
Elements: thunder
Ailments: thunderblight
Weak to: fire, water, ice
Weak points: head
Break points: horn
Bring: thunderproof mantle, immunity mantle
Kirin is technically an elder dragon, but he looks and fights like a unicorn. He loves charging almost as much as Diablos, but the real problem is his arsenal of thunder AoE attacks. However, once you learn where his lightning bolts are going to hit, you can use the wind-up on those attacks to get at his head, which is his only decent hit zone. Breaking his horn should be your number-one priority, as it will negate his lightning attacks. That said, his horn is as durable as he is, so dig your heels in for this one.
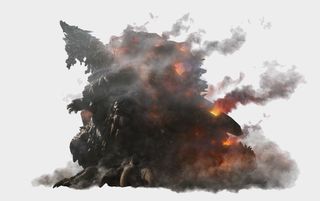
Zorah Magdaros
Areas: special
Elements: fire
Ailments: fireblight
Weak to: water, dragon, ice
Weak points: magma cores
Break points: head, belly, back
Bring: patience
Zorah Magdaros is more of an exercise than a monster. Once you break the magma cores on his back—mining the red ore nodes as you go—all you have to do is shoot him with a bunch of cannons and ballistae, throwing in a dragonator whenever it's available. This fight is going to be slow going no matter what you do, so just bring your favorite weapon and put on a nice podcast.
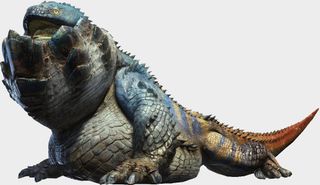
Dodogama
Areas: Elder's Recess
Elements: fire
Ailments: blastblight
Weak to: thunder, water, ice
Weak points: head, tail
Break points: head, front legs, tail
Bring: fireproof mantle, immunity mantle
Dodogama is basically a cuter Great Jagras that explodes. He'll scoop up mouthfuls of rocks and chuck them back at you once they're nice and molten. This deals fire damage and also causes blastblight, which you can negate with mantles or by rolling. You can turn his rocks against him by damaging his head: hit him hard enough and the rocks in his mouth will combust, stunning him and dealing damage.
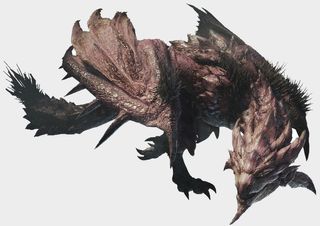
Pink Rathian
Areas: Wildspire Waste, Coral Highlands
Elements: fire
Ailments: poison
Weak to: dragon, thunder
Weak points: head, wings, tail
Break points: head, wings, tail
Bring: flash pods, antidotes or herbal medicines
Pink Rathian is a Rathian that's learned a few new tricks. Rather than a vertical tail flip, she does a 360-degree tail flip with bigger range. She'll also follow her bite attack with a second bite. These attacks aren't all that difficult to avoid though, so just give her some extra space and you can fight her like a normal Rathian.
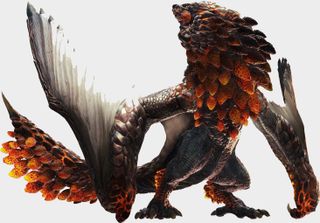
Bazelgeuse
Areas: Ancient Forest, Wildspire Waste, Coral Highlands, Rotten Vale, Elder's Recess
Elements: fire
Ailments: fireblight
Weak to: thunder, ice, dragon
Weak points: head, wings, tail
Break points: head, wings, tail
Bring: flash pods
Odds are you'll have already encountered several dozen Bazelgeuse by the time you get a quest for one. These things pop up everywhere and love starting turf wars with the monster you're actually trying to hunt, which can get a little annoying. Turns out, Bazelgeuse are just as annoying to fight. Their attacks themselves are slow and predictable, but the pinecone-like bombs that fall off them are a huge hassle. When Bazelgeuse is enraged, these will detonate almost instantly, and they deal major damage. Watch out for them as best you can, and flash Bazelgeuse out of the sky when he flies up for his iconic bombing run.
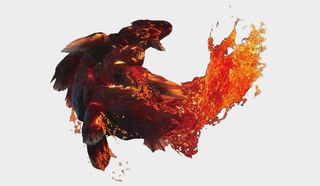
Lavasioth
Areas: Elder's Recess
Elements: fire
Ailments: fireblight
Weak to: water, thunder (immune when hardened), ice (immune when hardened)
Weak points: head, belly
Break points: head, back, legs, tail tip
Bring: slinger torch pods, fireproof mantle
Where Jyuratodus has mud armor, Lavasioth has lava armor. He'll coat himself in lava whenever he dives into the magma pools of the Elder's Recess. This can make it hard to hit him unless you're using a ranged weapon—and incidentally a light bowgun that rapid-fires water ammo is an excellent option—but the real problem is what comes after. His lava armor will harden, causing melee hits to bounce off of him. The good news is that you don't have to wait for him to dive back into the lava to soften it: you can pick up some slinger torch pods in a rockpile found in the center of his nest. Shoot a few of those at his armor and it will soften right up.
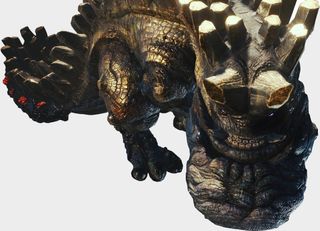
Uragaan
Areas: Elder's Recess
Elements: fire
Ailments: blastblight
Weak to: water, ice, dragon
Weak points: head, belly, forearms
Break points: head, back, tail
Bring: fireproof mantle, immunity mantle
Uragaan is extremely similar to Radobaan, except instead of bones, he throws bombs at you. Several of his attacks, including his roll, will litter the ground with bombs that explode after a while or when you hit them. These deal hefty damage and can easily stun you, so try to avoid them. Luckily, Uragaan does share a few things with Radobaan, like his weakness to piercing ammo.
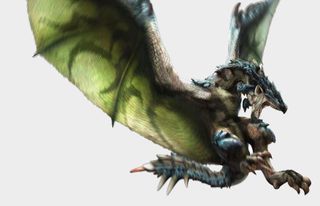
Azure Rathalos
Areas: Ancient Forest, Elder's Recess
Elements: fire
Ailments: poison
Weak to: dragon, ice
Weak points: head, wings, tail
Break points: head, wings, tail
Bring: flash pods, flashbugs, antidotes or herbal medicines
Azure Rathalos is to Rathalos what Pink Rathian is to Rathian: a slightly souped-up version that's been painted a different color. Azure Rathalos' new trick is a swooping claw attack that he'll do from the air. This has a fairly obvious tell—Azure Rathalos will wind up beforehand—and can be blocked or avoided with a dodge. Apart from that, it's business as usual. Apply flash bombs until dead.
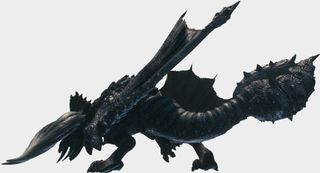
Black Diablos
Areas: Wildspire Waste
Elements: none
Ailments: none
Weak to: ice, water
Weak points: head, belly, wings
Break points: horns, wings, tail
Bring: screamer pods, flash pods
Fun fact: Black Diablos are female Diablos in heat, which is why they're so territorial. Black Diablos shares Diablos' weakness to screamer pods and flash pod follow-ups, and if anything she loves charging even more. She can double back for a second swipe after charges and burrow attacks, which means you're not safe just because you blocked or dodged the first one. Her tail is nasty too, and will hit you from behind if you're not careful.
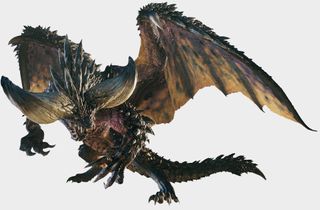
Nergigante
Areas: Elder's Recess
Elements: none
Ailments: none
Weak to: thunder, dragon
Weak points: head, front legs, white spikes
Break points: horns, tail, white spikes
Bring: nothing special
Nergigante is a glass cannon: he both deals and receives high damage. Once you get him to enrage, he'll start sprouting white spikes all over his body. He can grow spikes on his front legs, his head, his wings, and his tail. Wherever those spikes are, that's the area you want to attack. You'll deal more damage to those spikes, and if you break them, you'll trip and stun Nergigante for several seconds. Try not to let those spikes stay up, otherwise they'll harden into black spikes, which will cause your attacks to bounce and which fuel Nergigante's most powerful attacks. This is one fight where aggression pays off big time.
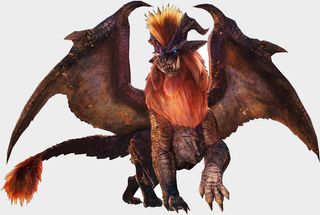
Teostra
Areas: Elder's Recess, Wildspire Waste
Elements: fire
Ailments: fireblight, blastblight
Weak to: water, ice
Weak points: head, wings, tail
Break points: head, wings, tail
Bring: flash pods, fireproof mantle, immunity mantle
Teostra is an anagram for toaster, which should tell you pretty much everything you need to know about this Elder Dragon. He loves fire, blast, and blasting fire. He'll constantly send out waves and pockets of sparks which cause blastblight, so you're going to be rolling a lot. The key to Teostra is hitting his head. If you can deal enough damage to his head quickly enough, he'll be stunned, and knocked out of his enraged state if he was in it. This creates a huge damage opening. You can create another opening by stunning him out of his supernova attack using a flash pod.
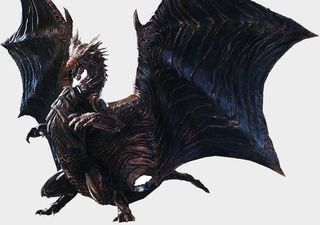
Kushala Daora
Areas: Elder's Recess, Ancient Forest
Elements: none
Ailments: none
Weak to: thunder, dragon
Weak points: head, front legs, tail
Break points: head, wings, tail
Bring: flash pods, flashbugs
Like Rathalos, Kushala Daora is a flash pod glutton. She flies all the time, and you're going to need plenty of flash pods to pin her down. Take care not to flash her inside one of the twisters she summons though, otherwise you won't be able to hit her while she's downed. You can also keep her grounded by hitting her head: she'll get stunned just like Teostra. Blast weapons are great for this. Focus on breaking her head, as this will disable her more powerful wind attacks.
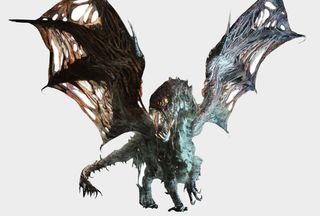
Vaal Hazak
Areas: Rotten Vale
Elements: none
Ailments: effluvia
Weak to: fire, dragon
Weak points: head, belly, tail
Break points: head, front legs, belly, tail
Bring: nullberries
Vaal Hazak is essentially a zombie dragon, and he's got a unique status ailment to back that reputation up: the effluvia gas he gives off deals damage over time and, if left unchecked, will cut your maximum health in half. You can cure it by eating a nullberry, but it's better to prevent it with the armor skills Effluvial Expert and Effluvia Resistance. These skills make the fight much more manageable. Vaal Hazak also has some dangerous attacks, mind, especially his effluvia beam. But if you stick to his sides, his beam attack becomes a big damage window. Focus his belly to stagger him, and his head or wings when he collapses.
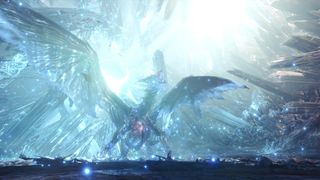
Xeno'jiiva
Areas: special
Elements: fire
Ailments: fireblight
Weak to: all elements
Weak points: head, front legs, belly, tail
Break points: head, front legs, tail
Bring: crafting materials for extra healing items
Xeno'jiiva is the final boss of Monster Hunter: World, and it's got a health pool worthy of that position. No matter what weapon you use it's going to take a while to bring this thing down, so get comfortable. Focus on its front legs to trip it, then go for its head. Once you reach its second form, use the same strategy but hit its belly when it collapses, as you'll deal considerable bonus damage. You can also use the stalagmites scattered around the second phase of the fight to shield yourself from Xeno'jiiva's beam attacks. If you're having a hard time breaking the tail, try dual blades or the insect glaive. And if you need to break the wings to get at some materials, try the heavy bowgun. Piercing ammo works wonders here.

Austin freelanced for PC Gamer, Eurogamer, IGN, Sports Illustrated, and more while finishing his journalism degree, and has been a full-time writer at PC Gamer's sister publication GamesRadar+ since 2019. They've yet to realize that his position as a staff writer is just a cover-up for his career-spanning Destiny column, and he's kept the ruse going with a focus on news, the occasional feature, and as much Genshin Impact as he can get away with.
Most Popular


