How to overclock your Intel CPU
You went for it. You shelled out for a top-shelf, unlocked processor, and now it sits at the heart of your new system, loafing at stock clock speeds. It’s surrounded by a motherboard to match, with a Z-rated chipset designed to let your cores run wild and free. The BIOS beckons with unknown performance potential. Who knows how far that new processor will go?
Fortunately, finding out isn’t as frustrating as it used to be. In fact, it’s surprisingly safe to perform a basic overclock when all the right parts are in place, and with some simple best practices, you can have your system just a few clicks shy of a pro-level performance makeover.
Are you an AMD user? Our guide to overclocking your AMD processor is right over here.
Before your rig hits the track, give it a check-up.
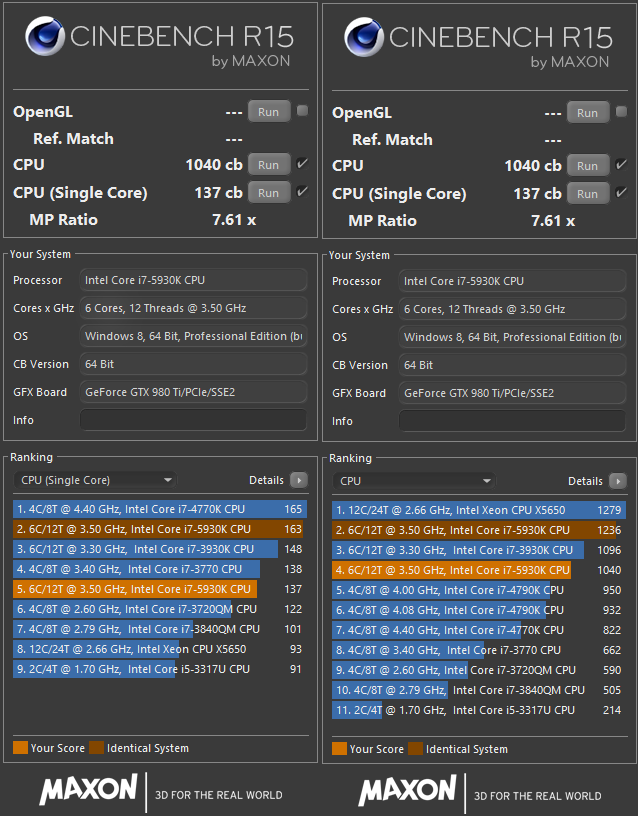
The numbers don’t lie. A fully tuned, overclocked system yields considerable performance advantages over a vanilla counterpart. Boosted results in brown, default speeds in orange.
There are a plenty of ways to push a processor, but before unleashing your CPU’s inner beast, it’s best to give the system a quick look-over to make sure everything under the hood is up to the challenge. Note: We did our overclocking with an Intel Core i7-5930K Haswell-E CPU, but the instructions here will mostly apply across modern Intel CPUs and various motherboard BIOS’.
If you’re upgrading a previous build, clear any chassis screens, fans, vents and heat spreaders from dust or other obstructions. Use compressed air and soft, long-bristle house-paint brushes for hard-to-reach areas. Intake fans should have dust screens over them for easy cleaning. These help avoid internal buildup too. By the time you’re done overclocking, that system is going to need all the heat dissipation it can get.
While you’ve got your system open take note of the CMOS reset button or jumper and make sure you can reach it. If any of the new settings hangs the system before BIOS on reboot, you’ll be using this to return things to normal.
Practice makes perfect
Next, get a tube of high quality non-conductive thermal paste, like Arctic MX-4. Why use non-conductive paste? It won’t short out sockets or motherboard components if some gets off the chip. Remember you need just a small dab in the center of the CPU: the cooler will spread it around when you push down. Test your success by comparing idle temps via the BIOS. Poorly seated coolers or improper heat paste applications show up as abnormal idle temperatures or cores that run much hotter than the others. Some core variation is normal, however, so don’t worry about 3-5°C differences.
The biggest gaming news, reviews and hardware deals
Keep up to date with the most important stories and the best deals, as picked by the PC Gamer team.

You can also do a post mortem on your technique by checking how evenly the compound is spread on the CPU’s lid and the cooler’s thermal plate when you separate them. Uneven distribution or worse, bare areas, mean the two surfaces aren’t meeting properly. Check to make sure the cooler’s screw-in posts are all threaded cleanly, and try reseating the cooler.
One trick is to have a friend hold the cooler plate even and still, applying gentle force while you tighten opposing corner screws simultaneously to keep the pressure even. Don’t overtighten; you can damage the socket. Just turn manually until you aren’t able to twist any more, and then give a last half turn with a screwdriver to finish. Well-engineered coolers compensate for this with built-in spring loaded screws that stop turning at an ideal thread height, taking some risk out of the process.
It also might be time to reevaluate your cooler if you’re still stuck with a stock unit. Go with at least a $35 Cooler Master Hyper 212 EVO, and consider water cooling with a closed-loop system like Corsair’s H100i GTX if possible. In addition to offering better performance, water-cooled systems are easy to attach to the CPU and allow better motherboard visibility and case airflow.
Base Clock vs Multiplier, where to start?
Now that the system is ready for track time, let’s limber up with some fundamentals. Your CPU’s clock speed is determined by two numbers: the base clock speed and the multiplier. The base clock speed, or BCLK, affects more than just the CPU and influences the speed of DRAM, storage controllers and other integrated components to varying degrees.
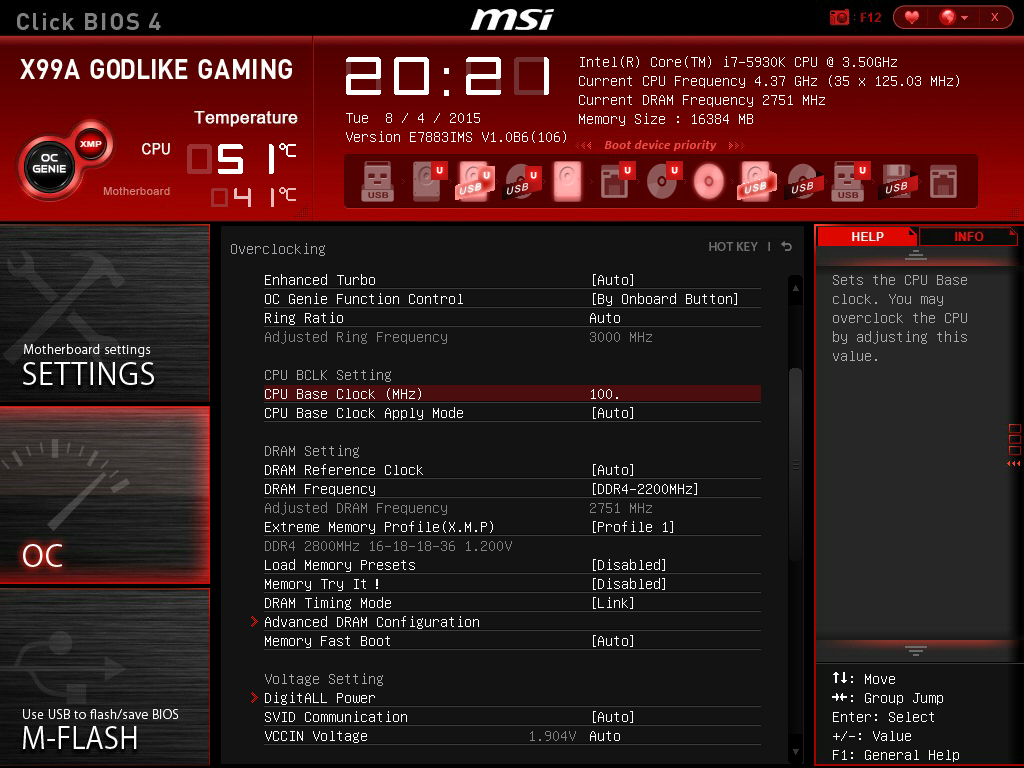
Usually set to 100 Mhz, most overclockers avoid changing this number initially since system instability is the usual result even with small increases. The vast number of motherboard subsystems tied to the BCLK speed means the chance that all of them will work beyond spec are slim. There are gains to be made and secrets to be discovered here for sure, but they are best left for later exploration, once the top clock speed of the processor is established by more stable means, namely changing the multiplier.
Happy times-tables
The multiplier affects CPU speed alone, so it’s the perfect place to start probing performance potential. This allows much higher clock speeds to be reached.
Intel’s Sandy Bridge, Ivy Bridge and Haswell series processors all have plenty of headroom in unlocked form, boasting multiplier-derived overclock speeds between 4.3 and 4.8 GHz when properly cooled. Determining where your CPU falls in this spectrum is straightforward.
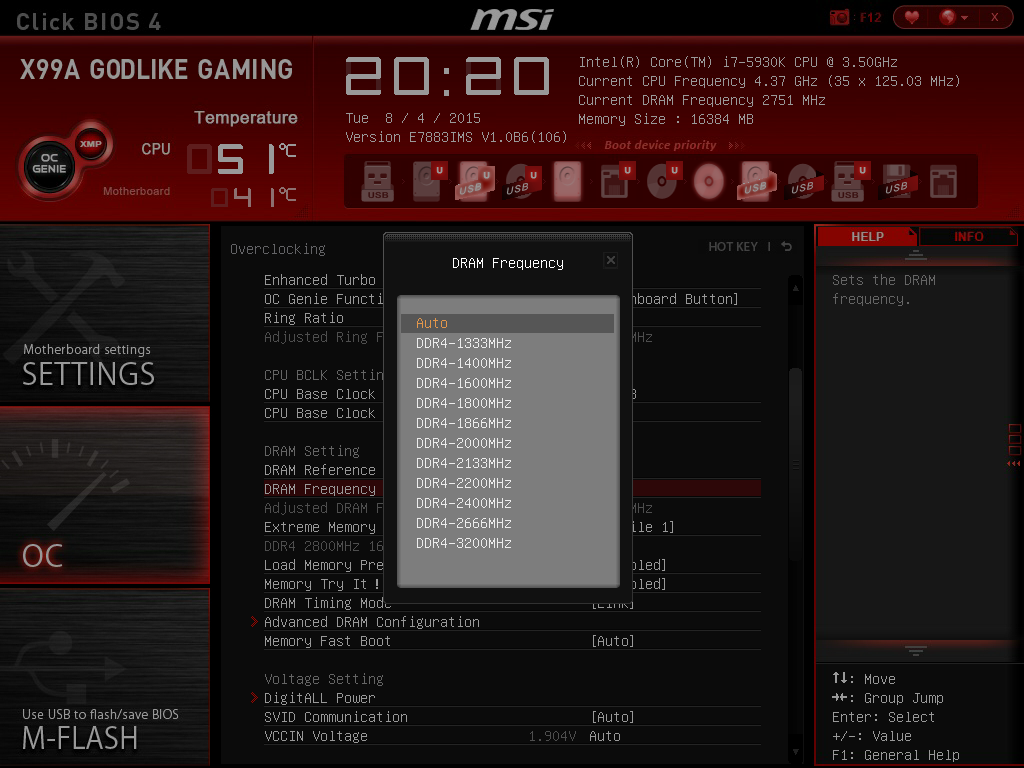
Boot your system into a stable state by going into the BIOS and loading the motherboard defaults. Set DRAM speeds to AUTO or the recommended spec for the chipset, for example 1600 MHz for Z97 or 2133 MHz for X99. If there are previous settings you wish to retain for later use, write them down, save a screenshot or take a photo of the BIOS screens. Most motherboards provide savable BIOS profiles for this purpose as well.
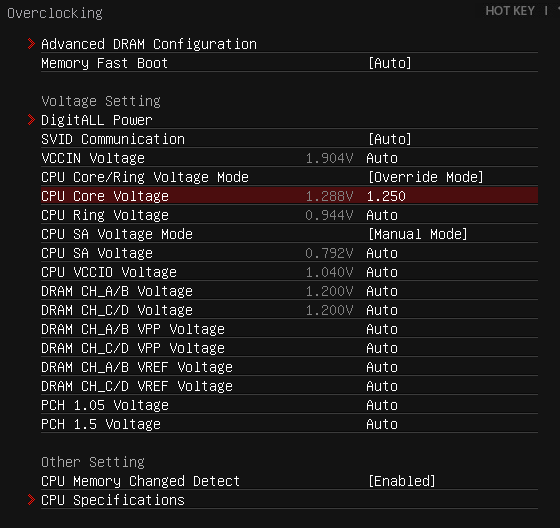
Next, set a safe manual CPU voltage—1.25v is a good start—and link the cores so the multiplier change affects them all. Avoid using adaptive or offset voltage while setting up a system for overclocking. Stress tests performed while using adaptive settings can cause voltage spikes well beyond the listed numbers and can trigger crashes or even processor damage.

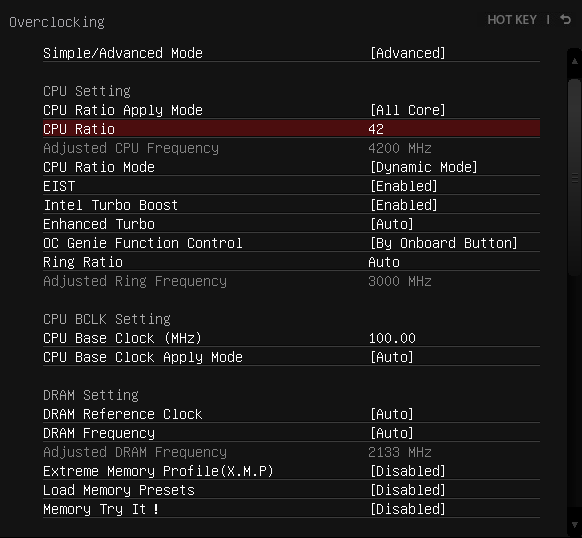
Now you’re ready to start adjusting your multiplier. Begin with 42 and keep raising the number until the system starts to show signs of instability, such as blue screen crashes, boot failures or application freeze-ups. Most chips manage 4.5 GHz or higher; the Haswell-E sample for this test maxed out at 4.6 GHz via simple multiplier changes. The number you reach is the basic maximum speed for your chip. That’s far from the end of the road when it comes to overclocking, however.
On the next page: How to test for stability, safely tweak voltage, and 'core' and 'uncore.'
