Everything you need to know about shields in Minecraft
Keep yourself protected with this handy Minecraft shield guide.


Minecraft update: What's new?
Minecraft skins: New looks
Minecraft mods: Beyond vanilla
Minecraft shaders: Spotlight
Minecraft seeds: Fresh new worlds
Minecraft texture packs: Pixelated
Minecraft servers: Online worlds
Minecraft commands: All cheats
Minecraft build ideas: What to build next
One of the less utilised items in Mojang's blocky survival game is the Minecraft shield. It could be because players prefer the idea of using a sword or bow and arrow, or it could simply be because having a big rectangle obscuring the lower half of your screen is a bit annoying.
That said, a shield can be the difference between life and death (who knew that not getting hit by a skeleton archer would be a good thing). With that in mind, here's a quick rundown of everything you need to know about the important item, and how to make a shield in Minecraft.
How to make a shield in Minecraft
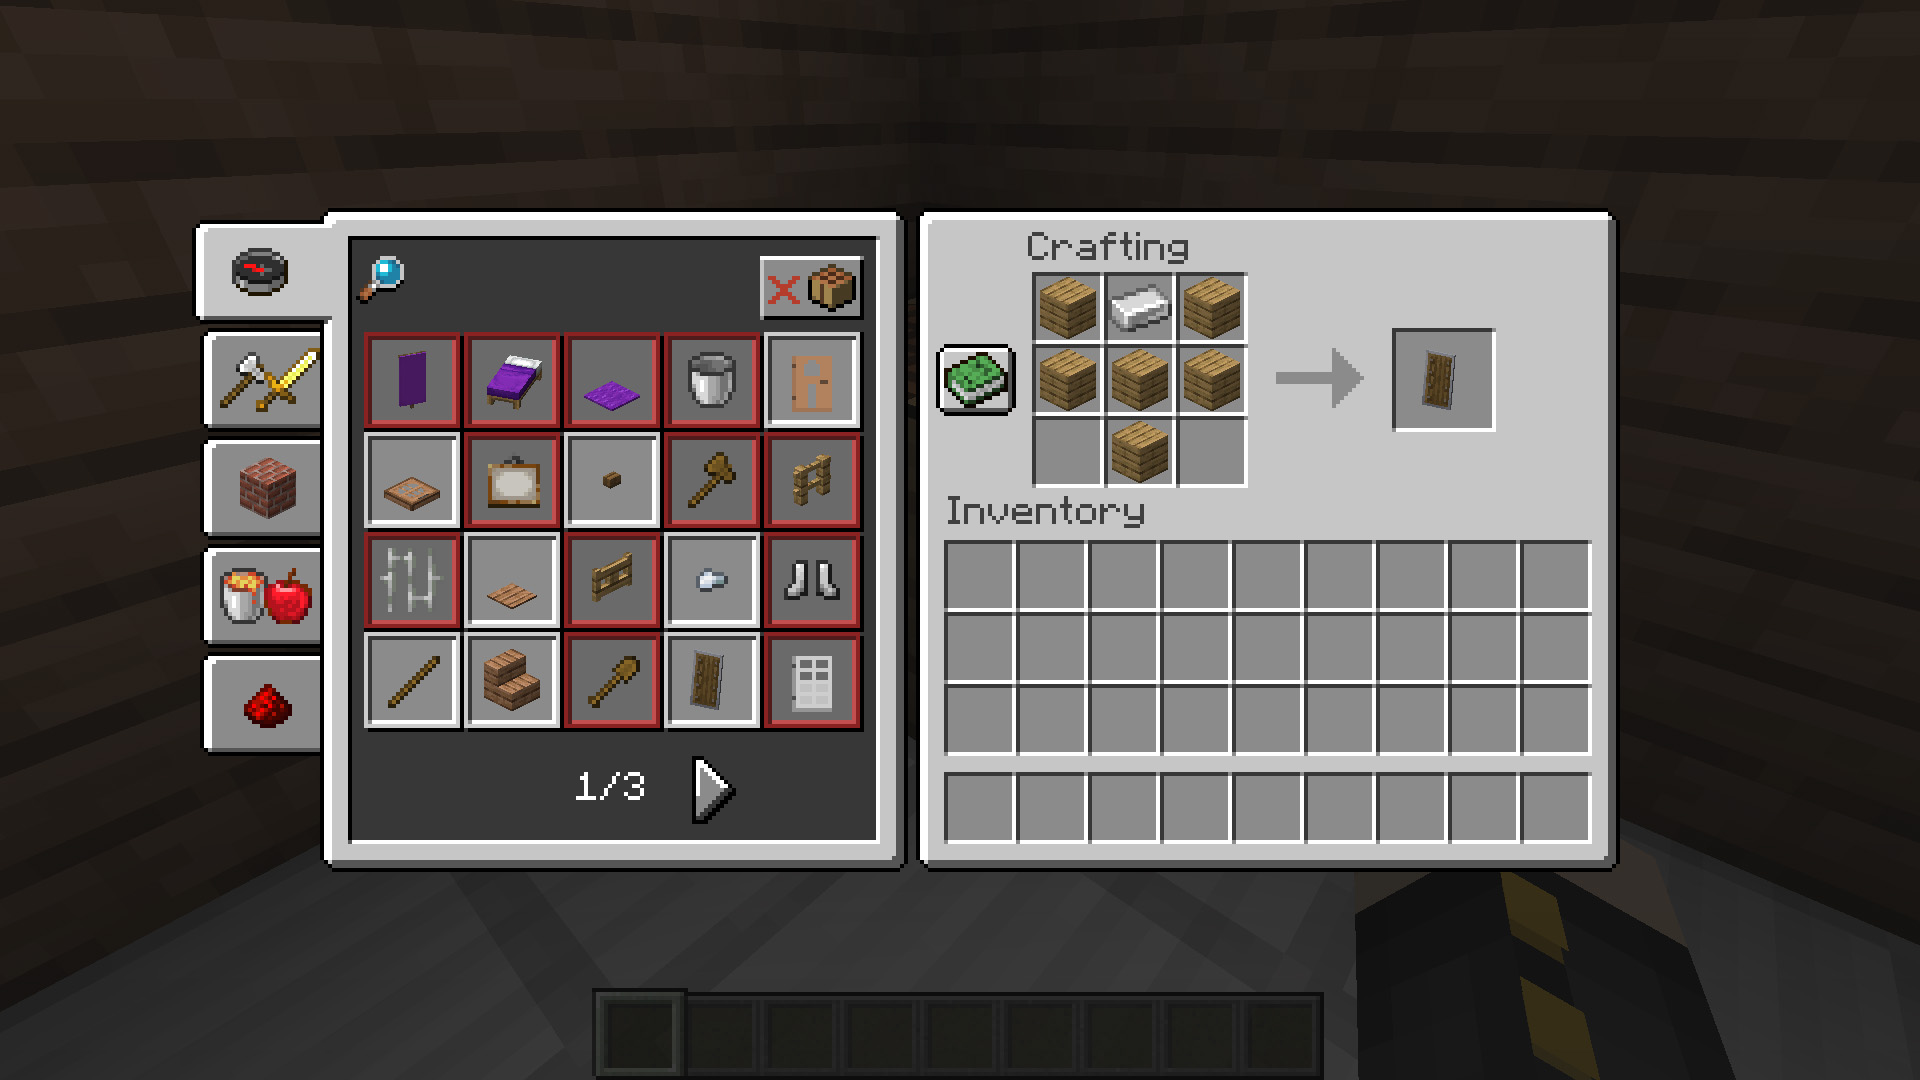
Crafting a shield is easy. Gather up enough wood to make six Wooden Planks, then make one Iron Ingot and you’re good to go. You can buy shields from some villagers as well, but it’s usually more efficient to build one given how easy the materials are to come by. It doesn’t matter what kind of wood you use, so feel free to be creative when it comes to the component parts.
How to customise a shield in Minecraft
The short version is you combine a banner with a shield to transfer over the pattern. Easy. But how much do you know about building and customising a Banner? If the answer is 'A lot', you can probably skip the longer version of this section. If not, keep reading.
To craft a Banner, you need six pieces of Wool and a Wooden Stick. The banner’s colour will match the wool used, so ensure to dye the wool if you want a colour more interesting than white, brown or black. Now comes the fun part: Customisation.
Customising a banner requires a Loom, which you can craft by combining two String and two Wooden Planks. Then, all you need to do is put your shield and some dyes into the Loom, letting you change the patterns on it. You can do this multiple times with multiple different colours to create something truly unique to you.
Once you’ve customised your banner, you just need to combine it with your shield and you’ll have a fancy new bit of equipment to walk around with. You do this by placing them both in the Crafting Table, then removing the customised shield.
The biggest gaming news, reviews and hardware deals
Keep up to date with the most important stories and the best deals, as picked by the PC Gamer team.
How to use a shield in Minecraft

Using a shield is a simple matter of right-clicking when it is held in either hand. Doing so will block nearly all melee and projectile damage and even help protect you from some environmental hazards, like being set on fire. The best way to use a shield is to equip it in your off-hand with a sword in your main hand. Doing so will allow you to both defend and attack (the essence of successful combat).
Remember that your shield will take damage the more you block with it, so eventually you’ll need to repair it. The good news is you can enchant a shield with both the Unbreaking and Mending enchantments to reduce the damage it takes. This is ideal if you’d rather not have to worry about your fancy custom shield being turned into firewood.

