How to format a hard drive, USB stick, or SSD
There's more to it than you might think.
Knowing how to format a hard drive seems like something that should be simple, but as with many aspects of computers, there are added layers of complexity that might come into play. For example, the process for formatting an internal hard drive can be different than formatting an external USB drive, and sometimes you have to decide between file system formats.
In this post, we'll go over how to format common types of drives, from internal hard drives in your PC (or SSDs, which we now recommend over hard drives) to external hard drives you might use between different computers.
How to format an external hard drive or flash drive
If you want to re-format an external hard drive (a drive you plug into your computer, instead of installing inside of your computer) or flash drive, it's extremely easy to do.
All you have to is open the file manager on your PC (search for 'File Explorer' in the Start Menu if you don't have an icon in your taskbar, or just press Windows+E on your keyboard), click 'This PC' in the sidebar, right-click the drive you want to format, and select 'Format'.
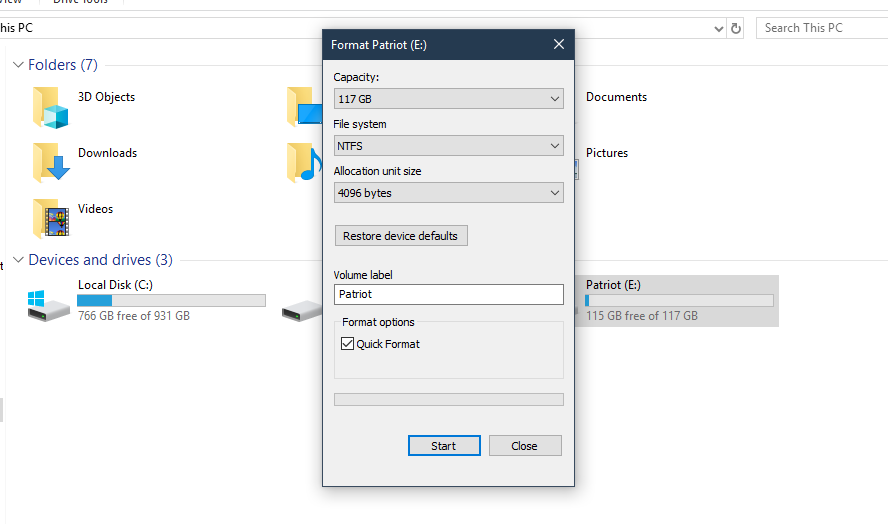
A popup will appear with a few options for formatting the drive. Here's what all of them mean, and what the best settings are:
- File system: This determines the way files are stored on the drive. Not every file system will work with every operating system. FAT32 is the best option in most cases, as all operating systems can recognize FAT32 drives. However, 32GB is the maximum drive size for FAT32, so Windows might give you an option for exFAT instead, which also has wide compatibility. (Note that if you intend to put a motherboard BIOS on the USB stick, some boards only look for FAT32 volumes.)
- Allocation unit size: Just leave this at whatever is already selected.
- Volume label: This is what the drive will be labelled as. Feel free to pick a fun name.
- Quick format: This speeds up the formatting process by not overwriting the entire drive with zeros and checking the drive for errors. You can uncheck this if you want the current data to be harder to recover, but if you're very worried about someone recovering old data from the drive, you should format using a dedicated program.
Once you've chosen your desired settings, click 'Start' and watch the magic happen.
How to format an SD card
While the above process will probably work for SD cards in most cases, the SD Association (the organization that develops SD cards) has a tool for properly formatting SD cards. You can download it here.
The biggest gaming news, reviews and hardware deals
Keep up to date with the most important stories and the best deals, as picked by the PC Gamer team.
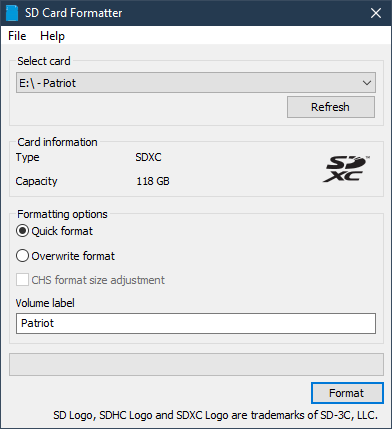
Even though it's intended for SD cards, it's also a great tool for formatting USB drives with all the correct settings to work on every operating system. For example, Macs sometimes format flash drives with a partition scheme that is incompatible with PCs. That's usually not a problem when formatting a drive from a Windows PC, but regardless, this tool ensures you'll never run into that.
How to format (initialize) a new internal hard drive
If you just built a PC, or added a brand new hard drive or SSD to an existing computer, you have to format it before you can actually store data on it. This is called 'initializing' the drive.
First, open the Start Menu on your PC, search for "disk management" and open the Disk Management tool that appears. (Alternatively, on Windows 10, press Windows+X and then "K" to get to Disk Management.) It might also be called "Create and format hard disk partitions." You'll need administrator access to run it.
The bottom half of the window displays all the drives connected to your computer. Find the one that says 'Not initialized,' right-click it, and select 'Initialize disk.'
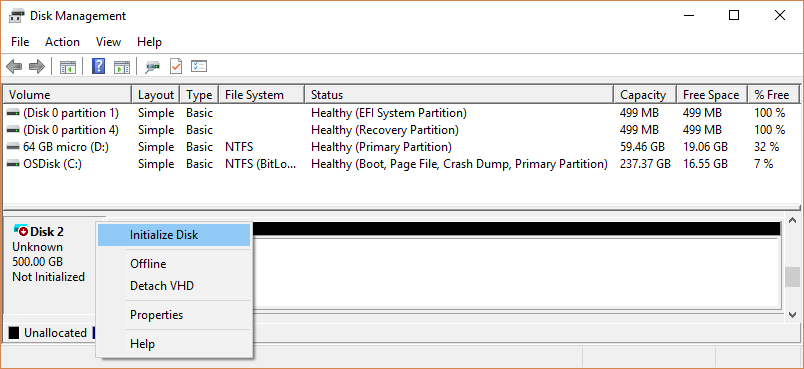
You'll get a popup asking what type of partition style you want to use for the disk. It's a good idea to leave "GPT" selected, since it's the newer standard that works the best. Master Boot Record, or "MBR" for short, is only required if the drive will be used with older PCs (or older OSes). MBR also only works with drives 2TB or less.
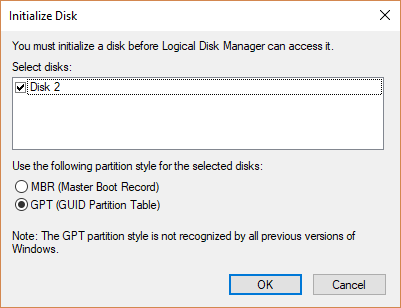
Once you've made your selection, click OK. Now it's time to actually format the drive, so you can store data on it. Right-click on the drive you just initialized and select 'Format'. A popup window will appear asking for the label and file system.
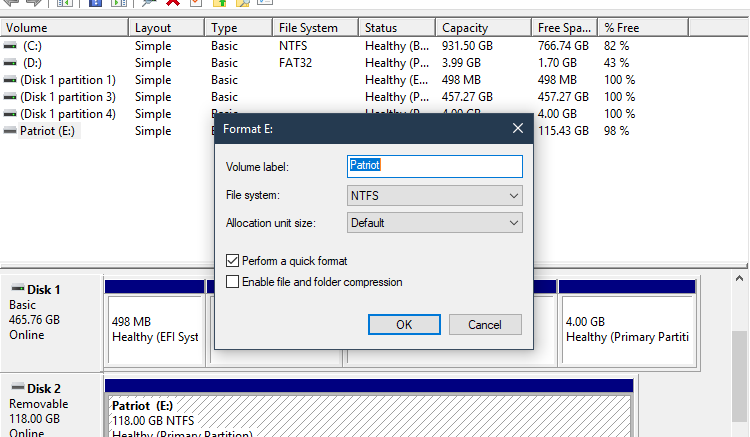
In the label text box, type the name you want the drive to be called. For the file system, leave 'NTFS' selected. This is the default Windows file system, and since this is an internal drive that won't be leaving your PC, there's usually not a reason to go with another file system. Click OK, and your new hard drive is ready to use!
Corbin is a tech journalist, software developer, and longtime PC Gamer freelance writer, currently based in North Carolina. He now focuses on the world of Android as a full-time writer at XDA-Developers. He plays a lot of Planet Coaster and Fallout and hosts a podcast all about forgotten stories from tech history.

