How To: An Overclocking Masterclass
Picking a Cooler
The first thing to consider after you’ve decided on overclocking is what you’ll use to cool your components. To put it bluntly, the stock coolers that AMD and Intel provide simply won’t cut it when it comes to dissipating the excess heat that comes from adding more voltage. They’re designed to deal with what the processor can output at stock frequencies, and not a lot more.
Air
The more traditional, easier solution would be to rely on air cooling for your CPU. There’s a huge list of air coolers out there, but it’s vital that you consider the size of the cooler versus the height of your RAM and the size of your case. The last thing you want is to buy a new heatsink for your shiny new i7-4790K, only to discover it won’t fit over the top of your Corsair Dominator GTs. The Dark Rock Pro 3 is a particular favorite of ours—it’s silent, yet can relieve your CPU of over 250W of TDP, plus it’ll keep your bacon cool.
AIO Water Cooling
The second option, and one we all prefer here at Maximum PC, is an all-in-one water-cooling loop. You’ve probably seen a lot of these kicking about, Corsair’s Hydro H100i being the more famous of the bunch. These are a quick and easy solution, and often provide a great deal more cooling than a single air cooler, due to their increased surface area. They’re also a lot less tricky to install (providing you have the radiator support), and can clean up your rig quite nicely while allowing you to swap out components with relative ease.
Custom-Loop Cooling
Finally, the fully custom loop. It’s the dream, the crème de la crème, and the aspiration of every tech enthusiast starting out on the bumpy road to a successful overclock. It’s also something that’s become increasingly easy to build in recent years. Although certainly the most effective of the three, due to the ability to expand on your loop by adding more radiators, and cool more components, it can become very rigid, especially if you want to change out a graphics card, for example. It’s definitely something that needs to be researched fully before committing to, if only because it can easily add up to $500 to your costs. And that’s without the real premium components. But wow, does it look good when you’re done. The Parvum Titanfall rig is a prime example of this.
Mobos and PSUs
Once you’ve got your cooling sorted out, you'll want to make sure you’ve got the best possible components that you can budget for in regard to stability. That means two items in particular—the power supply unit (PSU) and the motherboard. They are both imperatively important when it comes to overclocking. Perhaps most obvious is buying a motherboard that supports overclocking. For Intel, that’s any motherboard with the Z97 chipset. For AMD users, it’s currently any FM2 or AM3+ board.
Concerning power supplies, you want to be looking at a PSU that has at least 20 percent spare capacity, in terms of wattage, over what your system requires. Preferably, push as much money as you can into it. The higher-end power supplies not only feature better surge protection, but also provide a more consistent flow of electricity between the wall and your PC parts. This should result in longer life and more stability, both when overclocking and through everyday usage.
Overclocking Your RAM
Wait! There’s more! Overclocking isn’t limited to just your processor
Yes. It’s true. Overclocking doesn’t just mean tinkering with your CPU. Other avenues exist if you’re keen to shove the boat out a little bit more.
The biggest gaming news, reviews and hardware deals
Keep up to date with the most important stories and the best deals, as picked by the PC Gamer team.
RAM speeds over the course of the last few years have almost tripled in frequency, meaning performance can be improved quite dramatically in certain computational programs. It’s important to bear in mind, however, that the higher you push your RAM frequency, the more your CPU will suffer. In other words, it might mean an overall lower final overclock for your little powerhouse.
On the other hand, AMD’s APUs, despite being a lower-end graphics solution, will benefit hugely from an increase in those same frequencies. So, what does all this come down to?

1. What's the Frequency?
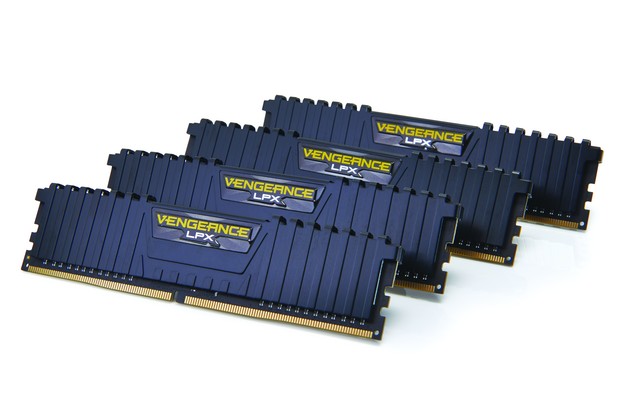
Identifying the frequency of your RAM on purchase is crucial. We wouldn’t go for anything less than 1,600MHz as a minimum if building a rig today. With Skylake and DDR4 around the corner, we’d be tempted to hold off a little and wait for that, as the price of the next generation of memory is still continuing to plummet.

Motherboard support may vary here.
2. The Profile Setup
We’re using a pair of Corsair Dominator Platinums, clocked at a stock speed of 2,133MHz. To take advantage Pushing your CPU and RAM to the max. of any potential additional clock speed, you’ll need to set up the memory with the correct profile on install. So, either Intel’s XMP profiles or AMD’s AMP profiles. This is exactly what we’ll be using, just to do a slight overclock of the memory.
3. Upping the Frequency
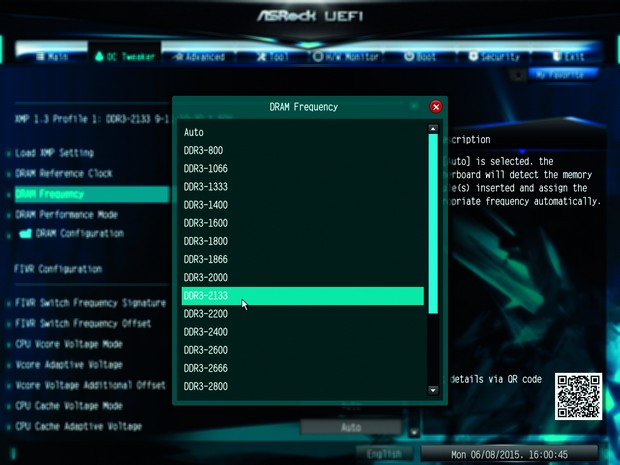
Enter your BIOS by again headbutting the Delete key. Make sure you have either your XMP profi le or your AMP profile selected, then change the memory frequency to one frequency higher than your memory’s stock frequency. In all likelihood, your RAM should be able to manage and maintain that frequency, regardless of what the stock speeds say.

Pushing your CPU and RAM to the max.
4. Above and Beyond
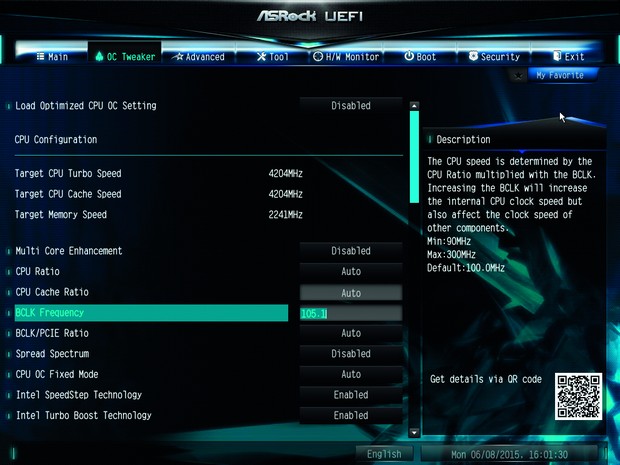
If you want to take it further, this time we’ll change the BCLK frequency, instead of adjusting a RAM multiplier. You can up this in very small increments. But it also ups your CPU’s basic overclock, so if you’ve already OCed your chip to the absolute max, it’s unlikely you’ll be able to push the memory or the CPU any further.
After graduating from the University of Derby in 2014, Zak joined the PC Format and Maximum PC team as its resident staff writer. Specializing in PC building, and all forms of hardware and componentry, he soon worked his way up to editor-in-chief, leading the publication through the covid dark times. Since then, he’s dabbled in PR, working for Corsair for a while as its UK PR specialist, before returning to the fold as a tech journalist once again.
He now operates as a freelance tech editor, writing for all manner of publications, including PC Gamer, Maximum PC, Techradar, Gamesradar, PCGamesN, and Trusted Reviews as well. If there’s something happening in the tech industry it’s highly likely Zak has a strong opinion on it.


