I built a real SteamOS Steam Machine out of the guts of an old laptop so Gabe doesn't have to go through that whole sad dance again
I get why you might not want to go back, but I just made myself a Steam Machine from office bits and it was (eventually) pretty damned easy.
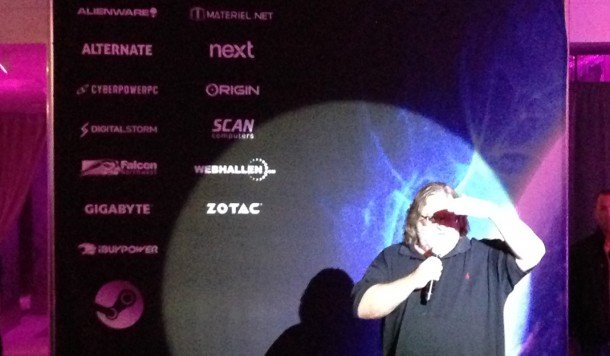
I'm reminded of the time I met Gabe Newell in Las Vegas. Now, if I never type another word the story would seem far cooler than it is. Sadly it was just another CES trip, way back in the January of 2014; a simpler time where people thought the future might be a positive place. Ah, how naïve we once were.
I'd been invited to a relatively small suite at the top of the Palms hotel and casino, just off the Strip, where Valve and its partners were demonstrating Steam Machines for the first time. Remember those little PCs—determinedly not Windows-based—promising to deliver the living room console experience for PC gamers?
Gabe delivered the presentation from a few feet in front of me, spoke enthusiastically about the future of Linux-powered game boxes, and then let us gathered journos loose to prod a selection of different Steam Machines and play with some prototype Steam Controllers within SteamOS.
And maybe a handful of words passed between Gabe and I during the event. Probably something like "I hope the quality of these prototype controllers carry on to the final units" or "you better hurry up and get SteamOS finished or else Alienware is going to do something crazy like launch its Steam Machine with Windows."
Or maybe it was a somewhat less erudite: "Hello Mr. Newell. Um, I like your games."
It was a long time ago, and the memory… ah, she is a fallible mistress.
But what I do remember is the utter failure of the whole endeavour as SteamOS itself faltered before it got out the gate and the Steam Machines themselves just became wee Windows boxes, before disappearing altogether. It was all rather sad, after an unveiling that promised an OS which "combines the rock-solid architecture of Linux with a gaming experience built for the big screen" we ended up with delay upon delay and what was an exciting moment for gamers and developers ended up with some very late launches and some unhappy partners with Steam Machine chassis they couldn't shift.
The biggest gaming news, reviews and hardware deals
Keep up to date with the most important stories and the best deals, as picked by the PC Gamer team.
Sure, the controller itself got out there, but subjectively speaking, it sucked.
You could say, however, that Gabe was playing the long game. Every detail of the unfortunate Steam Machine debacle led into the Steam Deck; arguably the true embodiment of what Valve was originally going for and surely the most successful piece of hardware the company has ever produced.
At its heart is a fully realised third-generation version of SteamOS, a distribution built on top of Arch Linux, and such a hit it has been that since the Deck released back in 2022 people have been desperate to get the operating system installed onto their other PCs. Despite promises that getting a standalone version out there has been "very high on our list" we're only just starting to see a sort of version you can sort of jam onto your other devices.
In fairness, you've been able to try that out for a while, grabbing the recovery install and see if your other hardware will take, but it's only now, 12 years after the first promise of SteamOS was made, there is actual baked-in support for other devices in the most recent 3.7 versions.
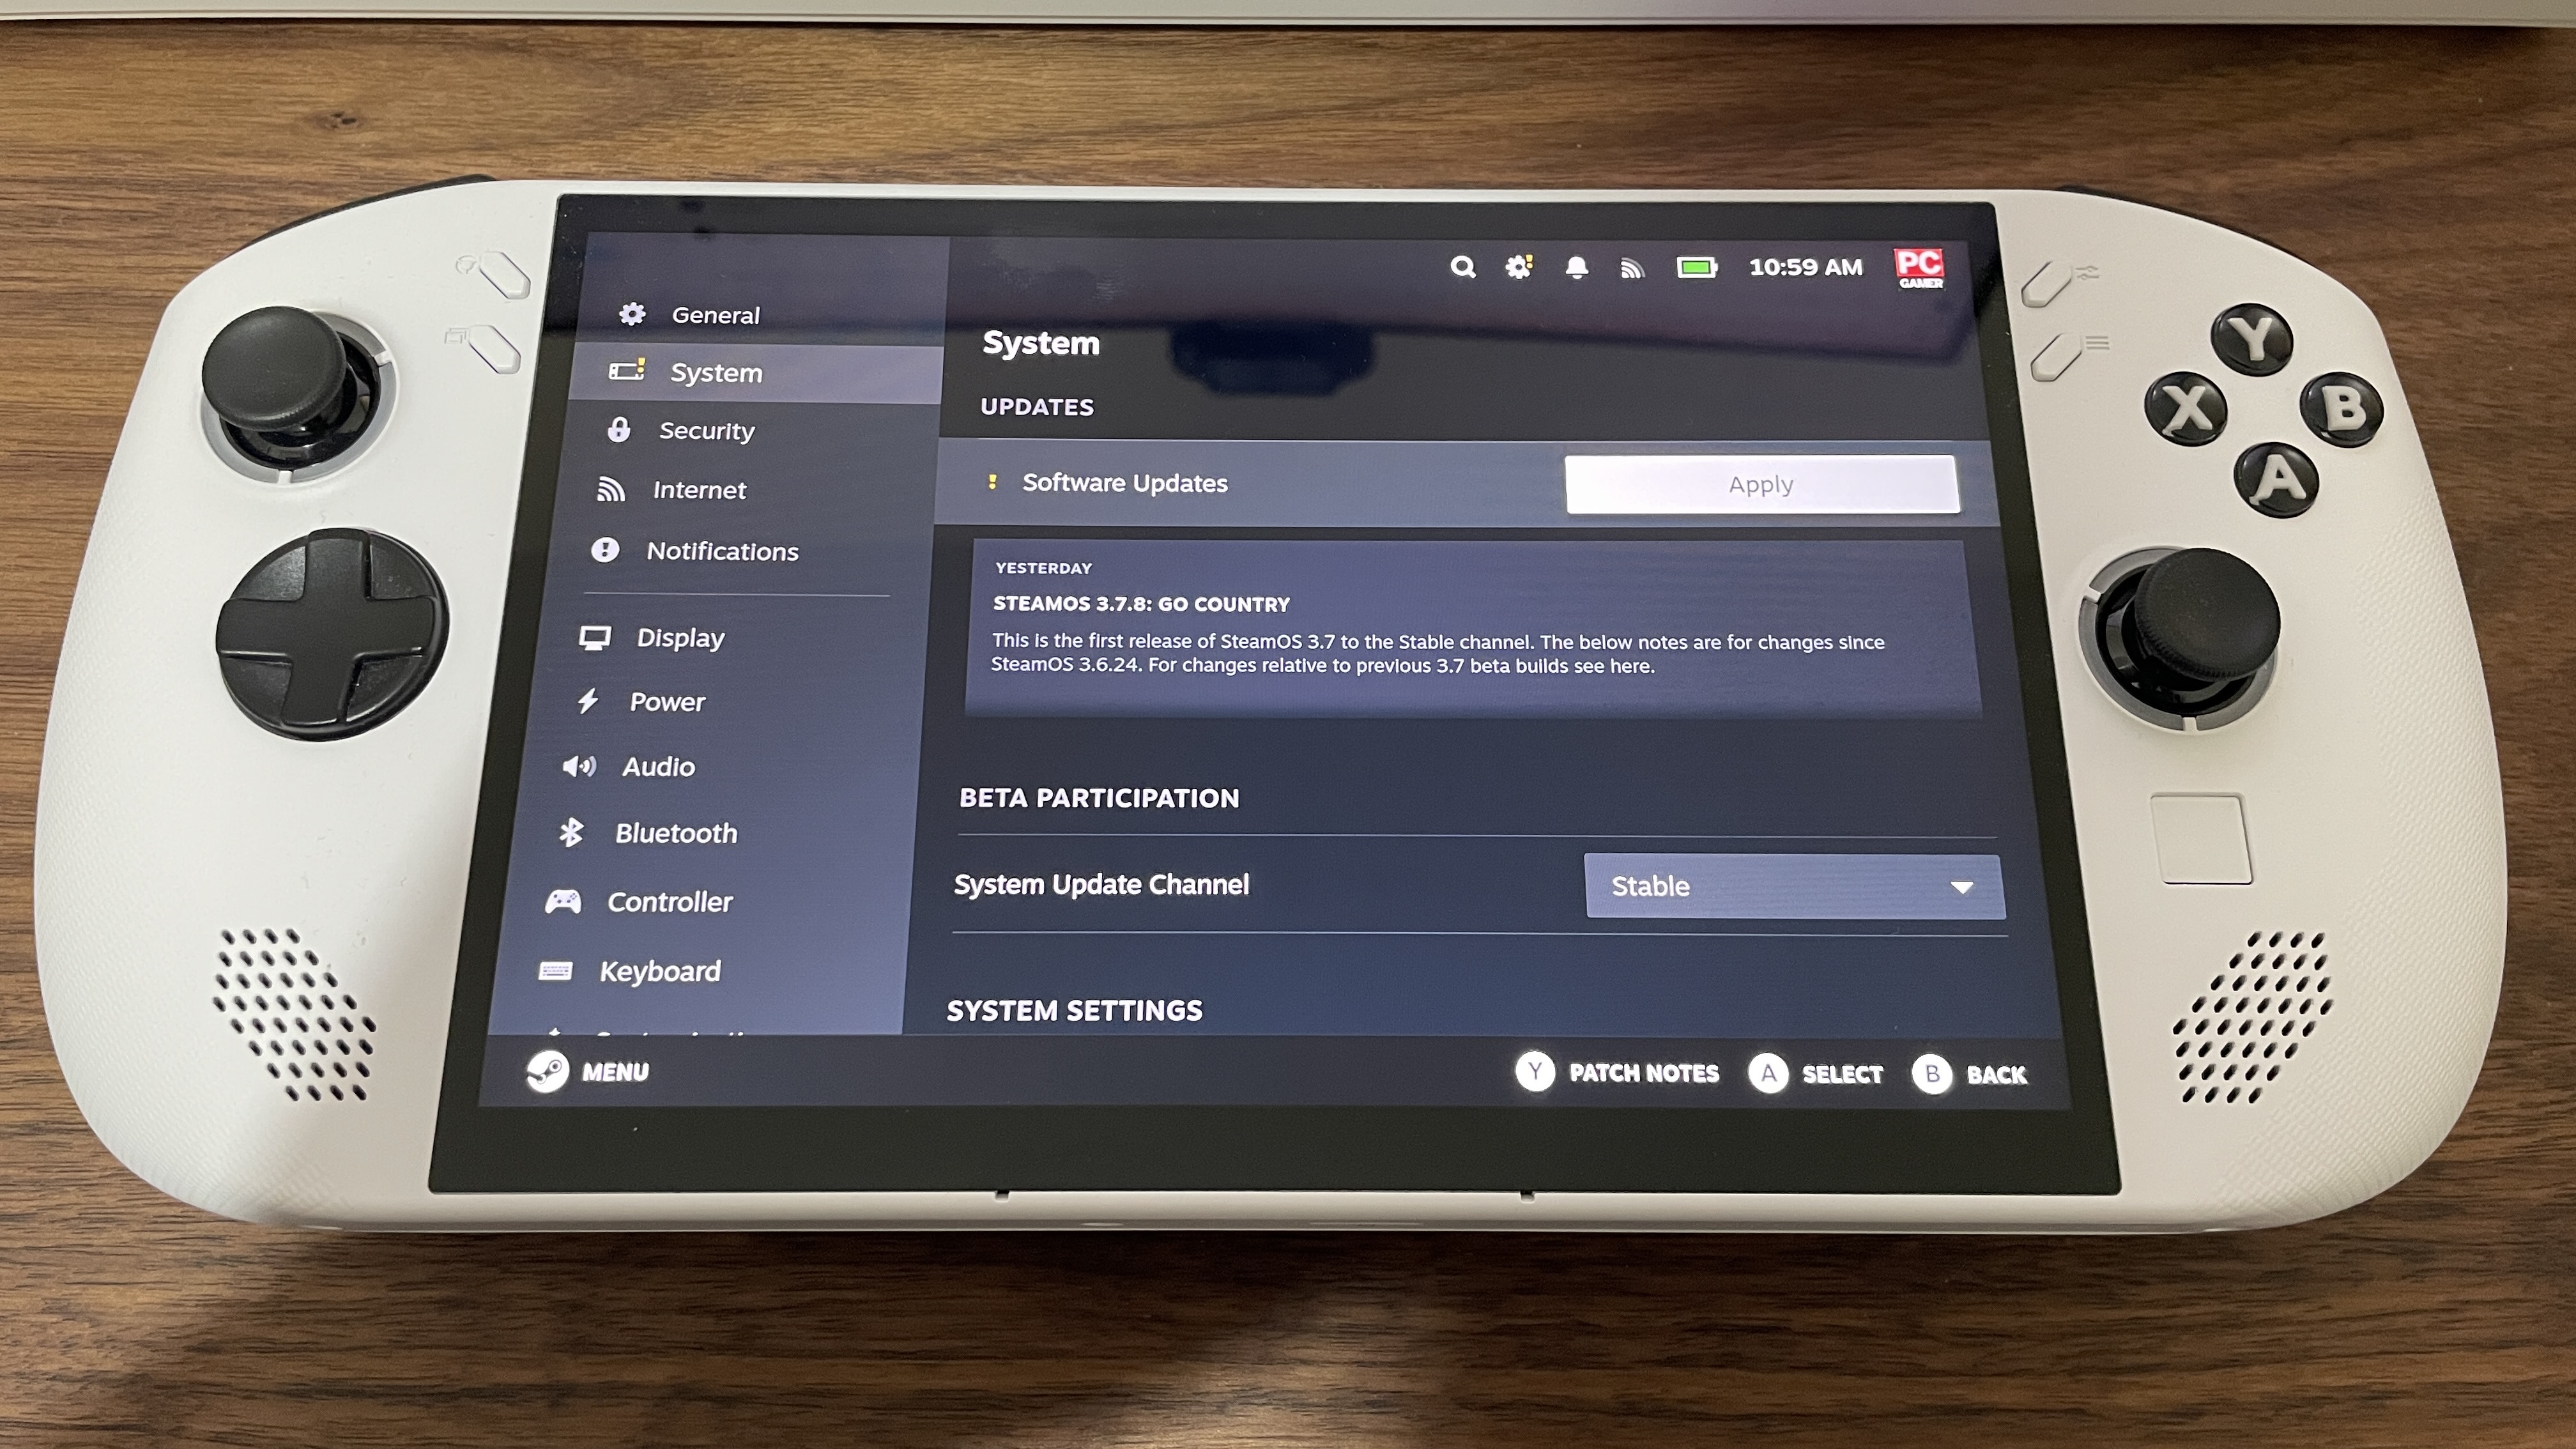
Jacob has stuck it on his Legion Go S and, of course I've made a Steam Machine with genuine SteamOS. No Bazzite-ing here. This one's for you, Gabe.
As Valve has stated in the past, SteamOS is still only really here for other handheld devices, specifically supporting the Legion Go S and ROG Ally, and I've honestly had pretty limited success getting the operating system working with any other handheld in my care. I was hoping the Strix Point-based OneXFly F1 Pro would hook it, but the installation procedure falls over before it even really begins. And I didn't get much further with the OneXPlayer X1 tablet, either.
It's worked out better on the Ayaneo Kun, where I've actually got a mostly functional setup that lets me play games with almost the same level of control over the system that the AyaSpace app affords in Windows. Sadly, the speakers don't work—and no amount of command line playtime has changed that—but, worse, the sleep function is entirely non-existent. Basically making it pretty useless as a gaming handheld.
This is a perennial issue of mine with Linux. I recently stuck PopOS on a Blade 15 laptop for giggles and rapidly stopped laughing when I realised the machine would resolutely never sleep. There's always something with Linux and the myriad configs of PC hardware to fix, which is why tinkerers love it, why it's taking so long for Valve to get a standalone version of SteamOS out there, and why it may still not be the perfect pick for regular PC gamers wanting to jam something other than Windows onto their systems. At least not yet.
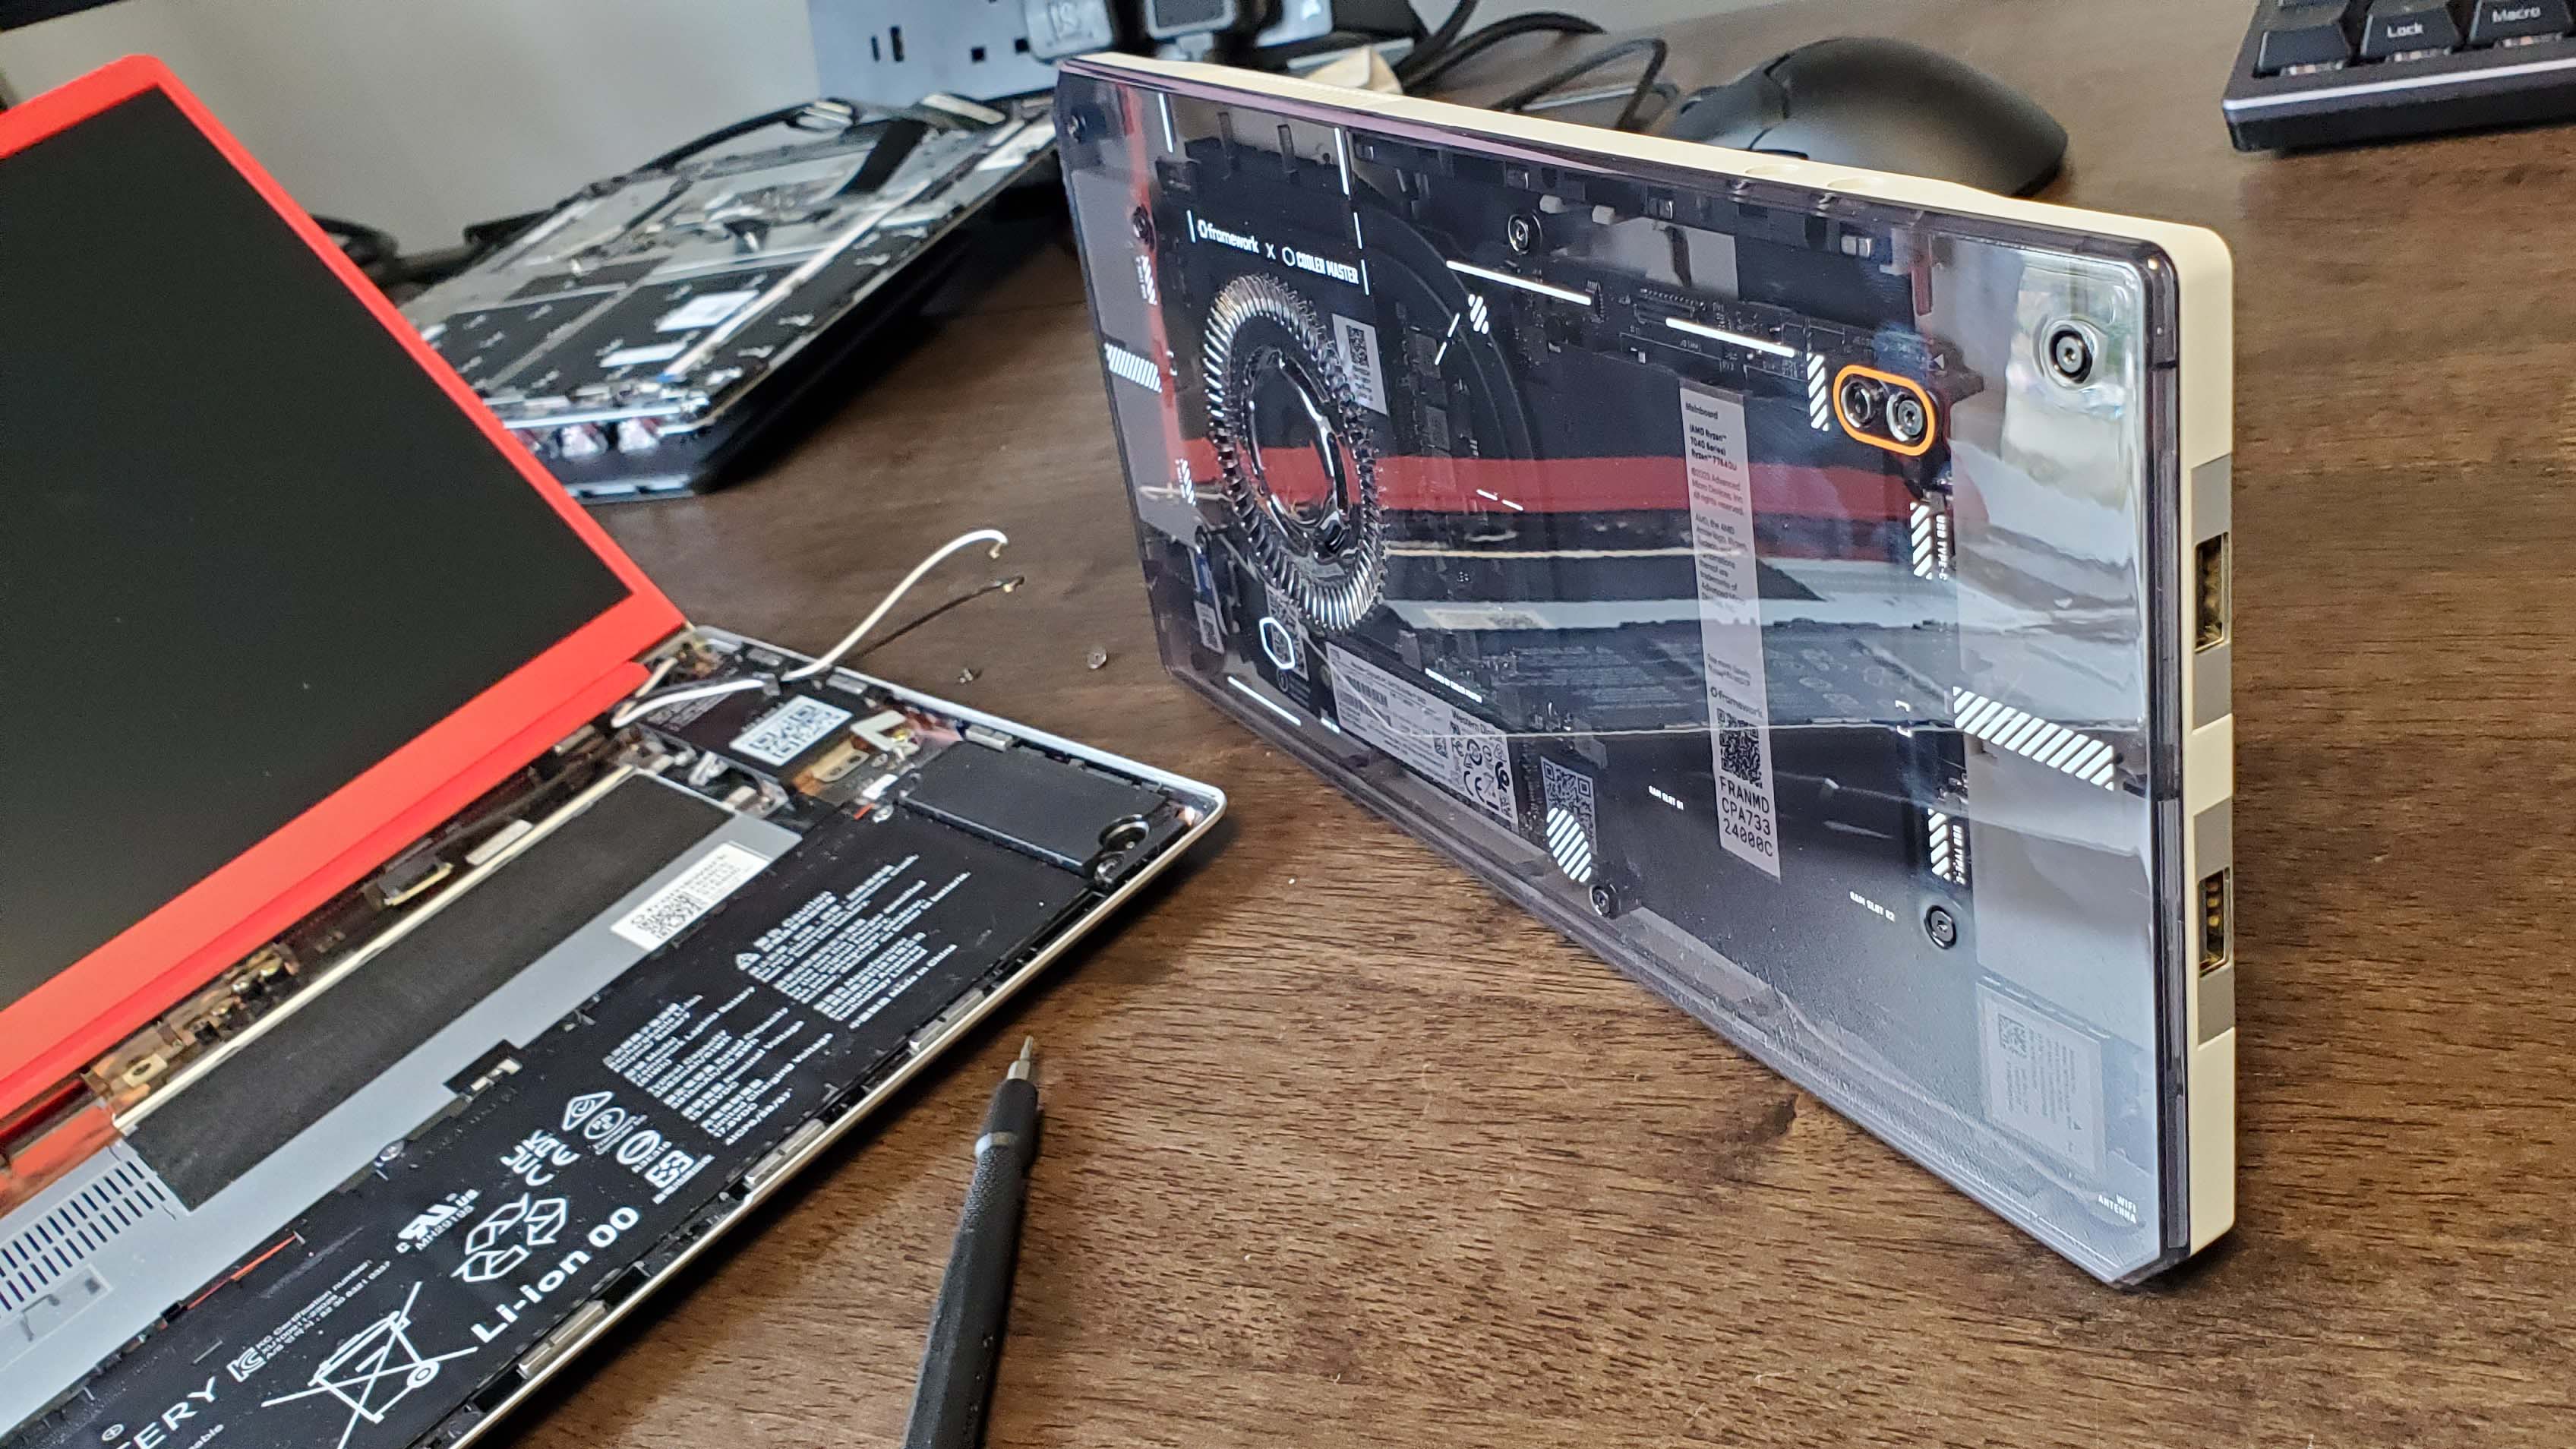
But the hardware in the Ayaneo handheld is essentially the same as my Framework 13 laptop with the Ryzen 7840U mainboard inside it, so I figured it ought to at least work as badly. Yet it works a treat. Once I'd unzipped the downloaded recovery file from Steam before I loaded it onto a USB stick via Rufus then I was installing SteamOS onto my laptop in no time.
And everything works.
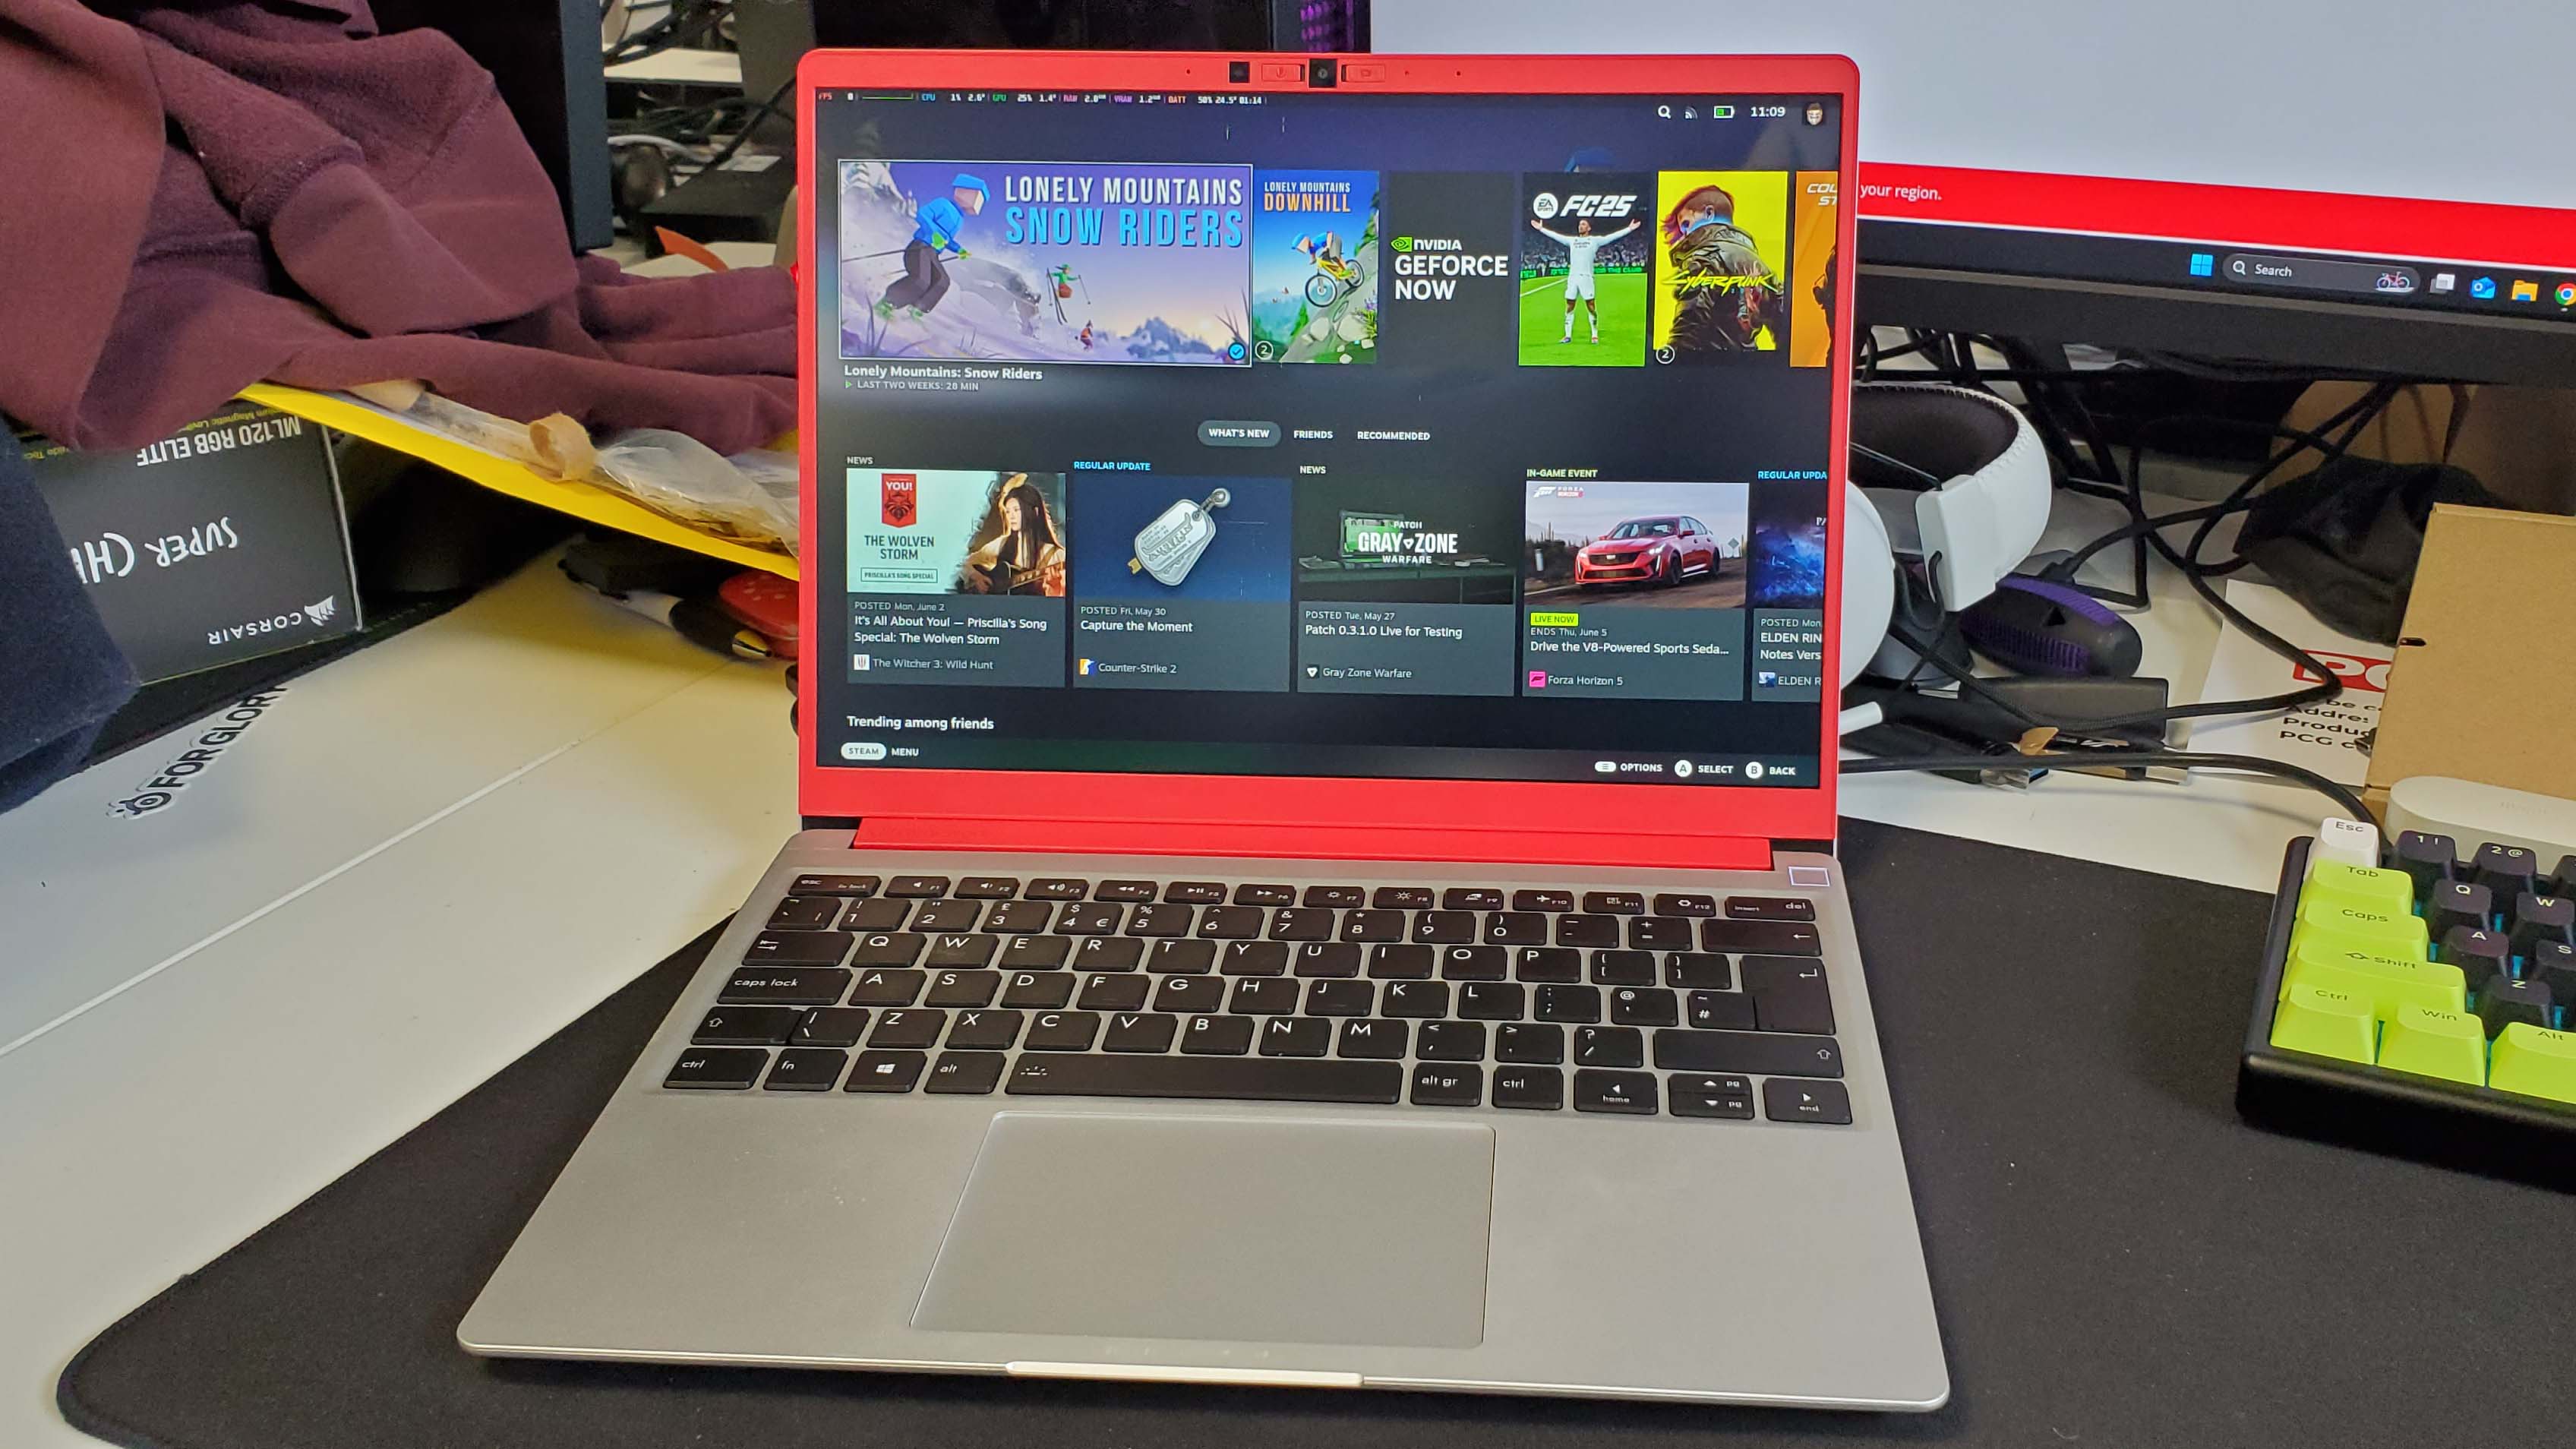
SteamOS is finally delivering on its 'screw Microsoft' promise.
The sound bursts from the speakers the moment it boots in and the sleep function is working exactly how it does on the Steam Deck, and with Decky Loader and SimpleDeckyTDP I can control the power of the thing. And that's exactly what I want. It makes for a very effective light-gaming laptop, with a Linux desktop there for any proper notebook work at the flip of a system setting.
But the joy of the Framework setup is that you can whip out the mainboard and just use it in Standalone mode to create your own mini PC. So long as you remember to put it in that mode via the BIOS before you rip it out of the laptop frame, that is. Yeah, I had a few stutters on the way to Steam Machine nirvana.
And so, with the assistance of the Cooler Master-made Framework case I now have a delightful mini PC that can plumb into a big screen living room TV and boot instantly into a gaming OS easily controllable via a joypad. We've finally got GeForce Now natively on SteamOS, too, so I've been playing Indiana Jones at 4K Ultra settings via this little Steam Machine, kicking back in my chair.
Like it or not, Windows has never made for a good experience in the living room, but SteamOS is finally delivering on its 'screw Microsoft' promise.
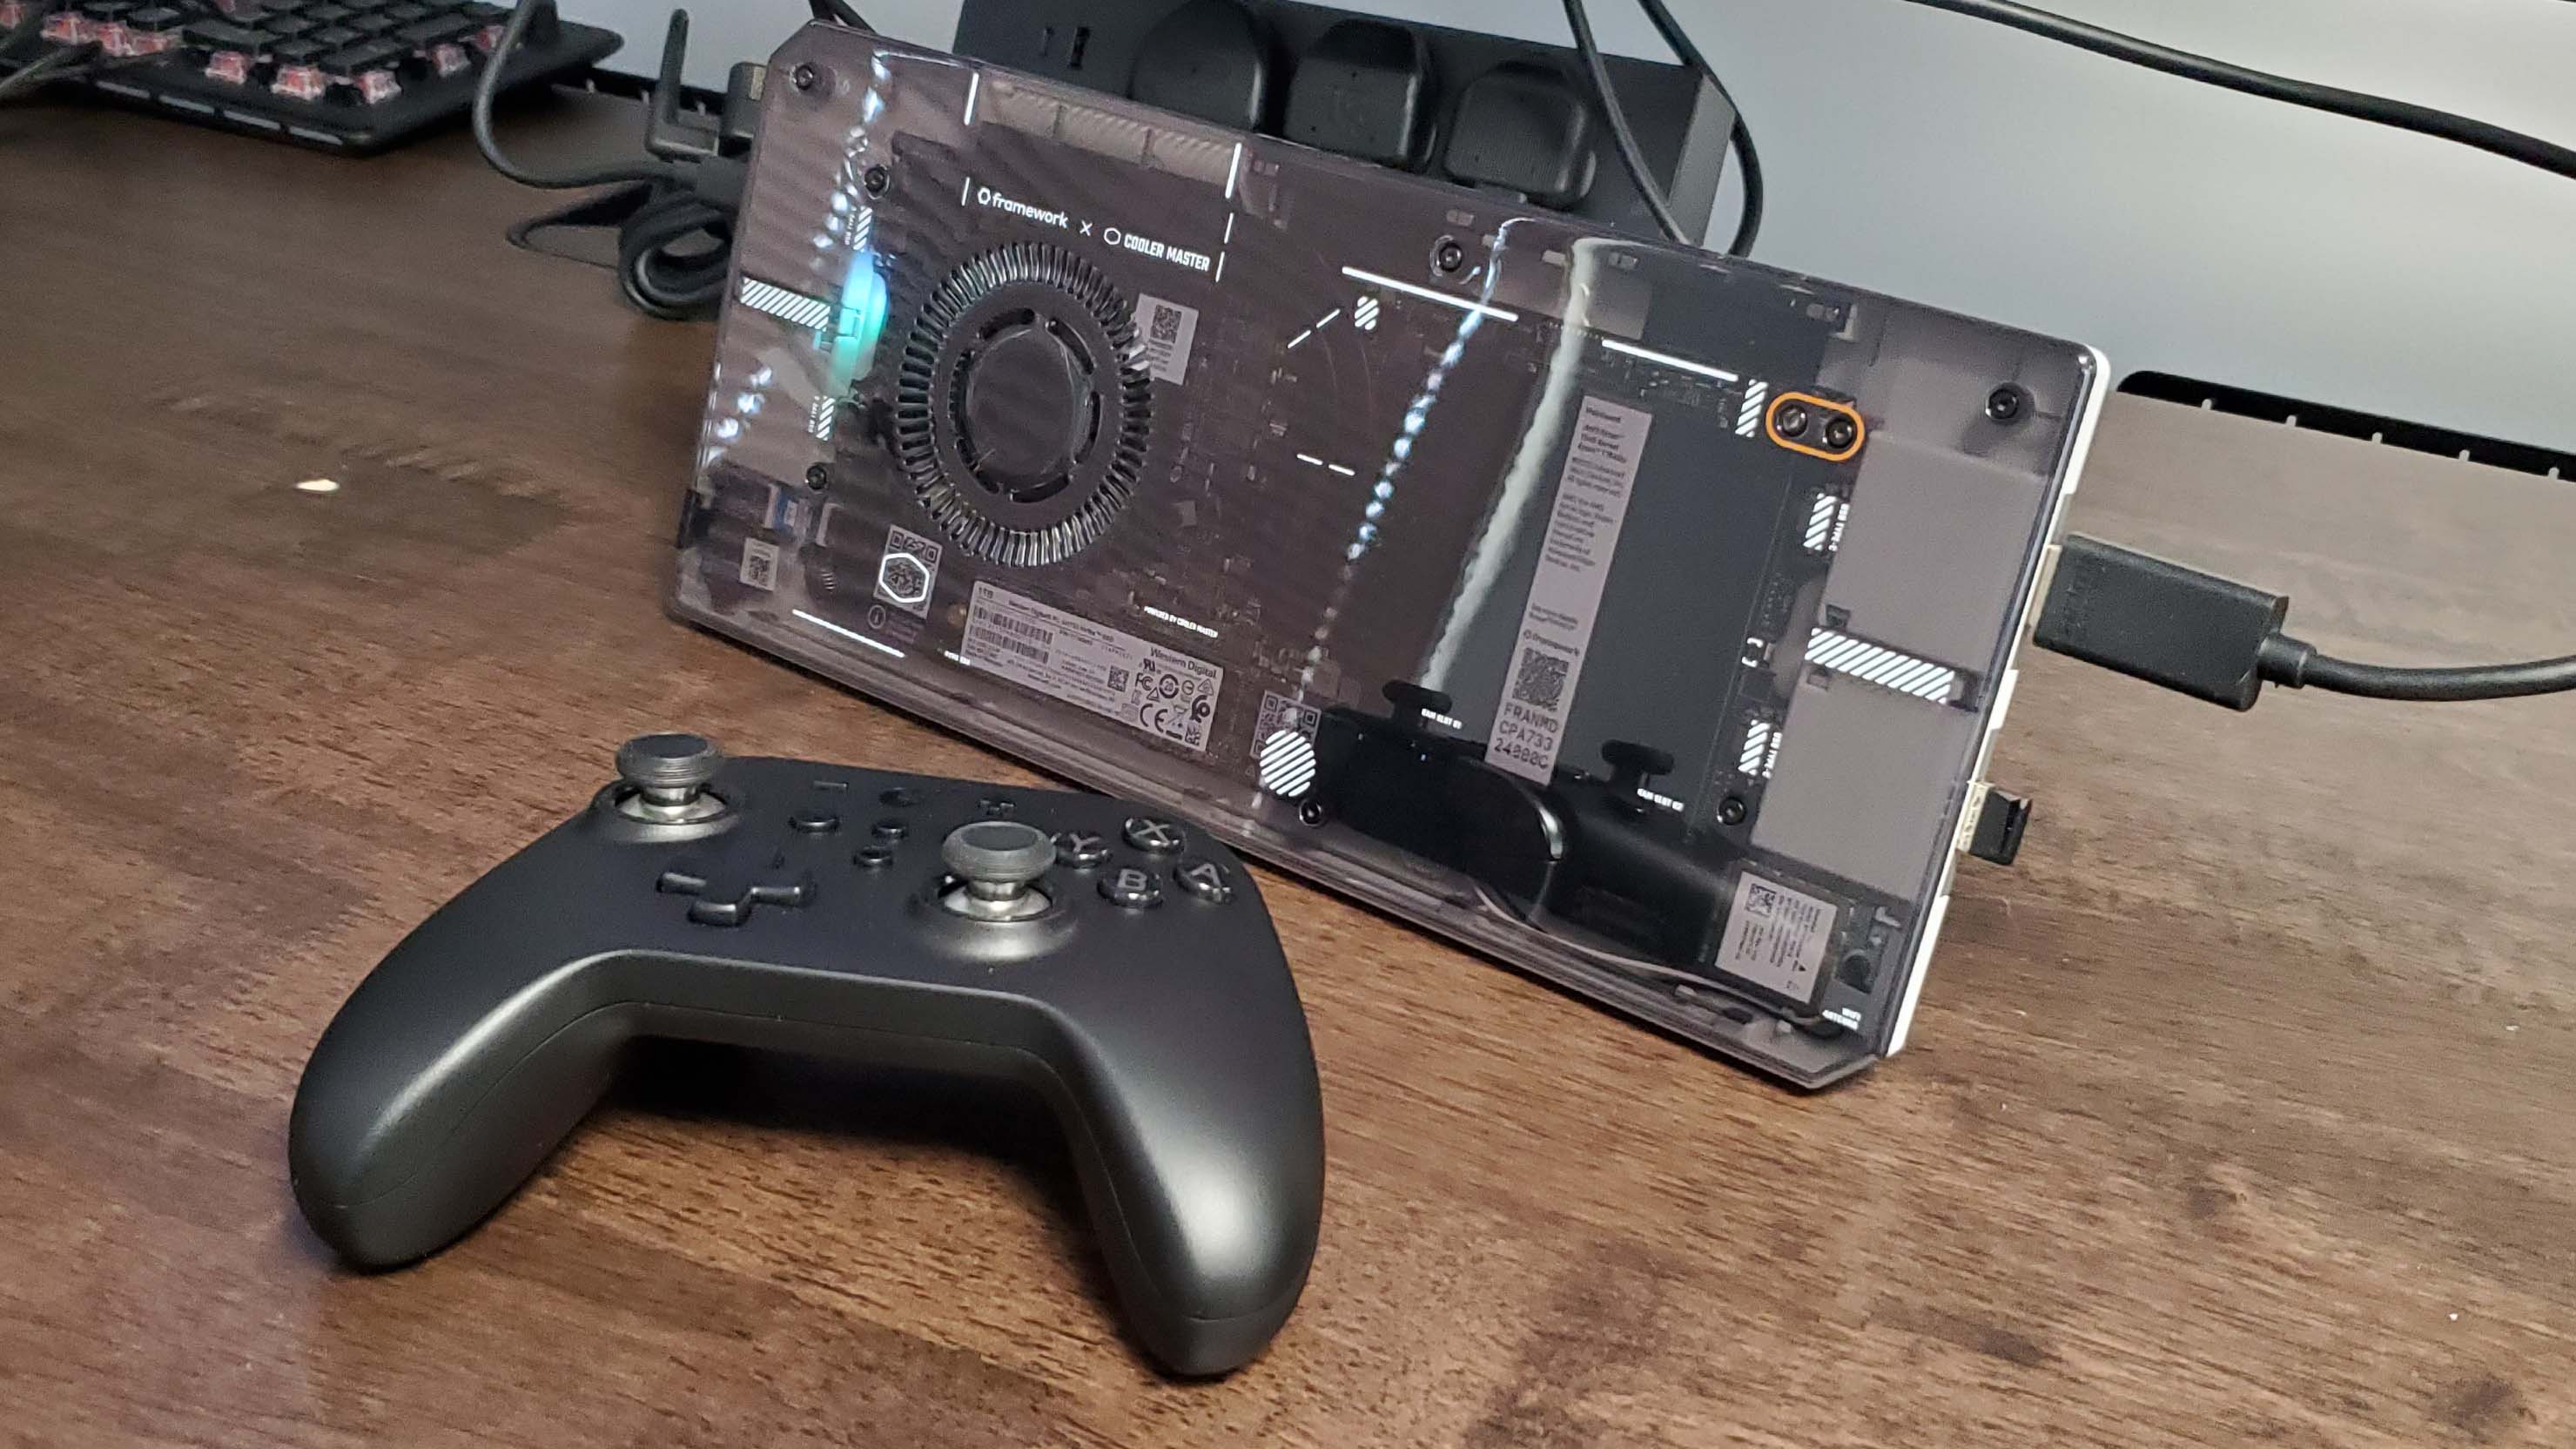
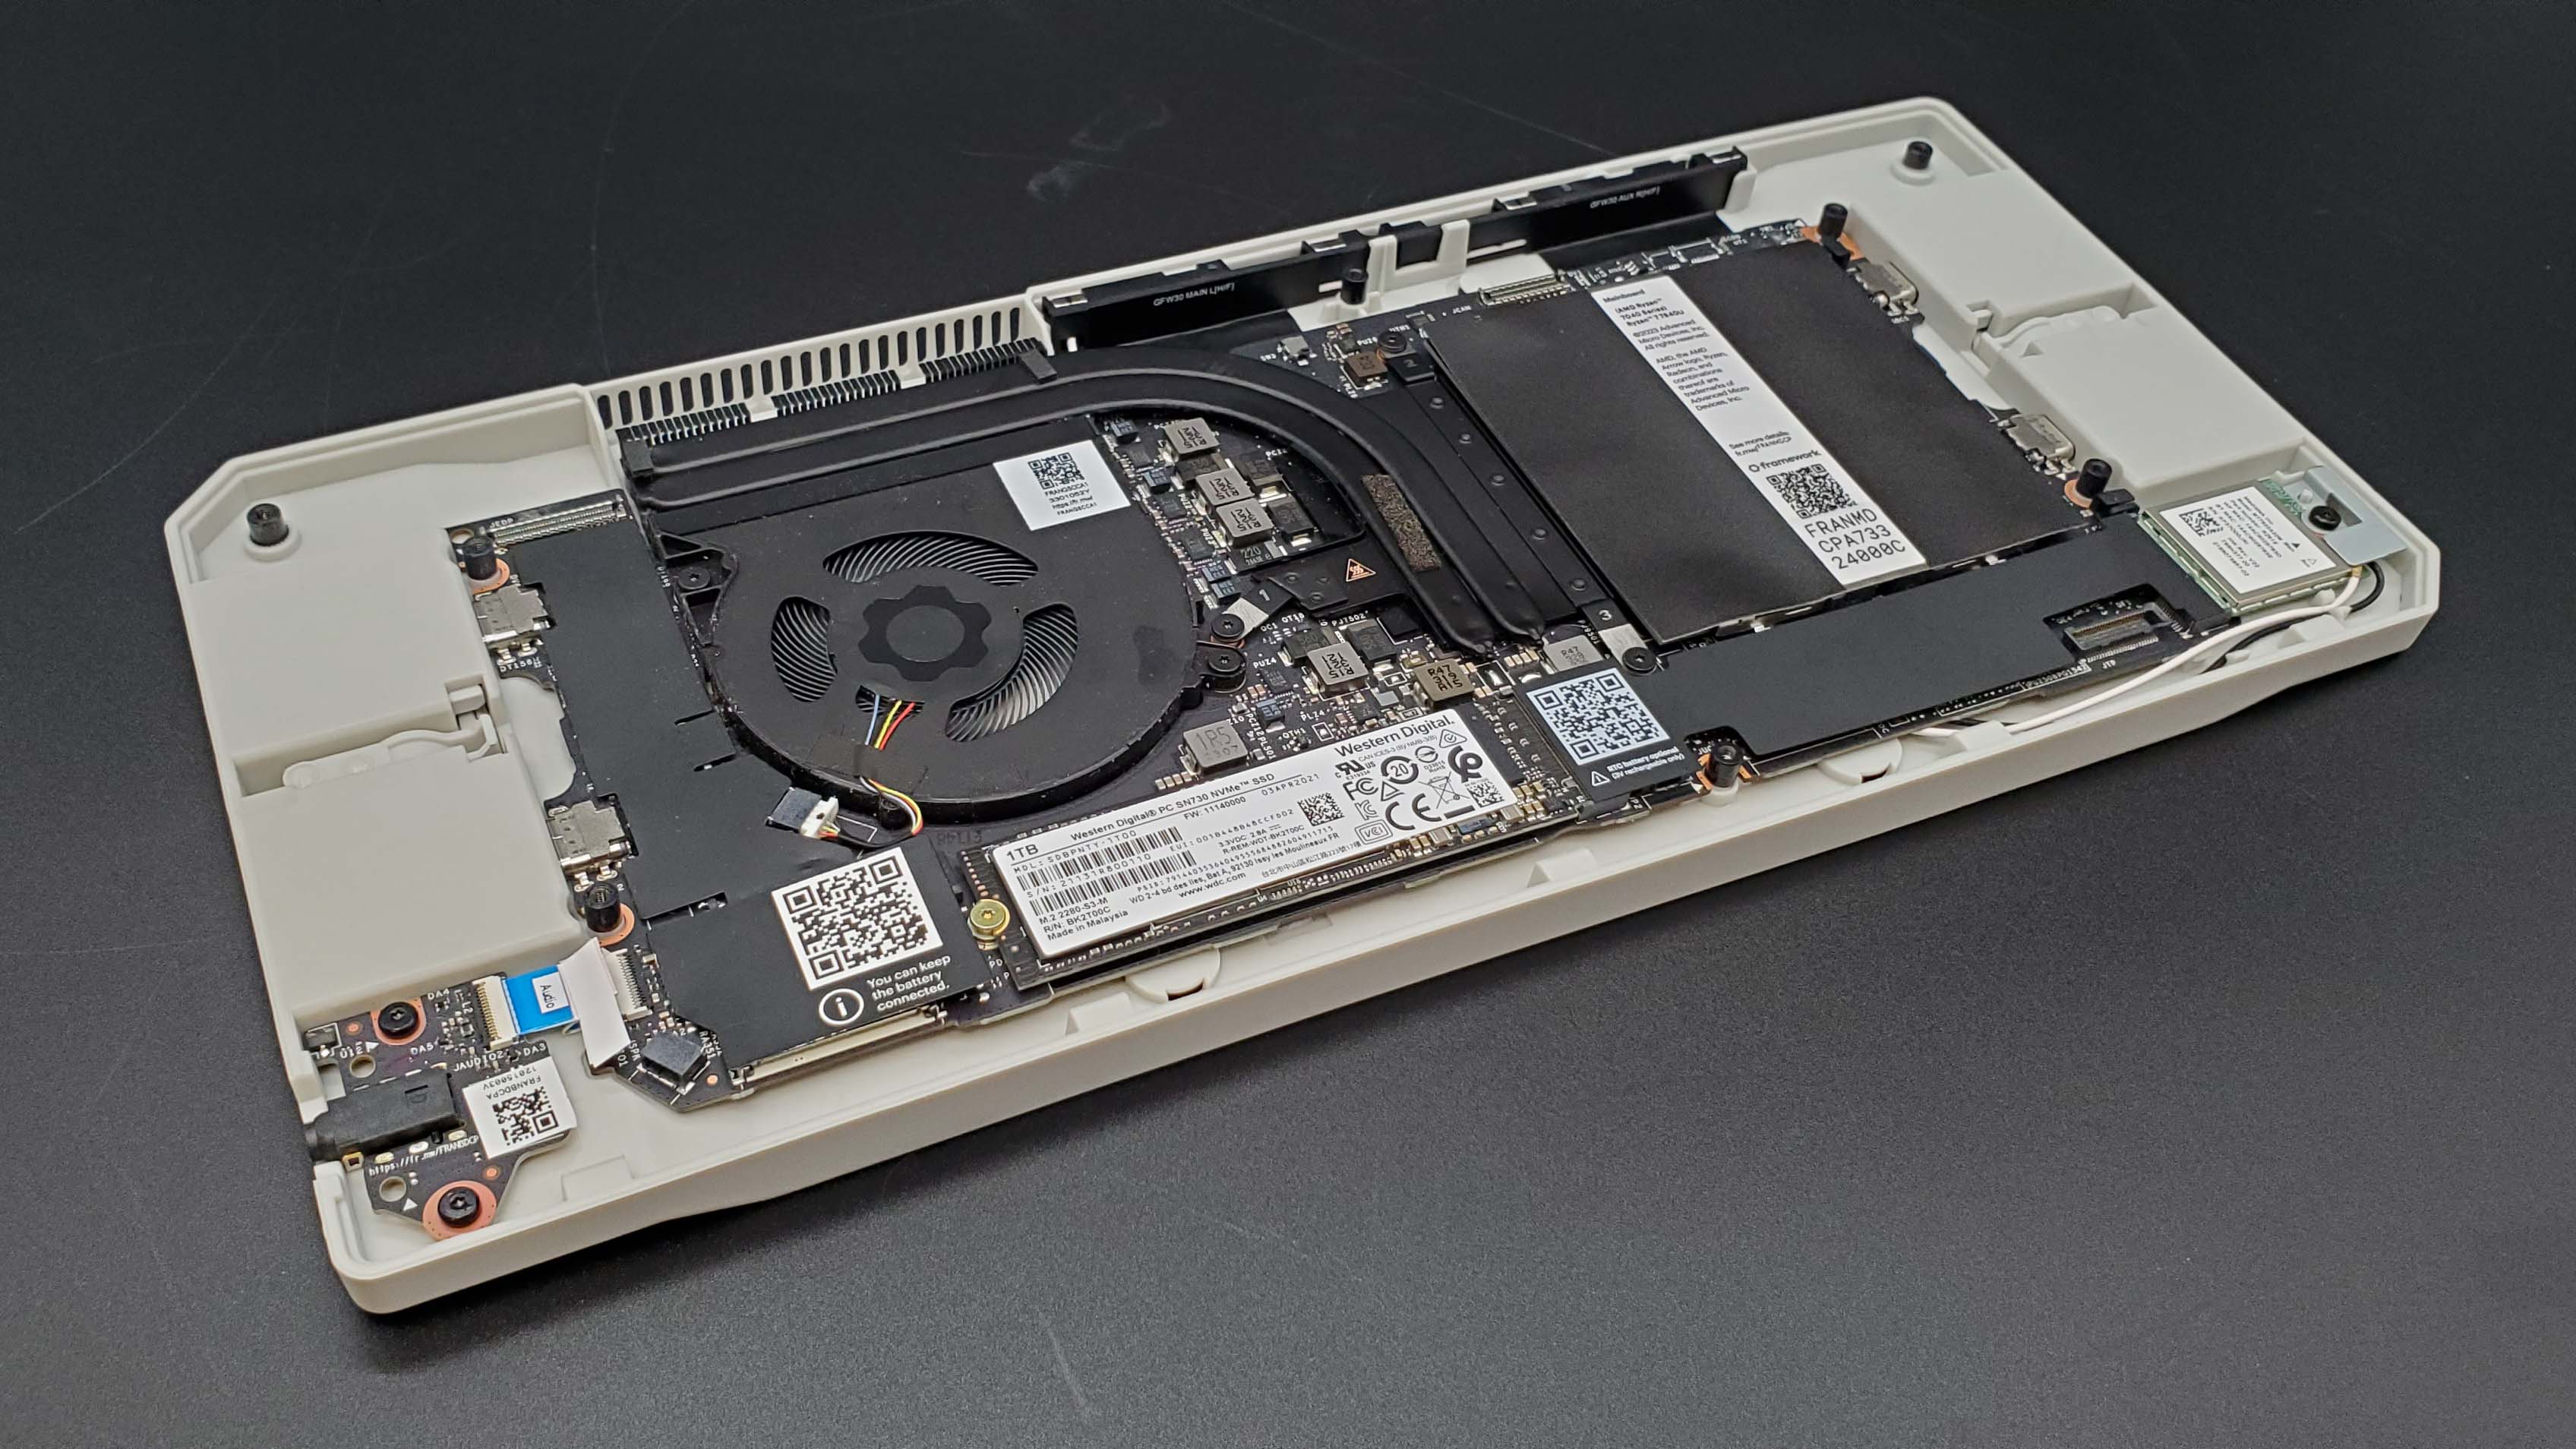
The best thing is that it's been surprisingly easy to get things working. Okay, it's third time lucky in terms of the products that I've tried to install SteamOS on, but it's been a no-fuss experience for the most part getting it running on the Framework mainboard. The installation went smoothly, it discovered all the necessary drivers, and Decky Loader and the TDP control are but a download and a command line away respectively.
I've been a little resistant to all the recent clamour of SteamOS now being available for everything—it most certainly is not—but if you can find a device that it does work on, it works brilliantly.
Certainly the Radeon 780M iGPU inside my wee slab of a PC isn't going to set any speed records natively, but it's more than capable of delivering good 1080p gaming performance, and when you're running permanently cabled into the mains there's no excuse not to run it at its 40 W maximum.
In all, my new Steam Machine is responsive, accessible, and surprisingly stable for a beta OS. Oh yeah, I'm running the latest beta version of the operating system, partly because I'm a glutton for punishment, but also because it now brings in keyboard shortcuts for the two SteamIOS side menus. That's certainly useful in both laptop and desktop modes, and 12 years later I'm on the way to becoming more of a convert to Gabe's thinking.
As long as everything with the final standalone release is so easy… and why wouldn't it be?
How to install SteamOS on other devices
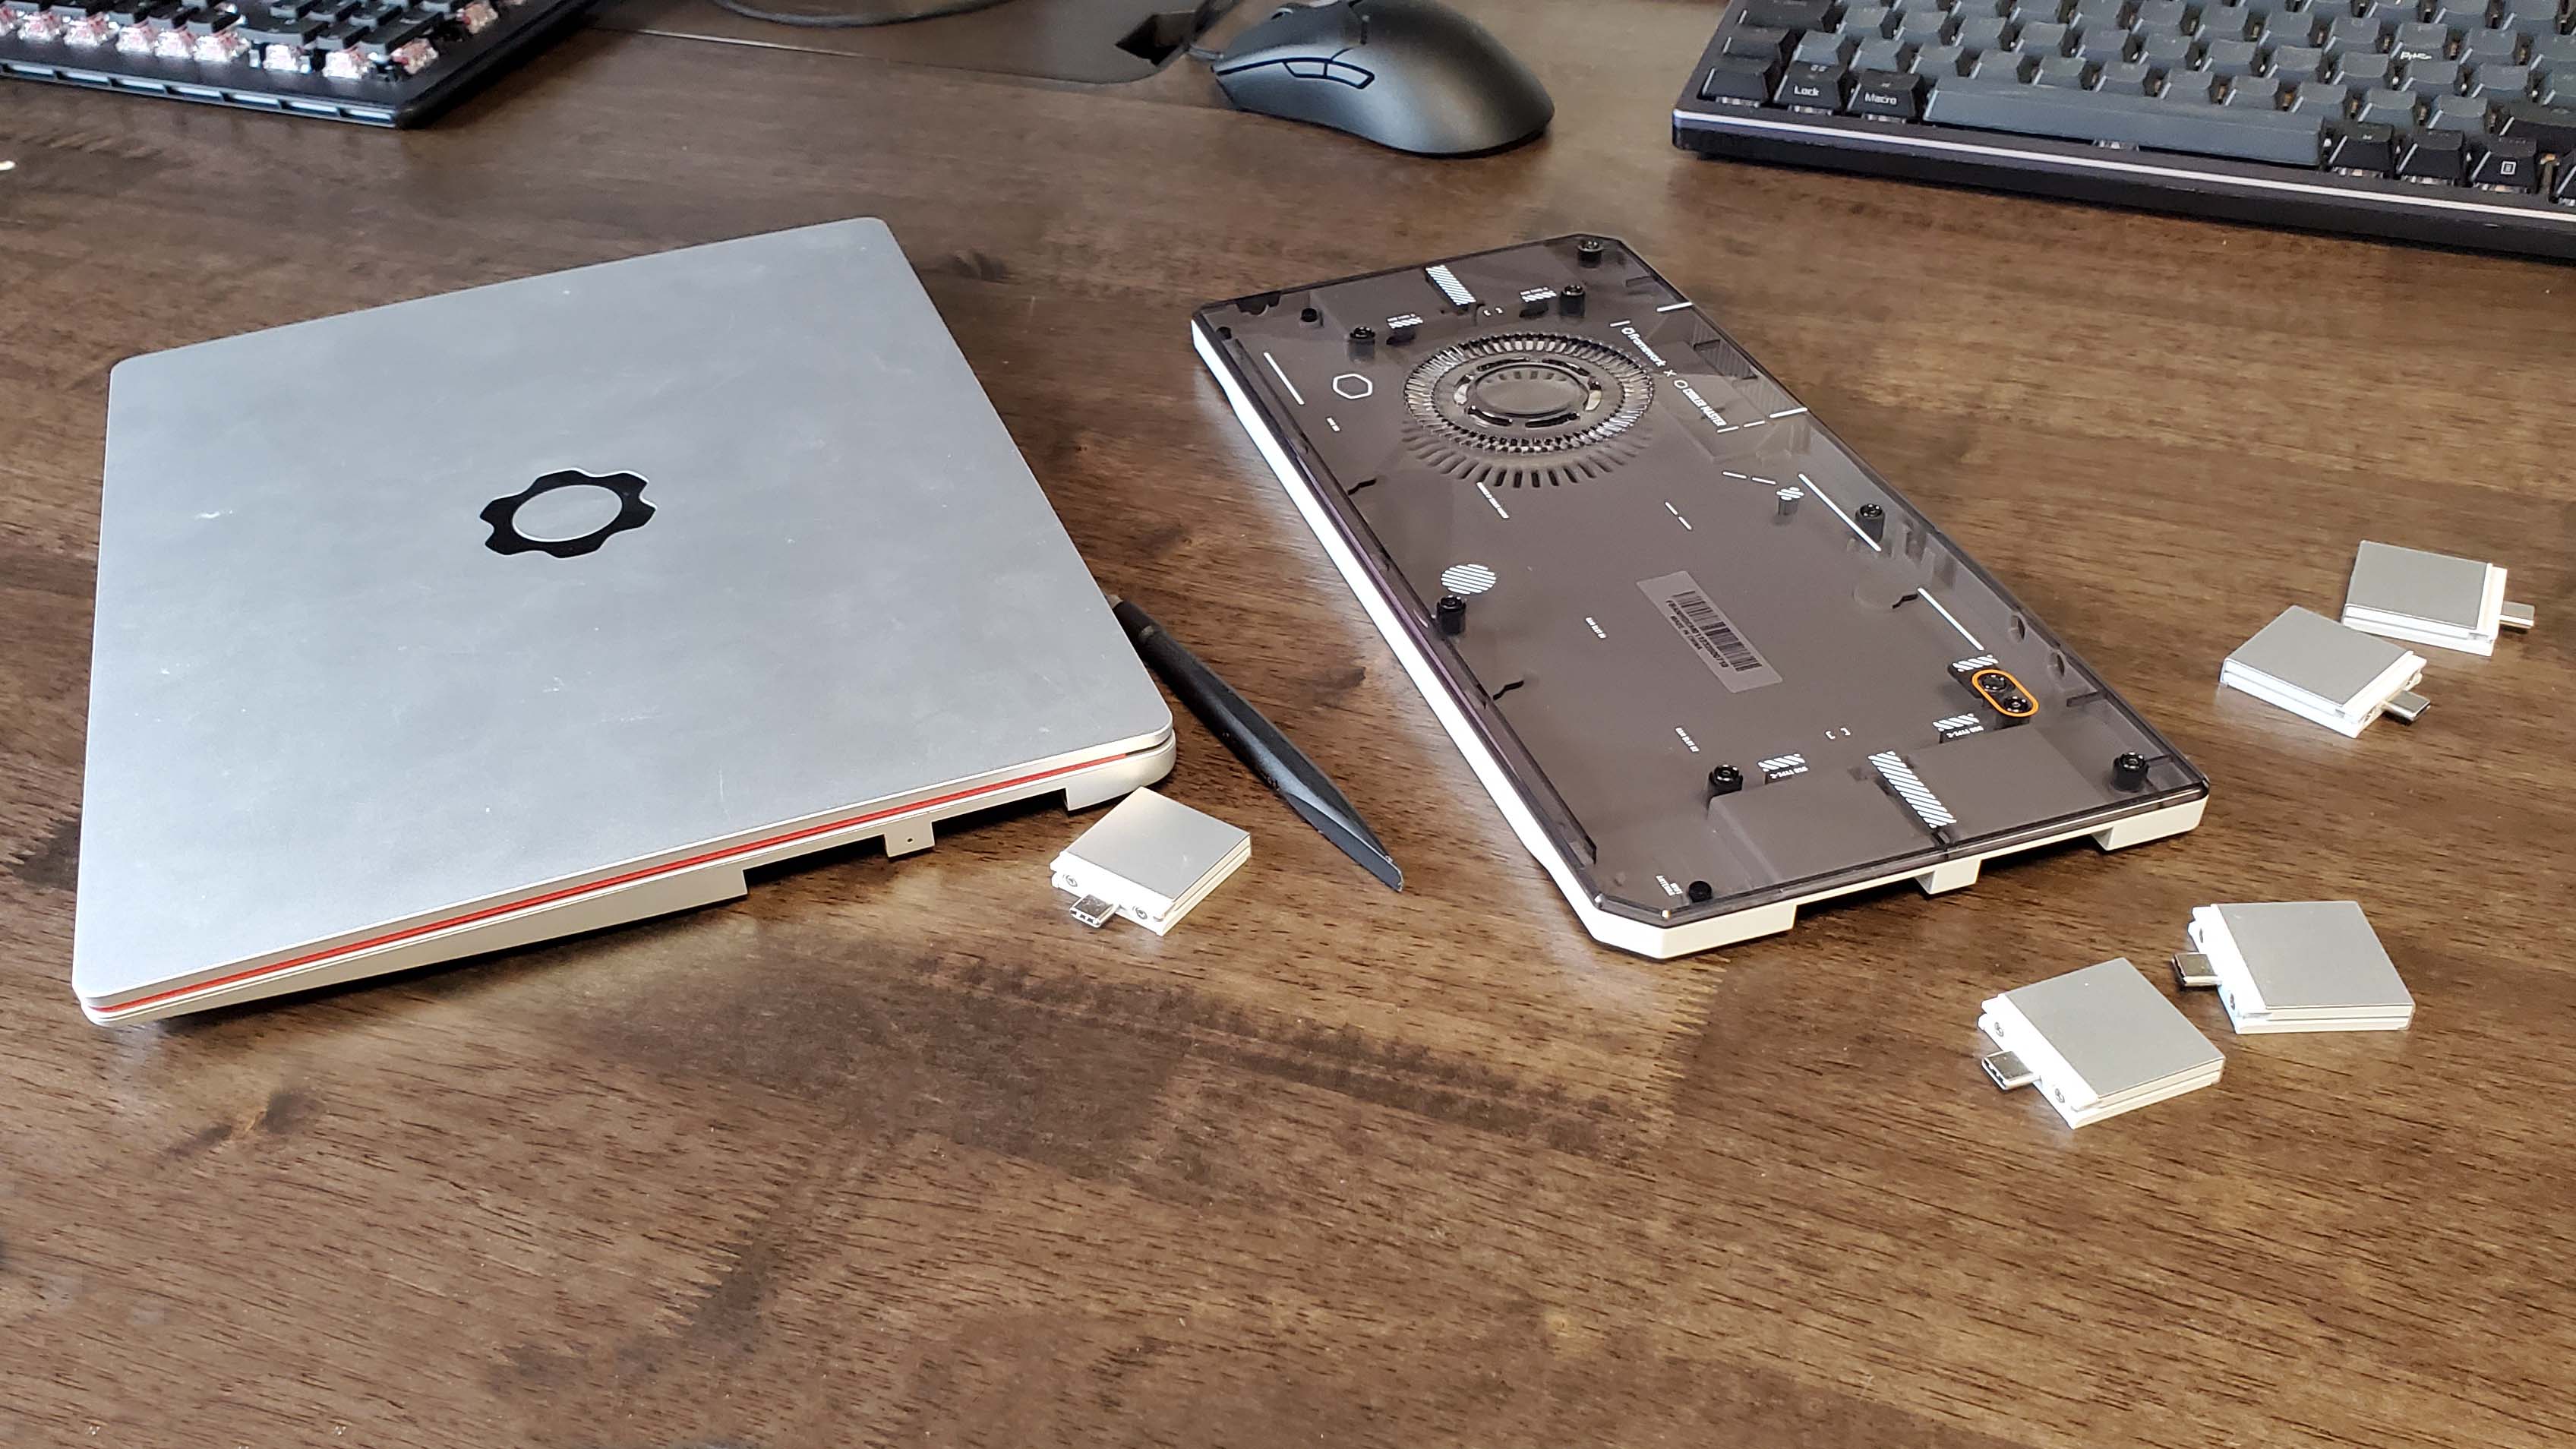
The process I've gone through to get my li'l Steam Machine up and running is really straightforward, and also something you could easily replicate yourself. It wouldn't necessarily have to be with a Framework board and case, either, as there's a good chance a lot of AMD-based mini PCs will take the install, too.
The first step is to download the Steam Deck recovery file, this is the data that is used to reset the Steam Deck, but this page is also where Valve details the methods used to get SteamOS onto other devices. Though obviously washes its hands over responsibility for smooth operation on anything other than the Deck, Legion Go S, and ROG Ally.
The next thing you'll need to do is unzip the file you just downloaded. You can mount it on a boot drive as is, but I've had better success from unpacking it first.
Now, get yourself a USB drive you don't mind wiping—preferrably 8 GB+ as there's a lot of SteamOS—and then format it as FAT32.
And to mount the OS on there, you'll need Rufus. Download the program and boot it up, and then you can point it at your USB drive and the SteamOS repair file. Click Start to get the ball rolling and a handful of minutes later Rufus will have created you a bootable SteamOS installation drive.
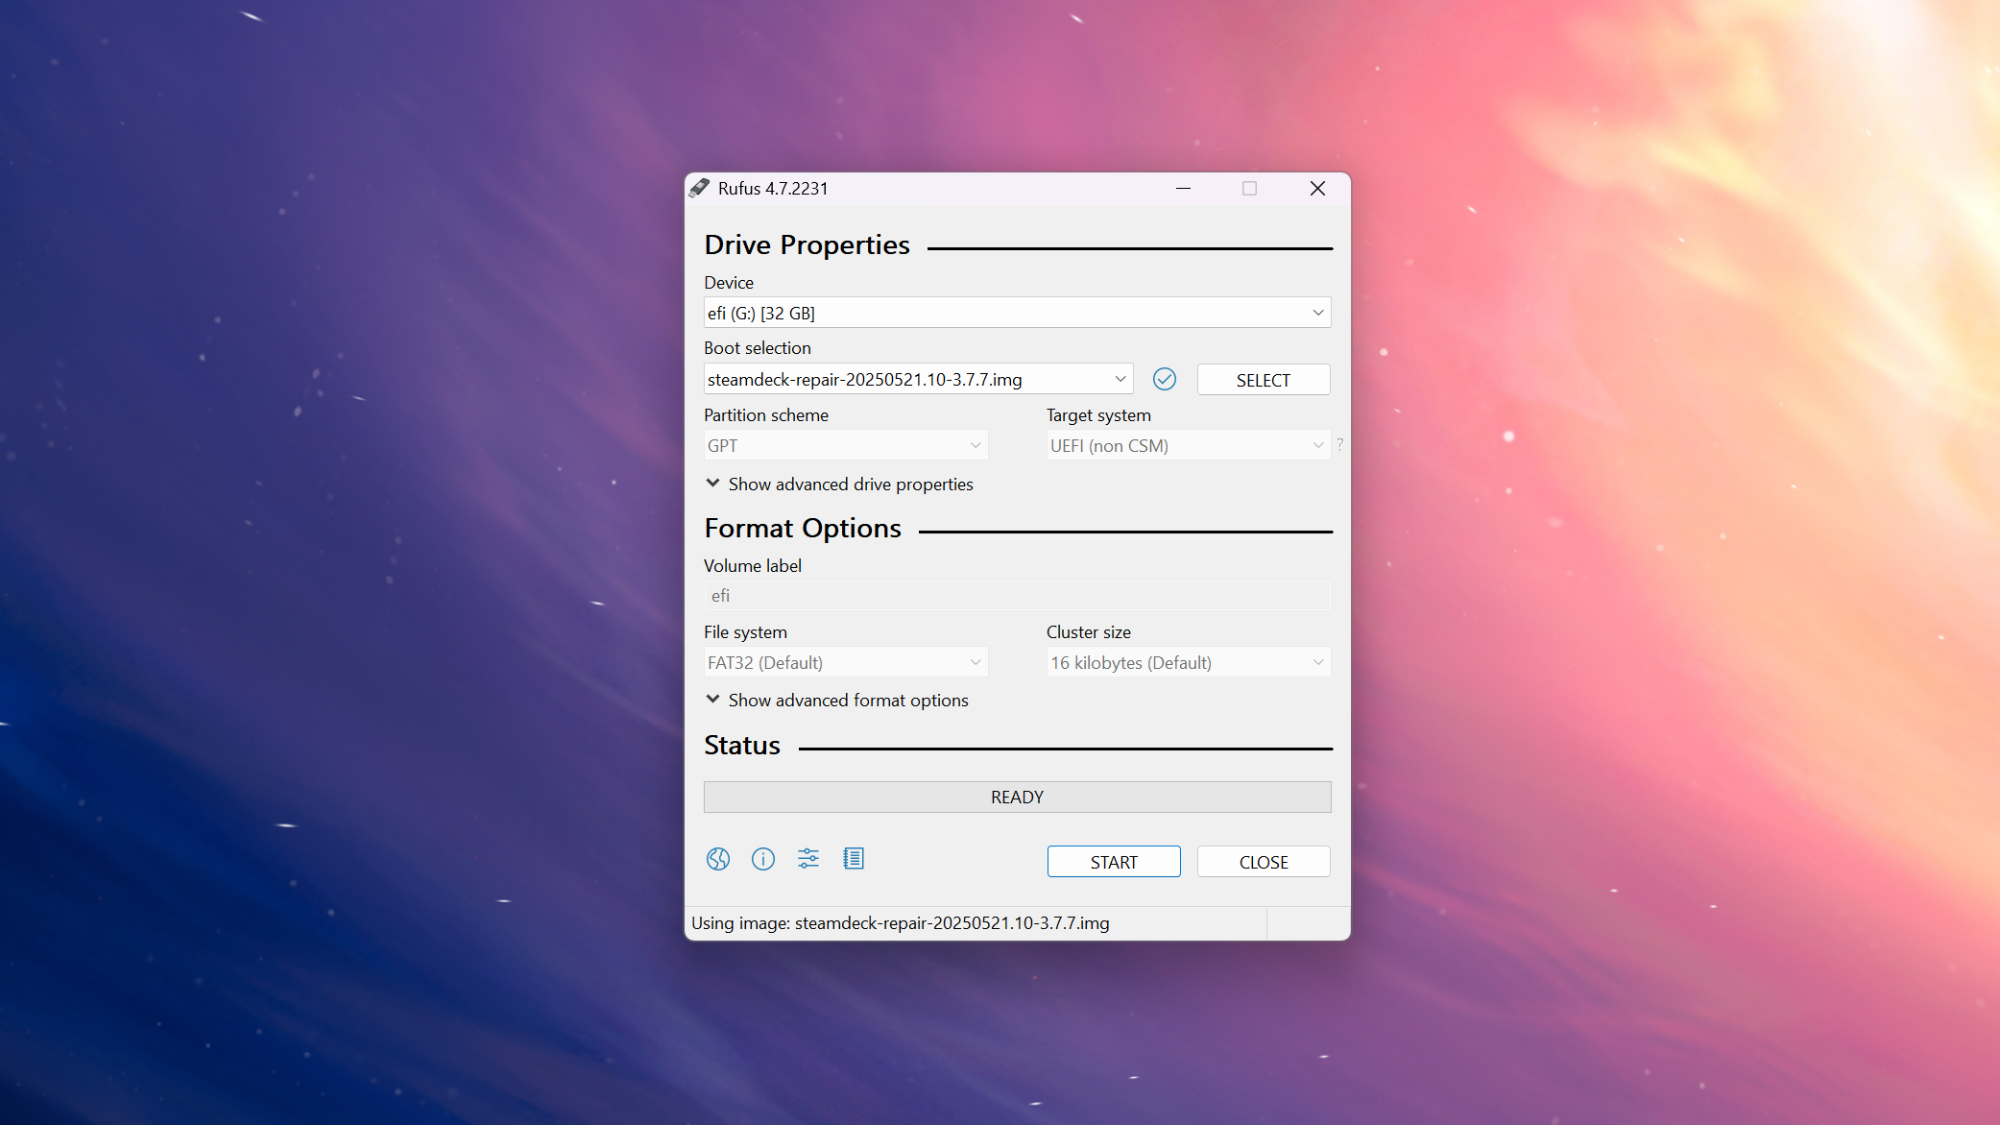
You will need to disable Secure Boot in the BIOS, too. This is a vital step.
Now, you will need to prep whatever device you're hoping to install to. The first thing I would suggest is that you find the most recent BIOS you can and make sure it's installed on your target device. For some handheld devices that might be the difference between functional sleep modes or not, because Modern Standby or the lack thereof is what's holding back my Ayaneo device right now, and that's only enabled via a firmware update.
You will also need to disable Secure Boot in the BIOS, too. This is a vital step in ensuring your device even gets close to installing the Valve OS.
And for me, I needed to enable Standalone mode in the Framework BIOS. There is a chassis intrusion sensor that we need to tell the mainboard to ignore if it's getting stuck inside anything else—like a wee case, or a power desk for example—and you can't access it once the board is outside of the Framework 13 laptop chassis.
For this project I actually ran the installation while the Framework board was still configured inside a laptop—I wasn't 100% confident the setup would be fine, and figured it would be a quicker operation with a pre-attached screen, keyboard, and touchpad.
But the process is essentially the same for any other device: stick the USB drive in a spare port on your machine, boot into the BIOS, and select your USB stick (partition 1) as the boot drive. From there on you'll hopefully get a screed of text cascading down the screen before you boot into a live OS to create your install.
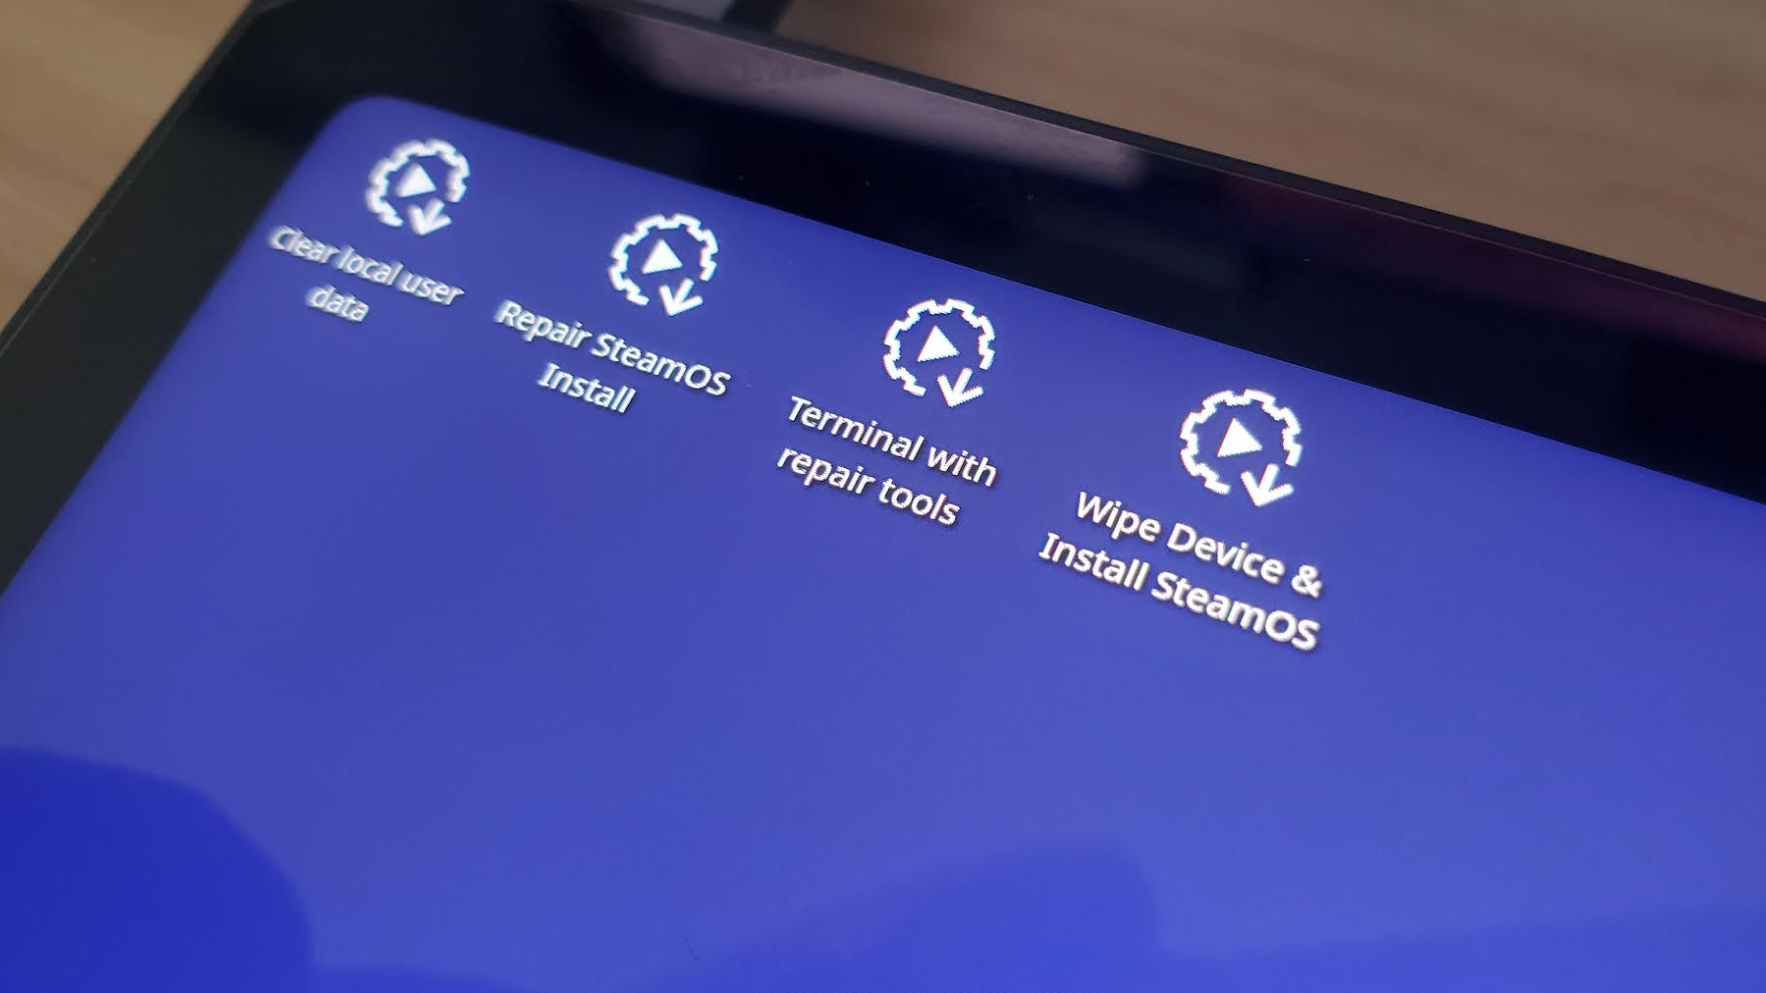
This is essentially the desktop SteamOS environment and there will be a selection of shortcuts at the top of the screen and you want to double-click the one marked Wipe Device and Install SteamOS. Obviously.
You'll need to confirm that you want to raze everything on your machine to the ground, and click Proceed. Then it will go through the process of installing the operating system for you and then it will reboot.
If you are lucky, and your system is content with the current state of SteamOS, then you will find yourself booting into a fresh new operating system.
The first thing to do here is to make sure you are running the latest version of the OS. Nip into the Settings menu, select System and check for software updates. Personally, at this point, I would look at the System Update Channel section and select Beta rather than Stable. Chances are you'll benefit more from quicker updates.
From here, the one thing I would make sure of is to have Decky Loader and SimpleDeckyTDP installed so you can control the power draw of your system. This is especially important if you're running something off a battery, but it also helps you control noise to a certain extent.
You'll need to jump into the desktop mode of SteamOS to do this, though. So bring up the Settings menu again, go into Power and Switch to Desktop. It will then boot into a relatively familiar Windows-style desktop environment.
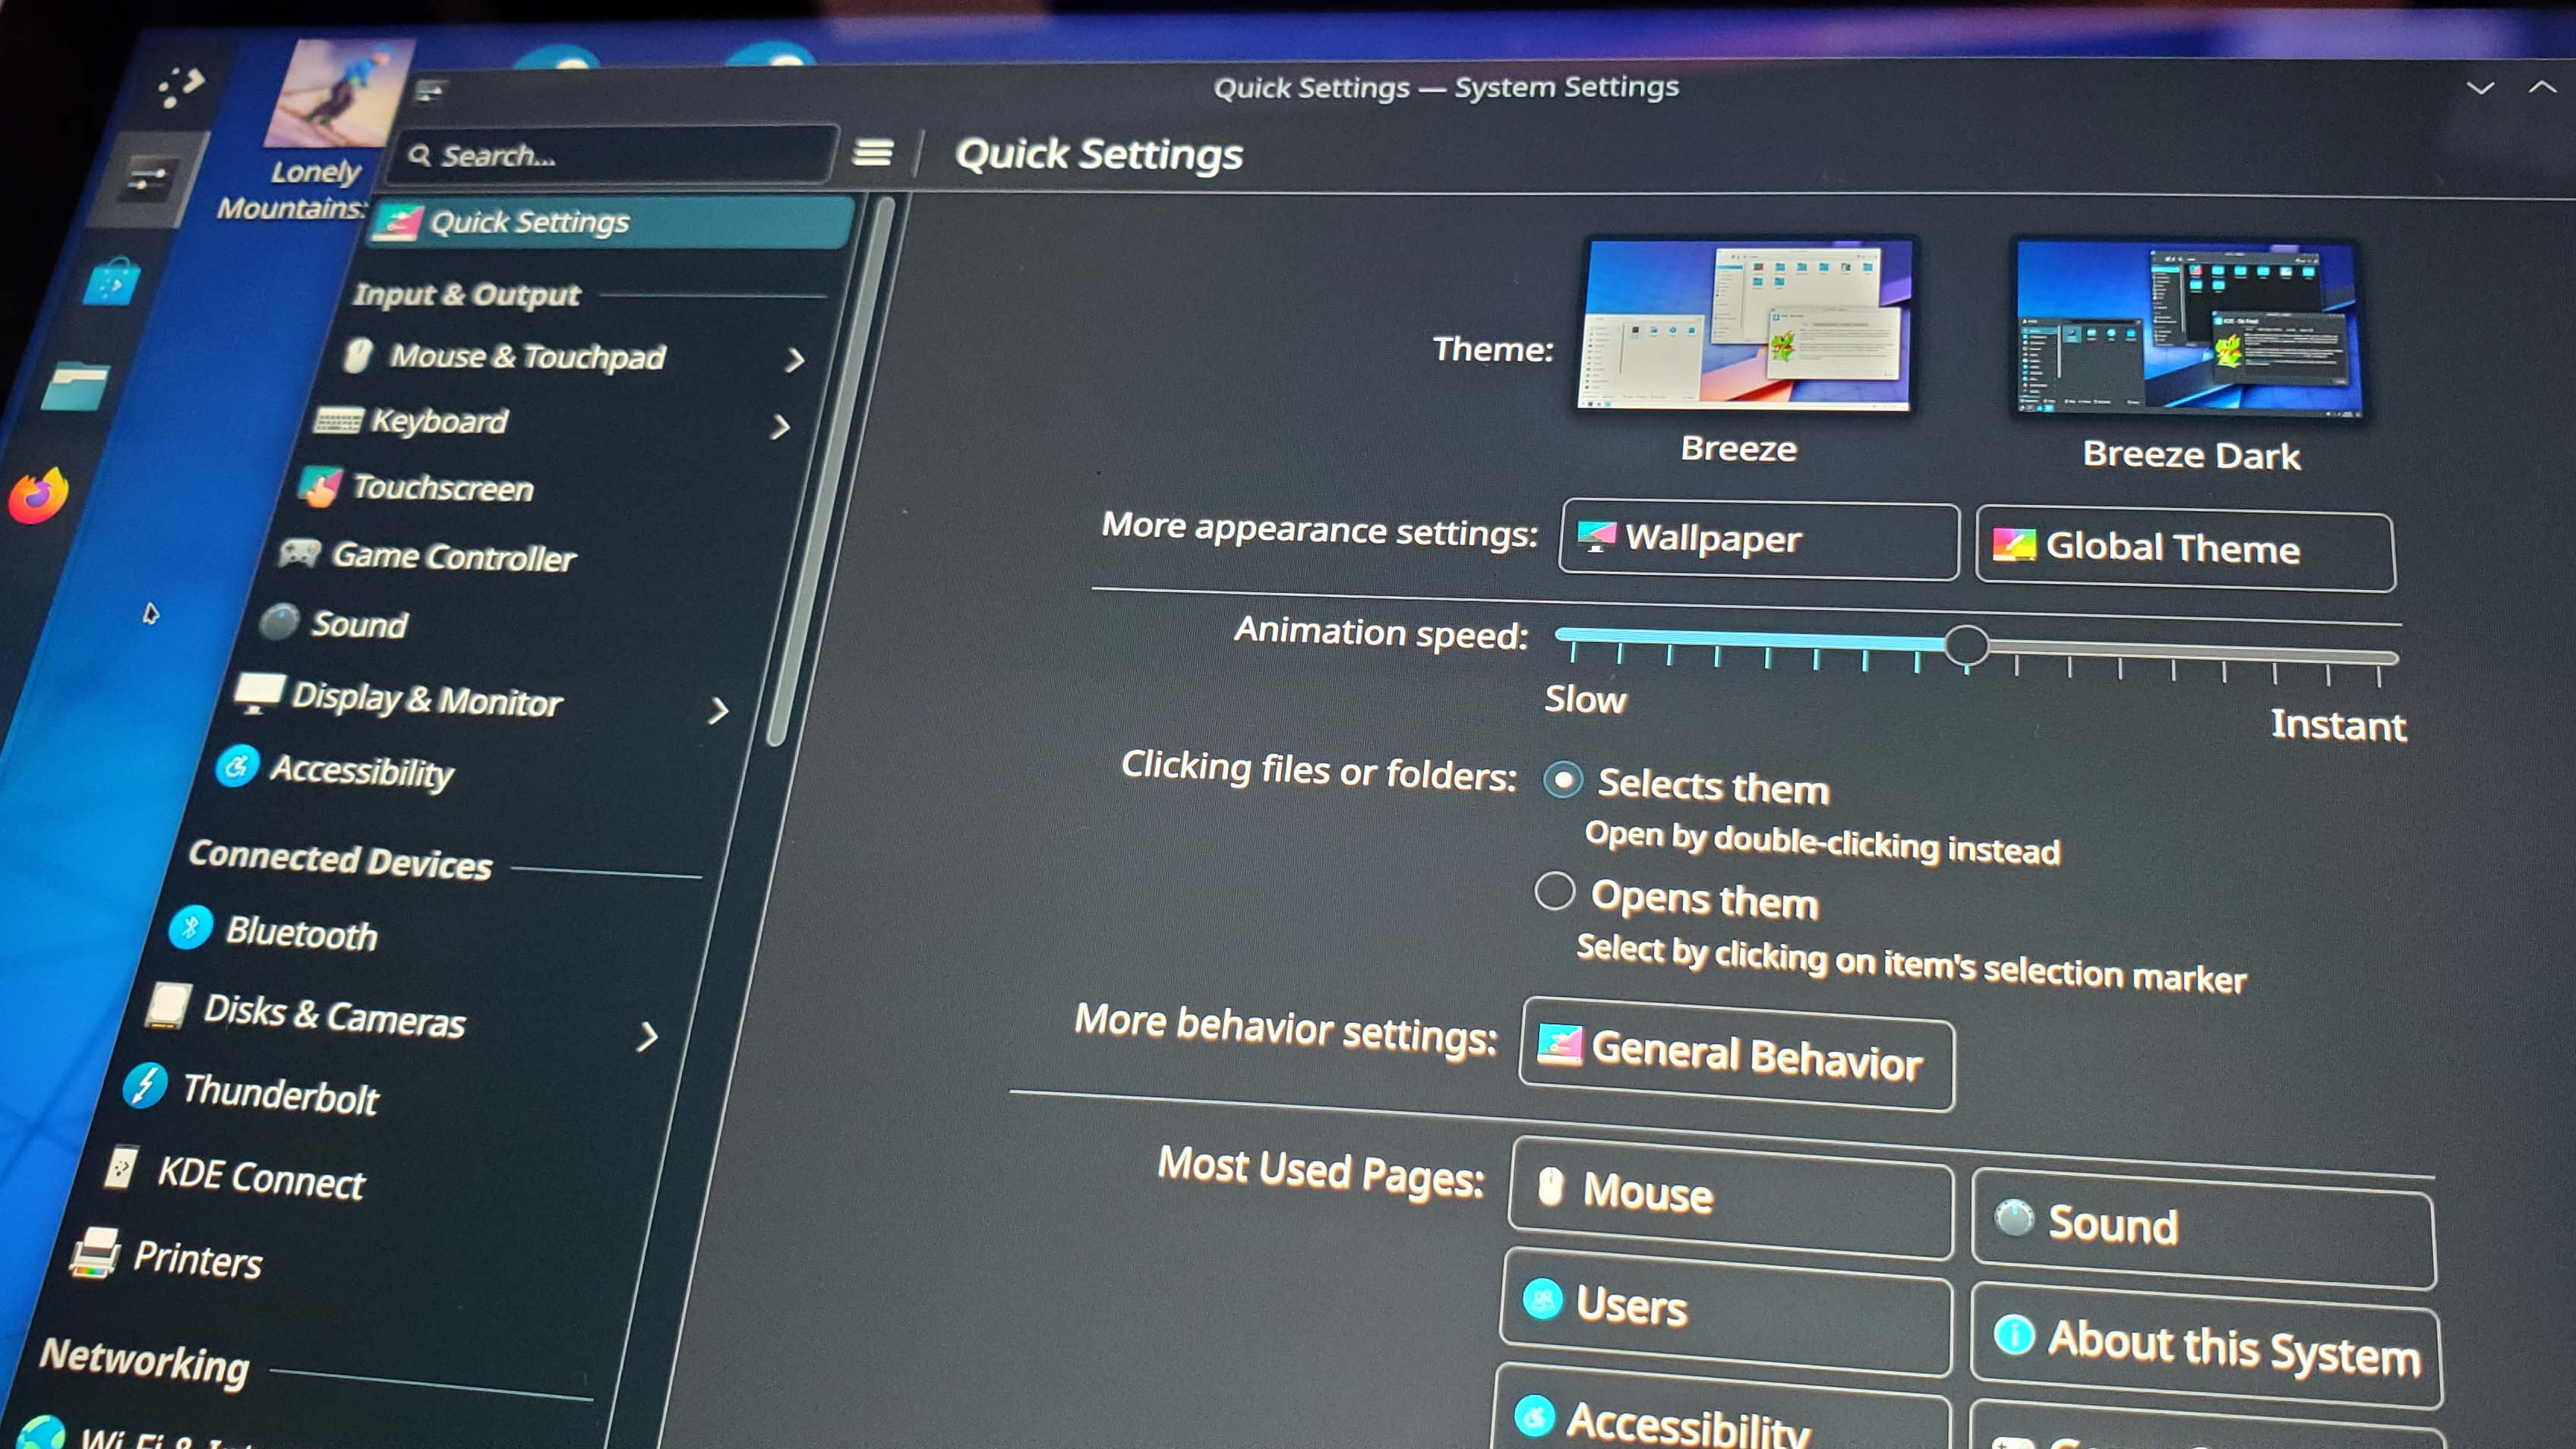
You may need to install FireFox so you have a functioning browser, but that will be accessible from the Applications button on the taskbar. Then navigate to the Decky Loader main page and hit download. Then bring up the file manager to access your downloads and double-click the file and select Execute to run it.
Getting the power control feature installed is a bit more Linux-y in that you'll need to hit the Konsole. But first you'll likely need a password so you can get things done in there. Hit the System Settings button, scroll down to Users and hit the Change Password button. You won't have one already, so just put in one now, and select not to change the password for other areas.
Now, navigate to the SimpleDeckyTDP github page and go to the install section. From here, boot the Konsole app and copy the install commands from the browser into the command line in Konsole. Hit enter, and it will start installing.
Once that's complete, reboot your machine into Game mode and you'll find Decky Loader and SimpleDeckyTDP at the foot of the secondary control menu. That's either Shift+CTRL+Tab on a keyboard or Xbox button+A on a controller.
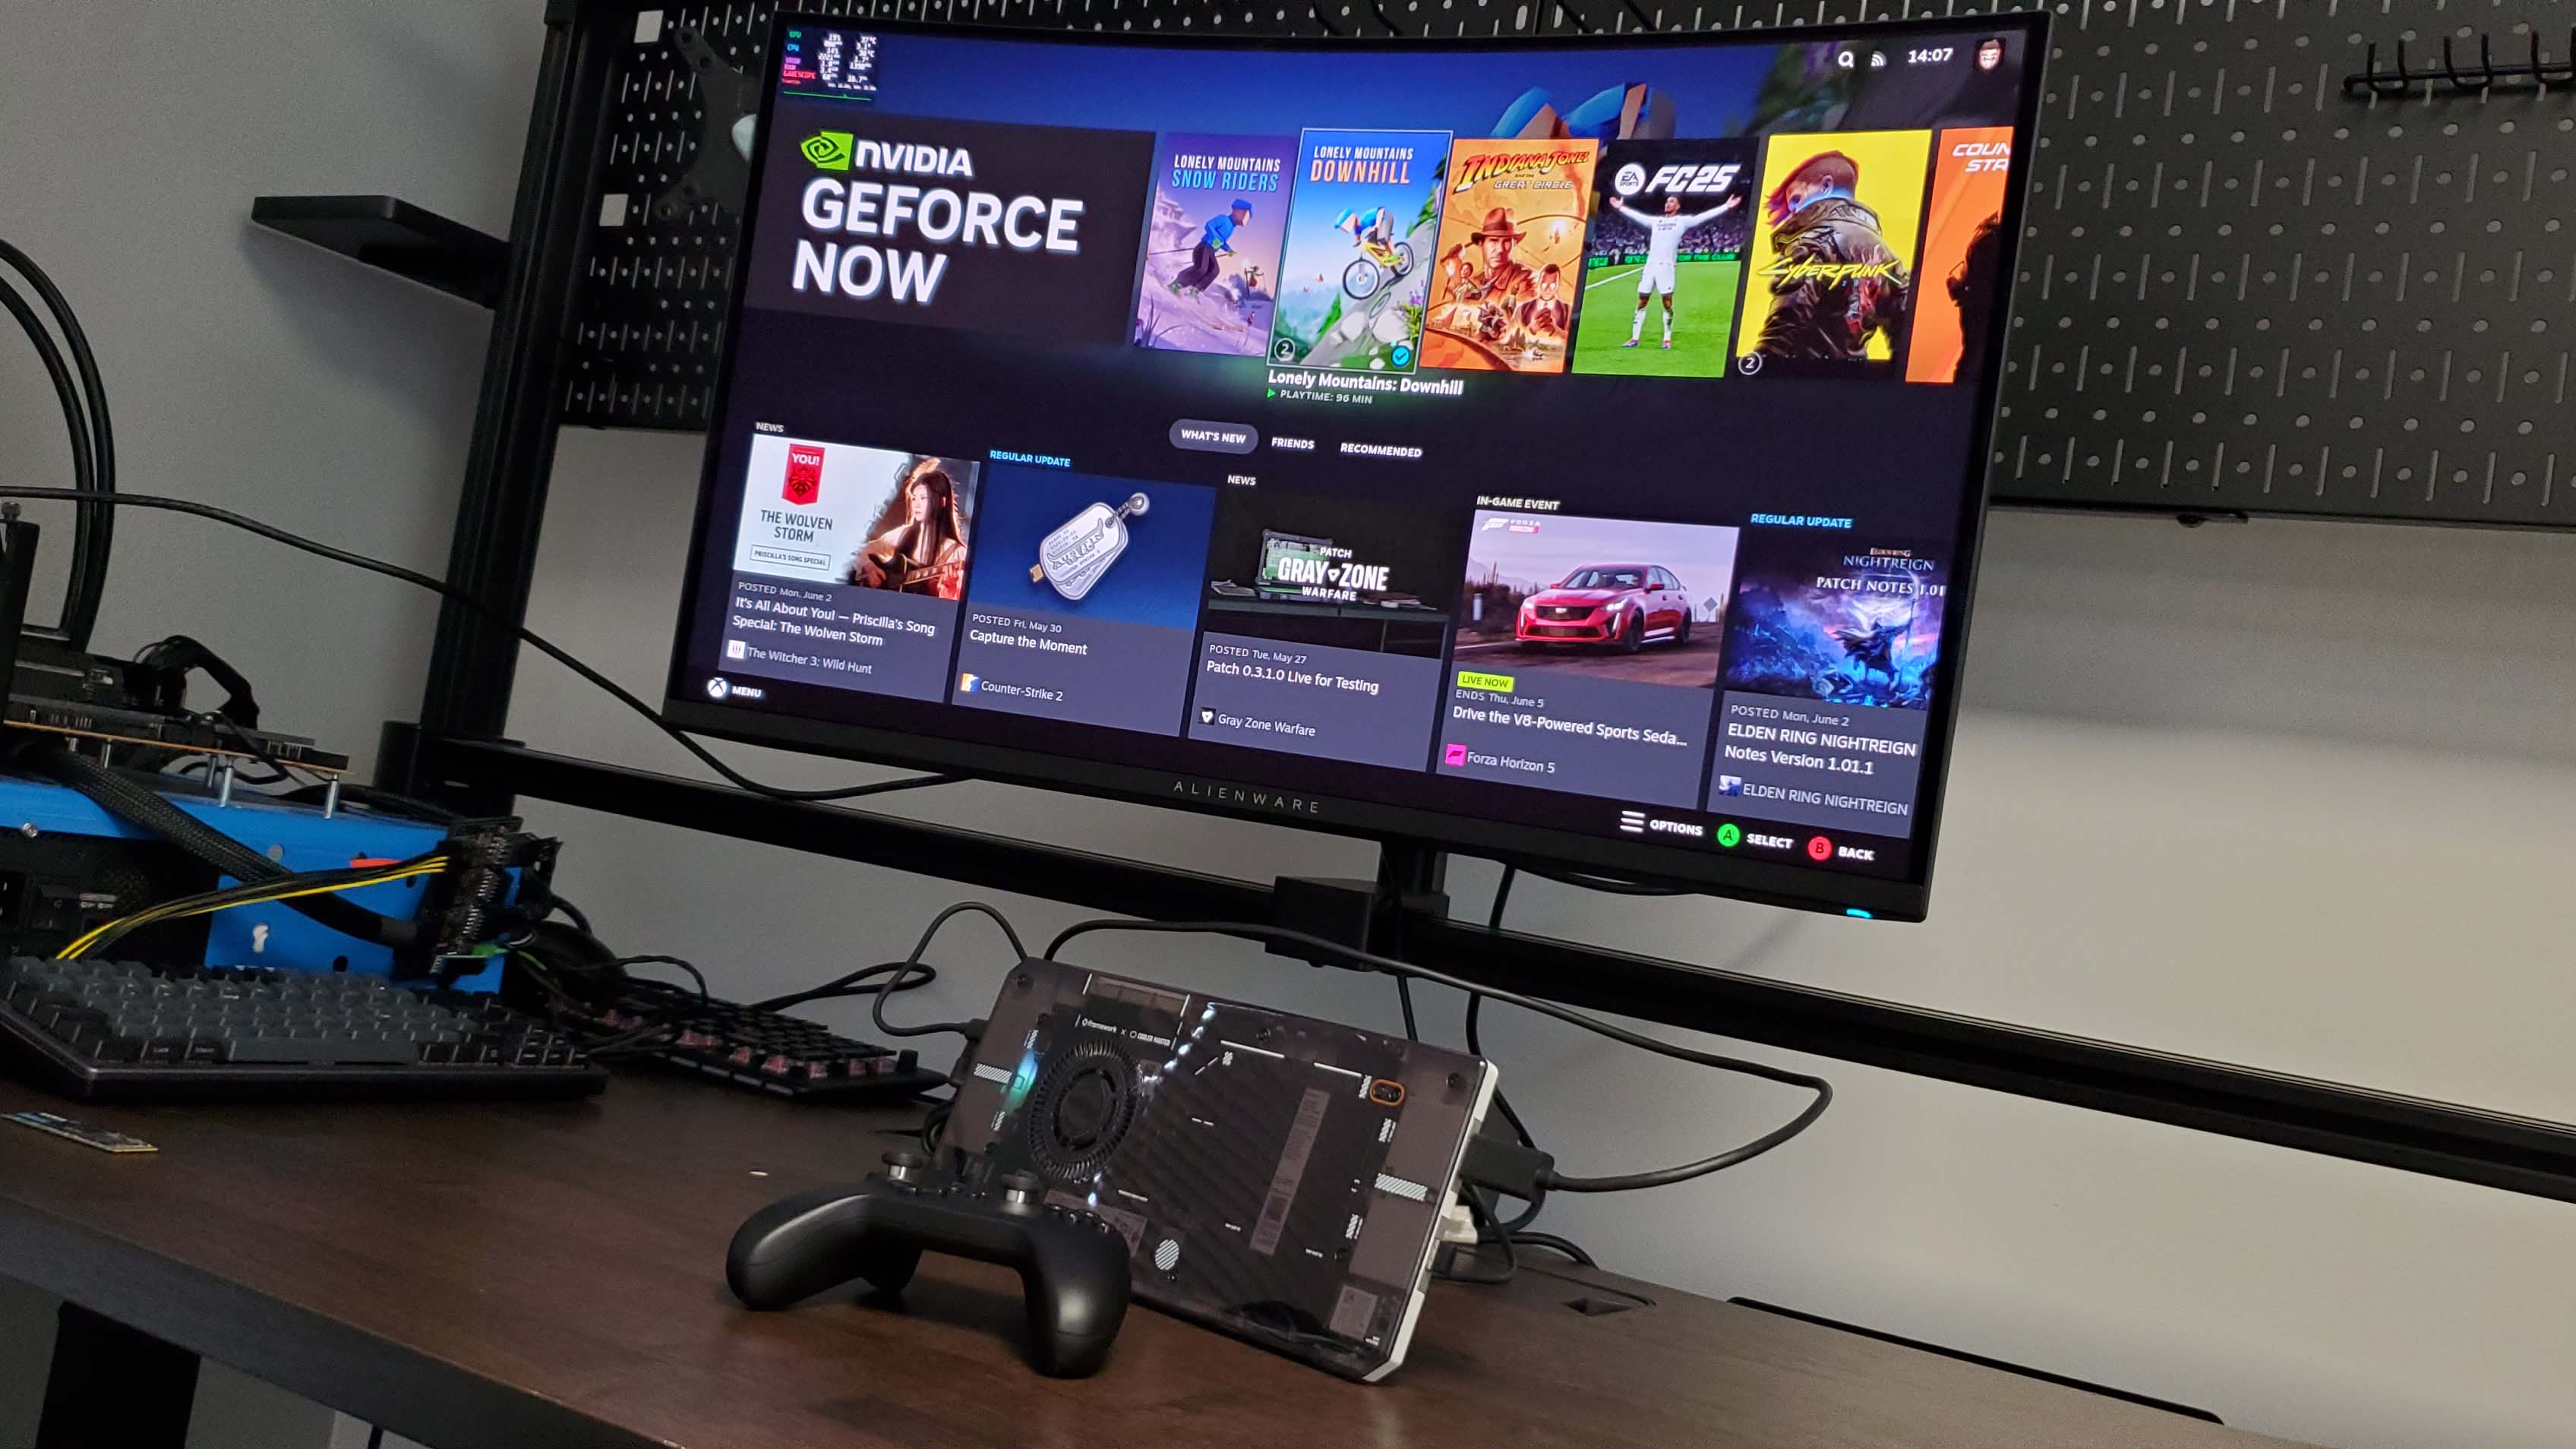
From there, you're weapons-free to install and play games at will on your new machine. Have at it. For me, well once that was done I had to get the mainboard out of the laptop and installed into the little Cooler Master chassis.
Thankfully Framework makes that super easy, and there's a full guide on how to do it on its site. It was essentially just a question of installing the Wi-Fi cable routing, dropping in the PCB and hooking that and the 3.5 mm audio jack up to the board.
It's finally worth noting for anyone doing this that the HDMI display output needed to be on one of the top two I/O modules for it to output to our 4K Alienware OLED properly, and the same is true of the USB Type-C module, too.

Dave has been gaming since the days of Zaxxon and Lady Bug on the Colecovision, and code books for the Commodore Vic 20 (Death Race 2000!). He built his first gaming PC at the tender age of 16, and finally finished bug-fixing the Cyrix-based system around a year later. When he dropped it out of the window. He first started writing for Official PlayStation Magazine and Xbox World many decades ago, then moved onto PC Format full-time, then PC Gamer, TechRadar, and T3 among others. Now he's back, writing about the nightmarish graphics card market, CPUs with more cores than sense, gaming laptops hotter than the sun, and SSDs more capacious than a Cybertruck.
You must confirm your public display name before commenting
Please logout and then login again, you will then be prompted to enter your display name.
