I built the mullet of gaming PCs with MSI's Project Zero 'Back-Connect' parts
Business up front, party out back.
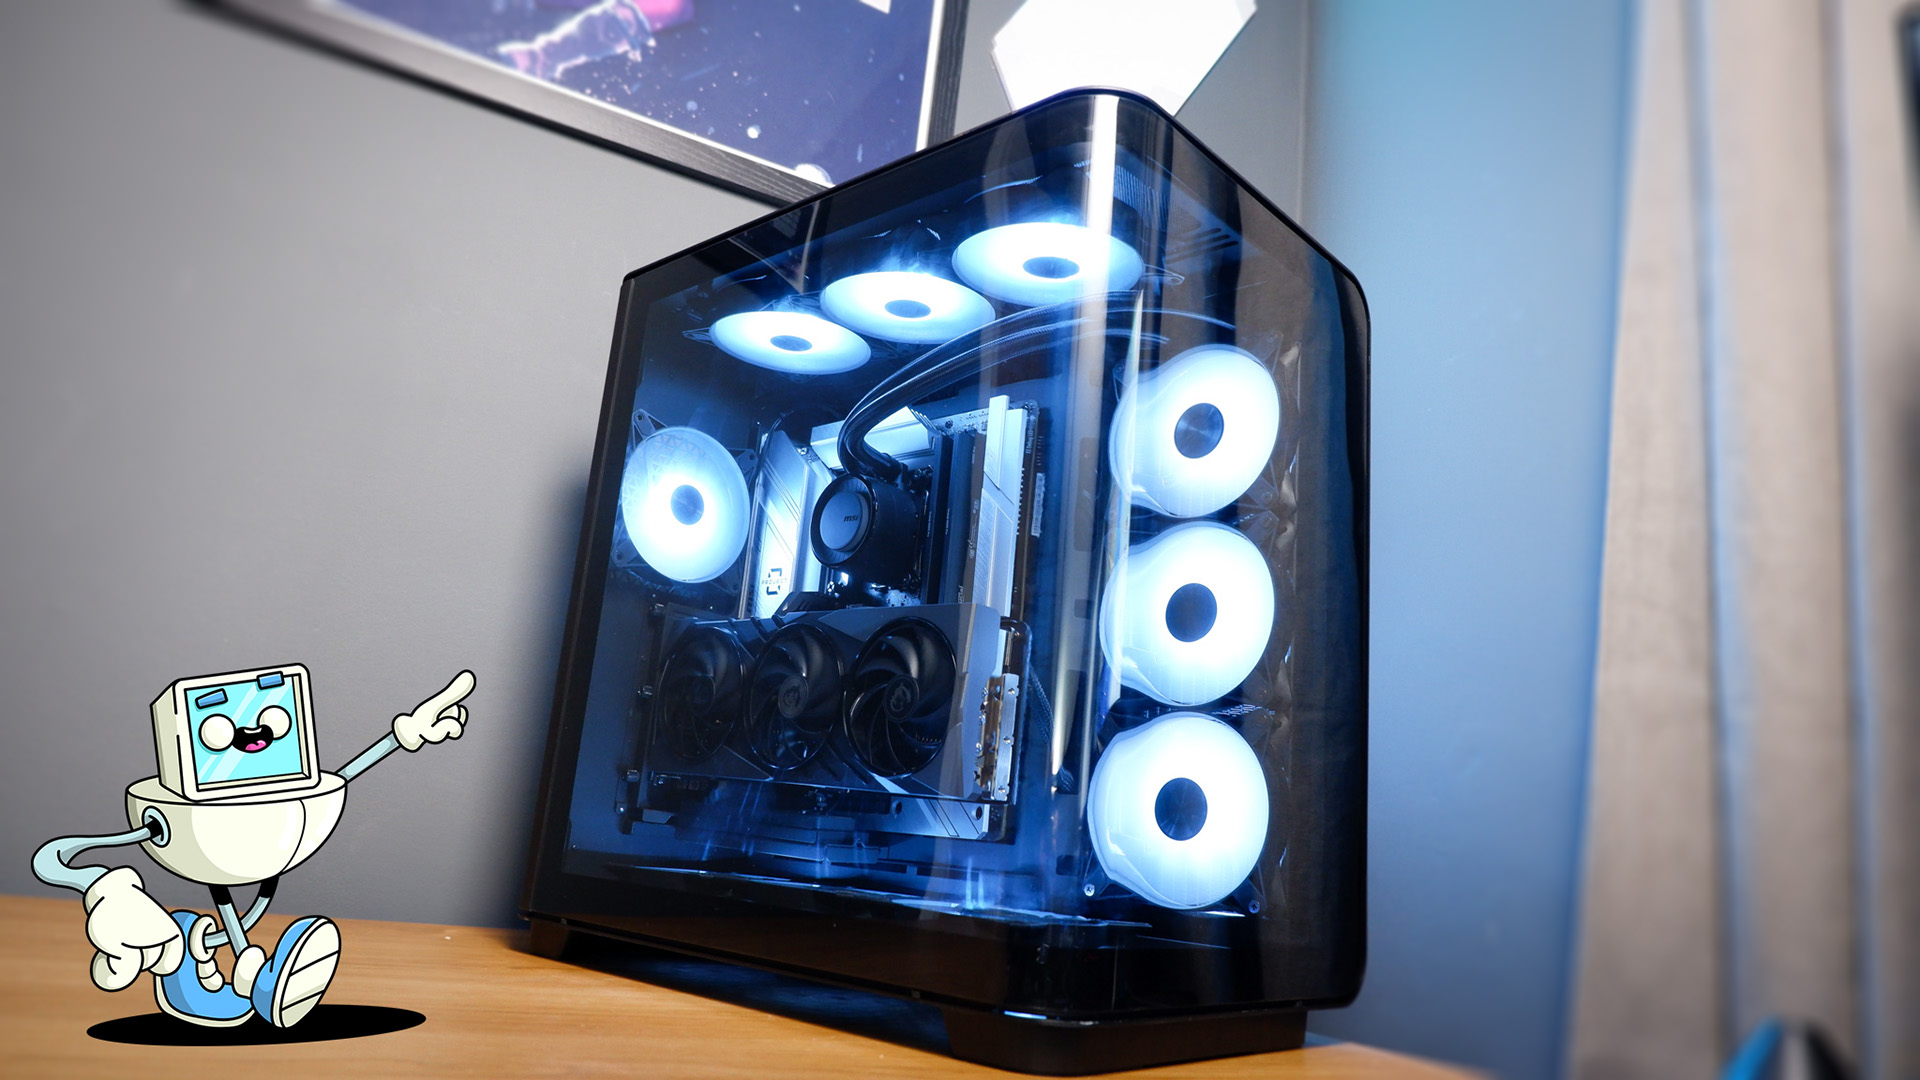
I dream of a cable-free gaming PC—no more tangles, zip-ties, velcro, or fiddly connectors. Alas, a life without cable management is a long way away. In the meantime, we do now have the means to at least hide some of those cables out of sight (and out of mind), and that's exactly what I've gone and done with this gaming PC build.
The motherboard and case used in this build are from MSI's Project Zero line. This uses a system called Back-Connect to shift the cables and connectors usually facing frontways in a motherboard around to the rear. A case has to be compatible with Back-Connect to allow for these cable runs in the rear, though there are quite a few available these days.
You could take a dremel to a motherboard tray and end up with something that's loosely compatible at home, but I've got the fine pairing of MSI's Z790 Project Zero and MEG Maestro 700L PZ to make life easier. The result is a PC that is near-effortlessly clean and tidy when viewed through the windowed side panel… and a colossal mess in the back—much like a mullet.
The parts
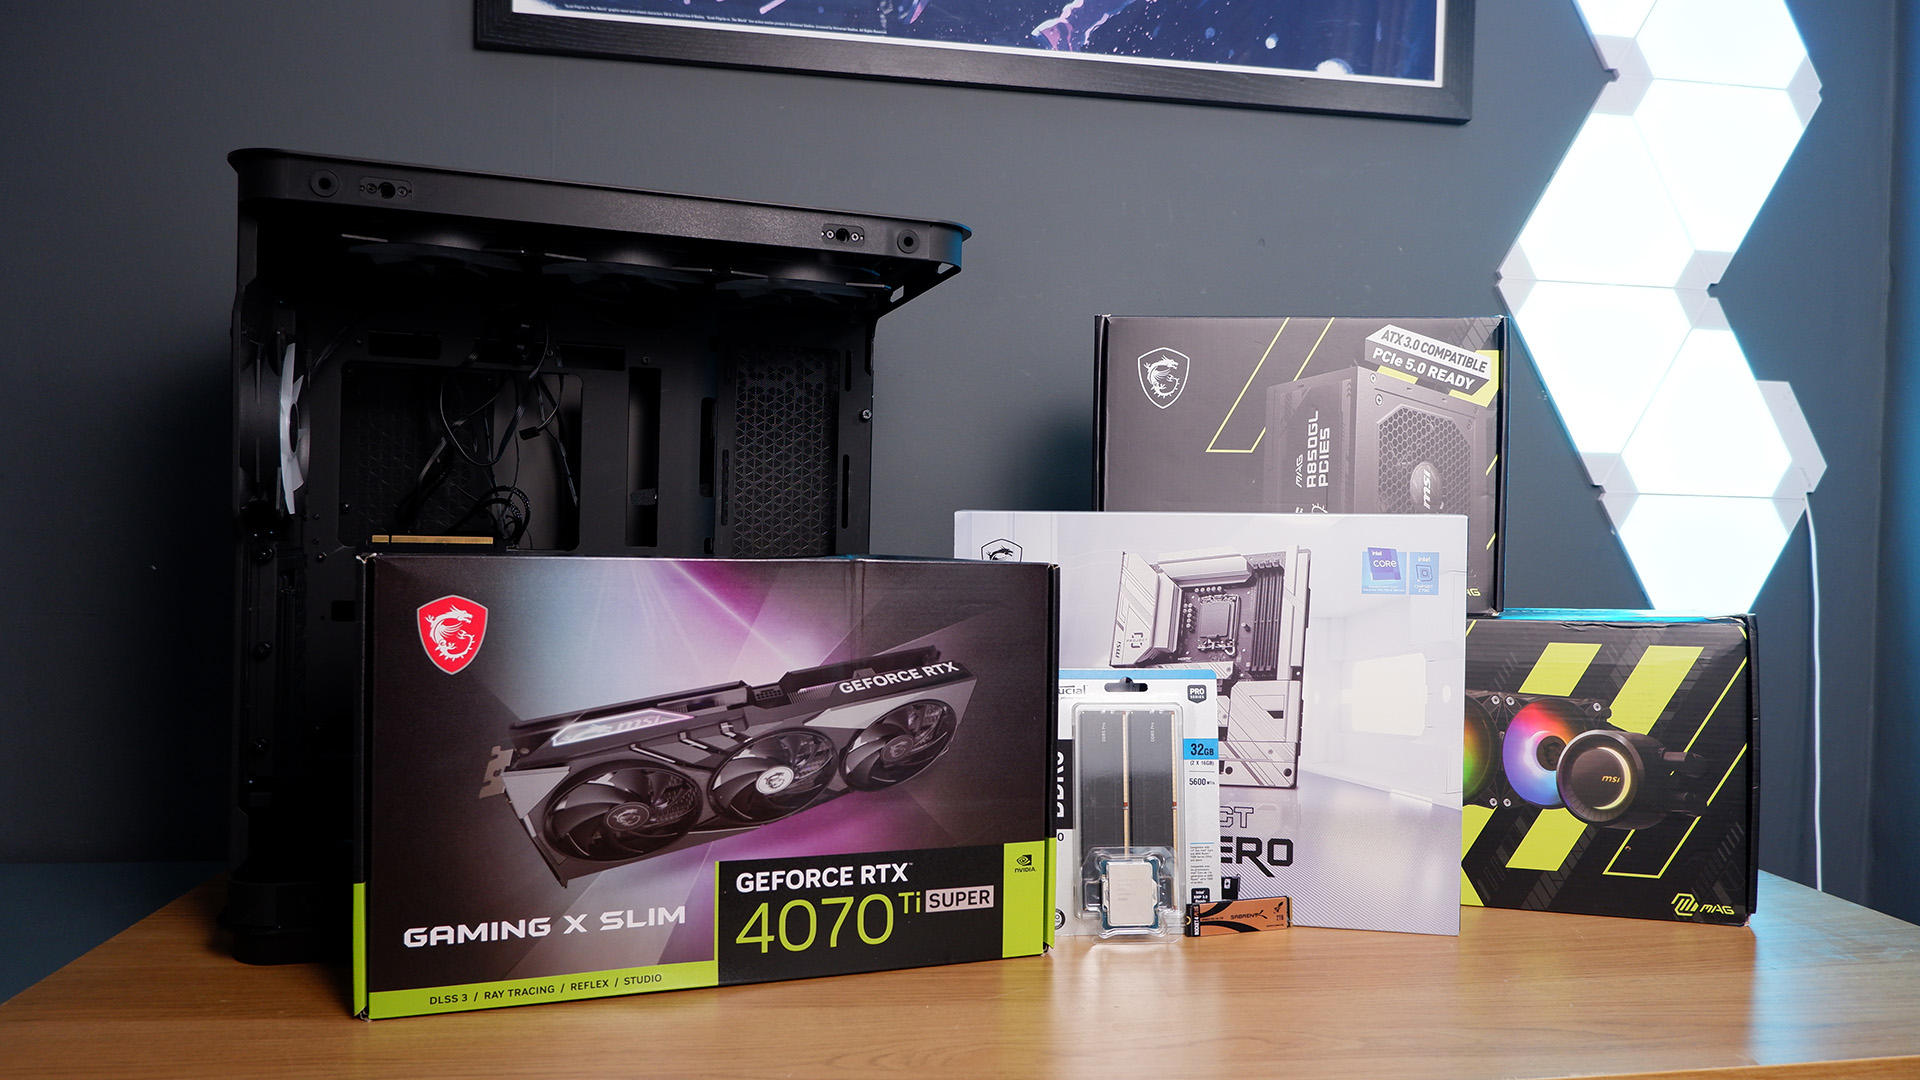
| Component | Model | US price | UK price | Header Cell - Column 4 |
|---|---|---|---|---|
| CPU | Intel Core i7 14700K | $350 | £324 | Buy link |
| GPU | MSI GeForce RTX 4070 Ti Super 16G Gaming X Slim | $860 | £860 | Buy link |
| Chassis | MSI MEG Maestro 700L PZ | $360 | £360 | Buy link |
| Motherboard | MSI Z790 Project Zero | $280 | £250 | Buy link |
| Memory | Crucial DDR5 Pro DDR5-5600 32 GB | $90 | £86 | Buy link |
| Storage | Sabrent Rocket 4 Plus 2 TB | $135 | £135 | Buy link |
| CPU cooler | MSI MAG CoreLiquid E360 | $133 | £85 | Buy link |
| Cooling | MSI MPG F120 ARGB x7 (+3) | $35 | £53 | Buy link |
| Power supply | MSI MAG A850GL PCIE5 | $120 | £81 | Buy link |
Total: $2,363 | £2,234
The MSI Z790 Project Zero is the best of the best for Project Zero motherboards at the moment, though that's not going to be the case forever. While I'm stuck with an Intel Core i7 14700K, an older Intel processor, the latest Project X displayed by MSI at CES shows an even more radical shake-up with intention to keep this cable-free party going, likely with newer chipsets. These motherboards even had the rear I/O, um, not on the rear, but we're not quite going that extreme with this build.
One glance at this motherboard and it looks deceptively normal. I'm no cable management maestro—though I am using a case called the Mastro 700L PZ—no, this motherboard's claim to fame is reversed connections that sneakily hide those pesky connectors out of view. The power connectors, fan headers, and USB headers are on the rear, with few exceptions remaining up front bar the important bits including RAM, PCIe slots, and SSD slots.
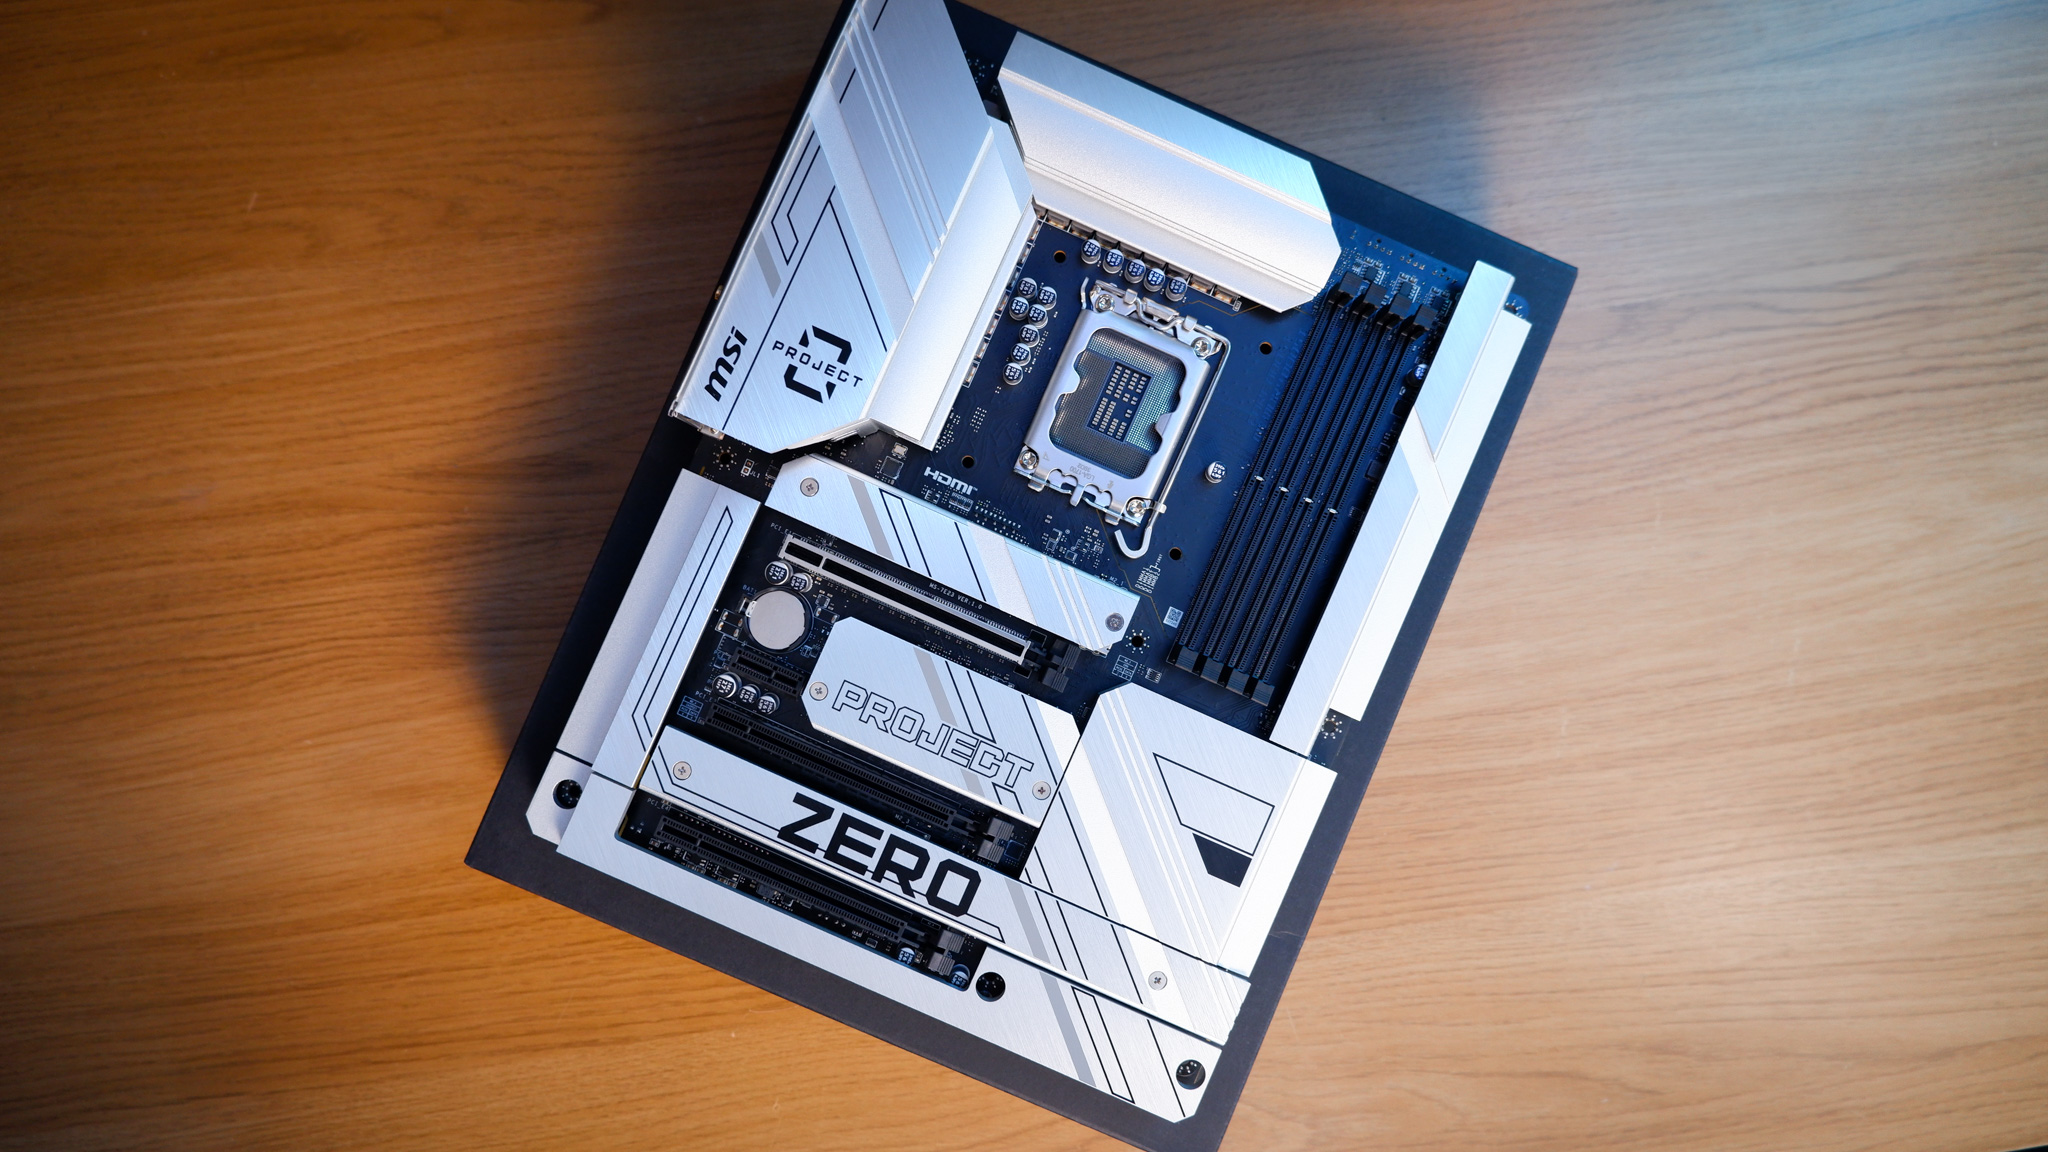
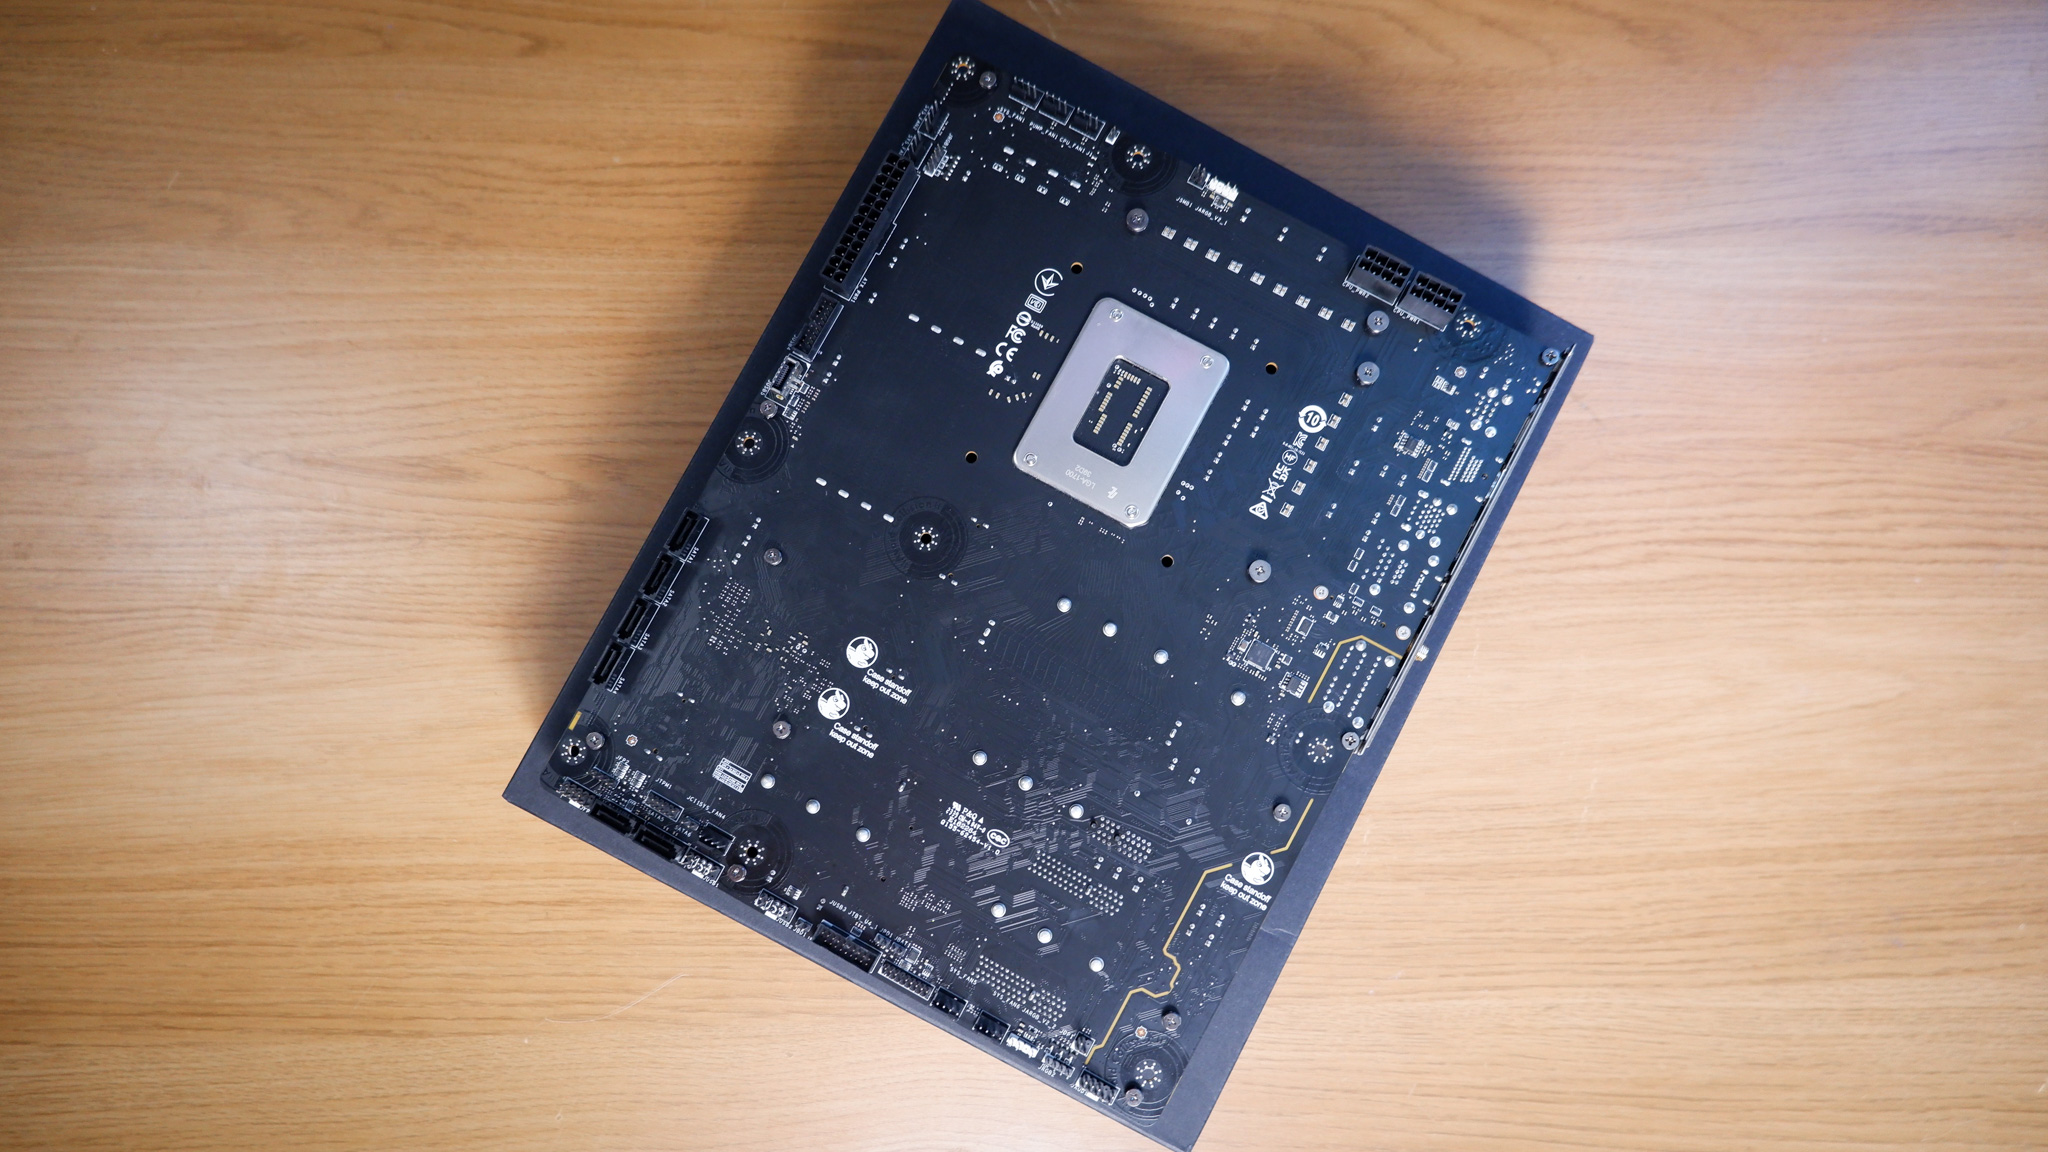
A black motherboard might not benefit as much, or look quite as good, for having fewer cables running across it. But this bare-metal beast? It stands out. There's still some clutter to deal with even on this motherboard, however, namely the GPU power connectors. If you have a shiny new GPU, that's maybe only a single power connector, though anything older could be working with up to three discrete 8-pins. I'd definitely recommend some sort of custom modded cables or extensions if you were to follow in my footsteps with a Back-Connect build.
The biggest gaming news, reviews and hardware deals
Keep up to date with the most important stories and the best deals, as picked by the PC Gamer team.
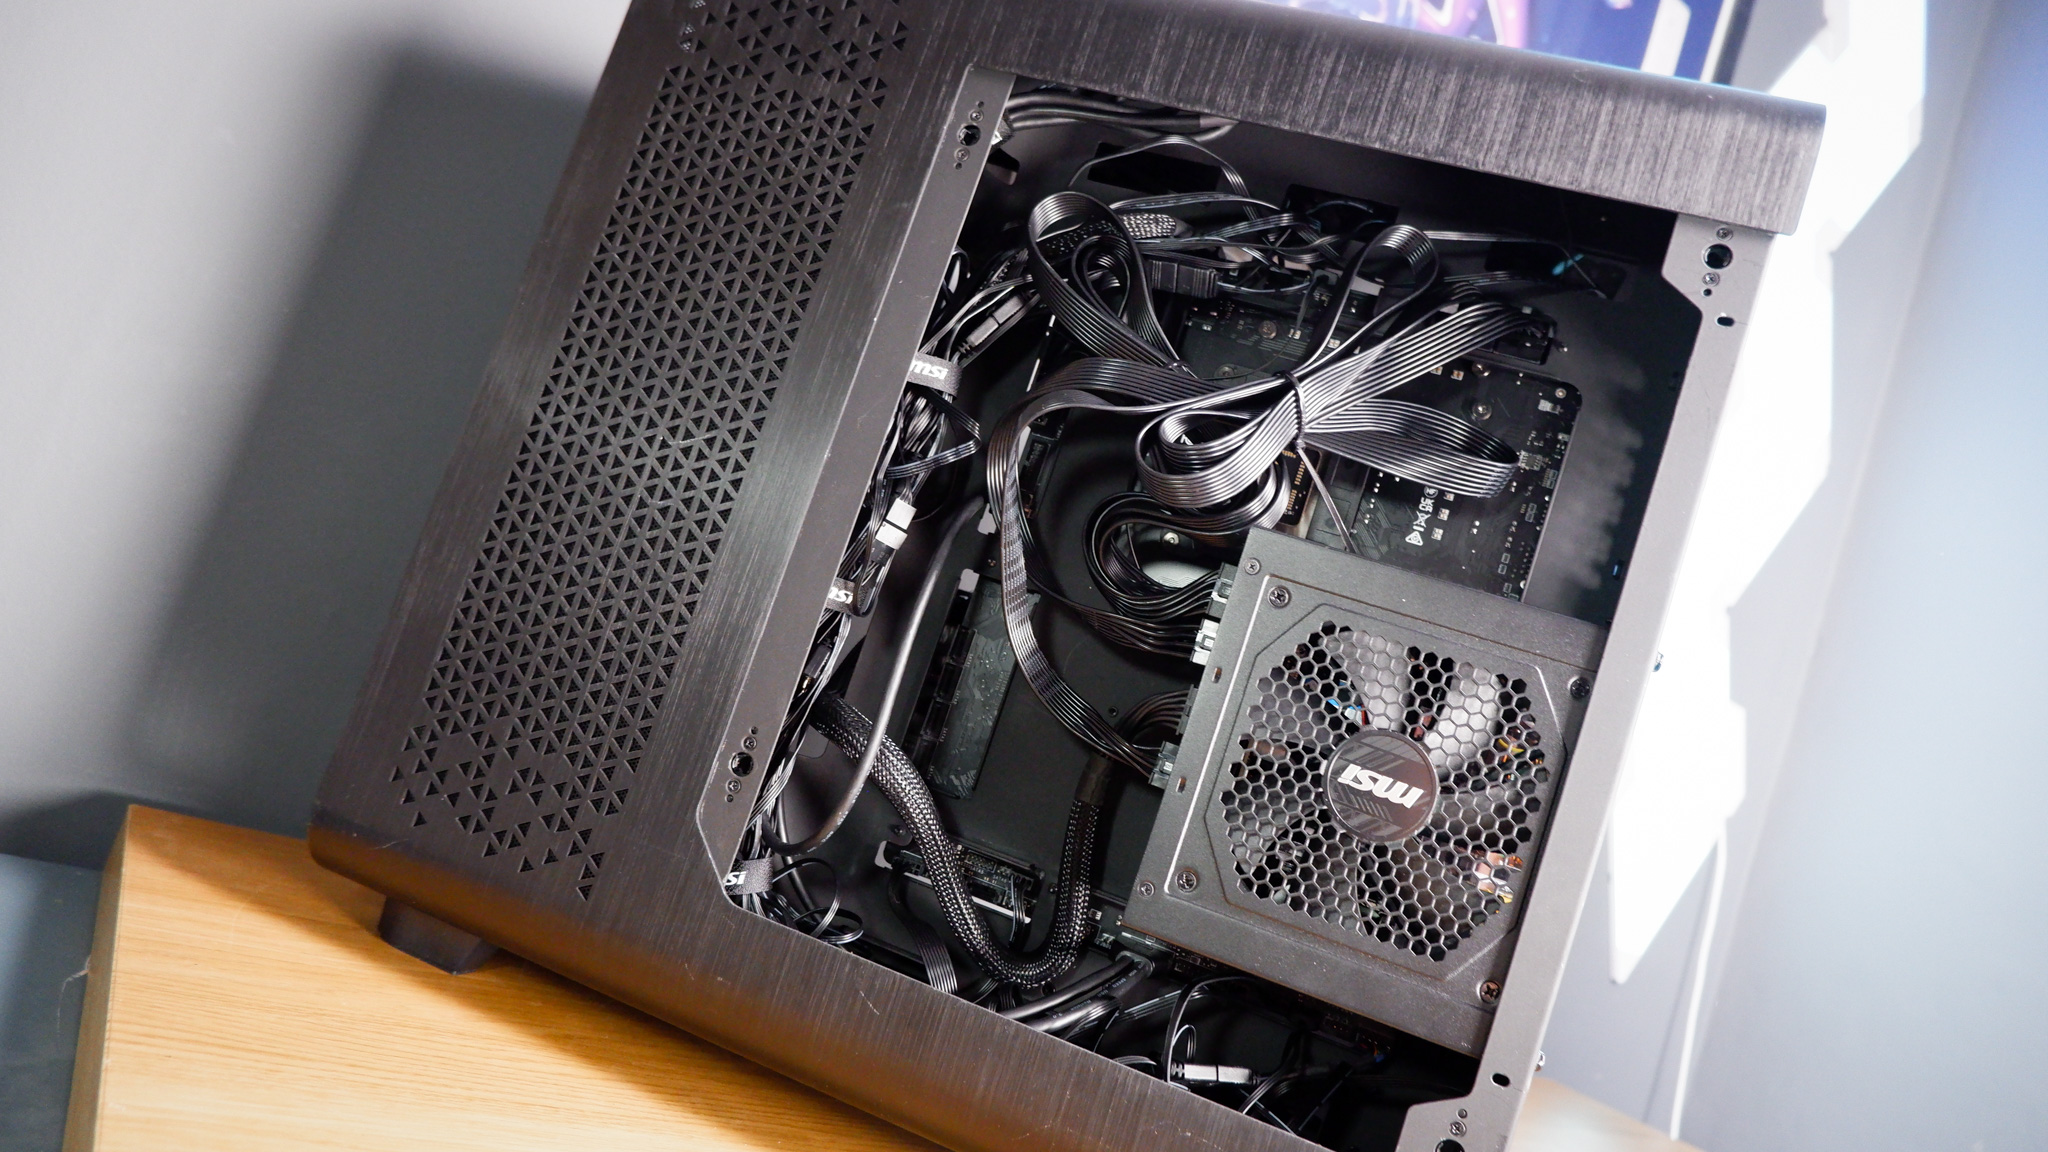
The lack of cables up-front means the back of this case looks like something a bomb-defusal expert would be sweating over. A combination of cables, connectors, and individually cabled RGB fans means I have a colossal mess to deal with in the rear of the MSI MEG Maestro 700L PZ.
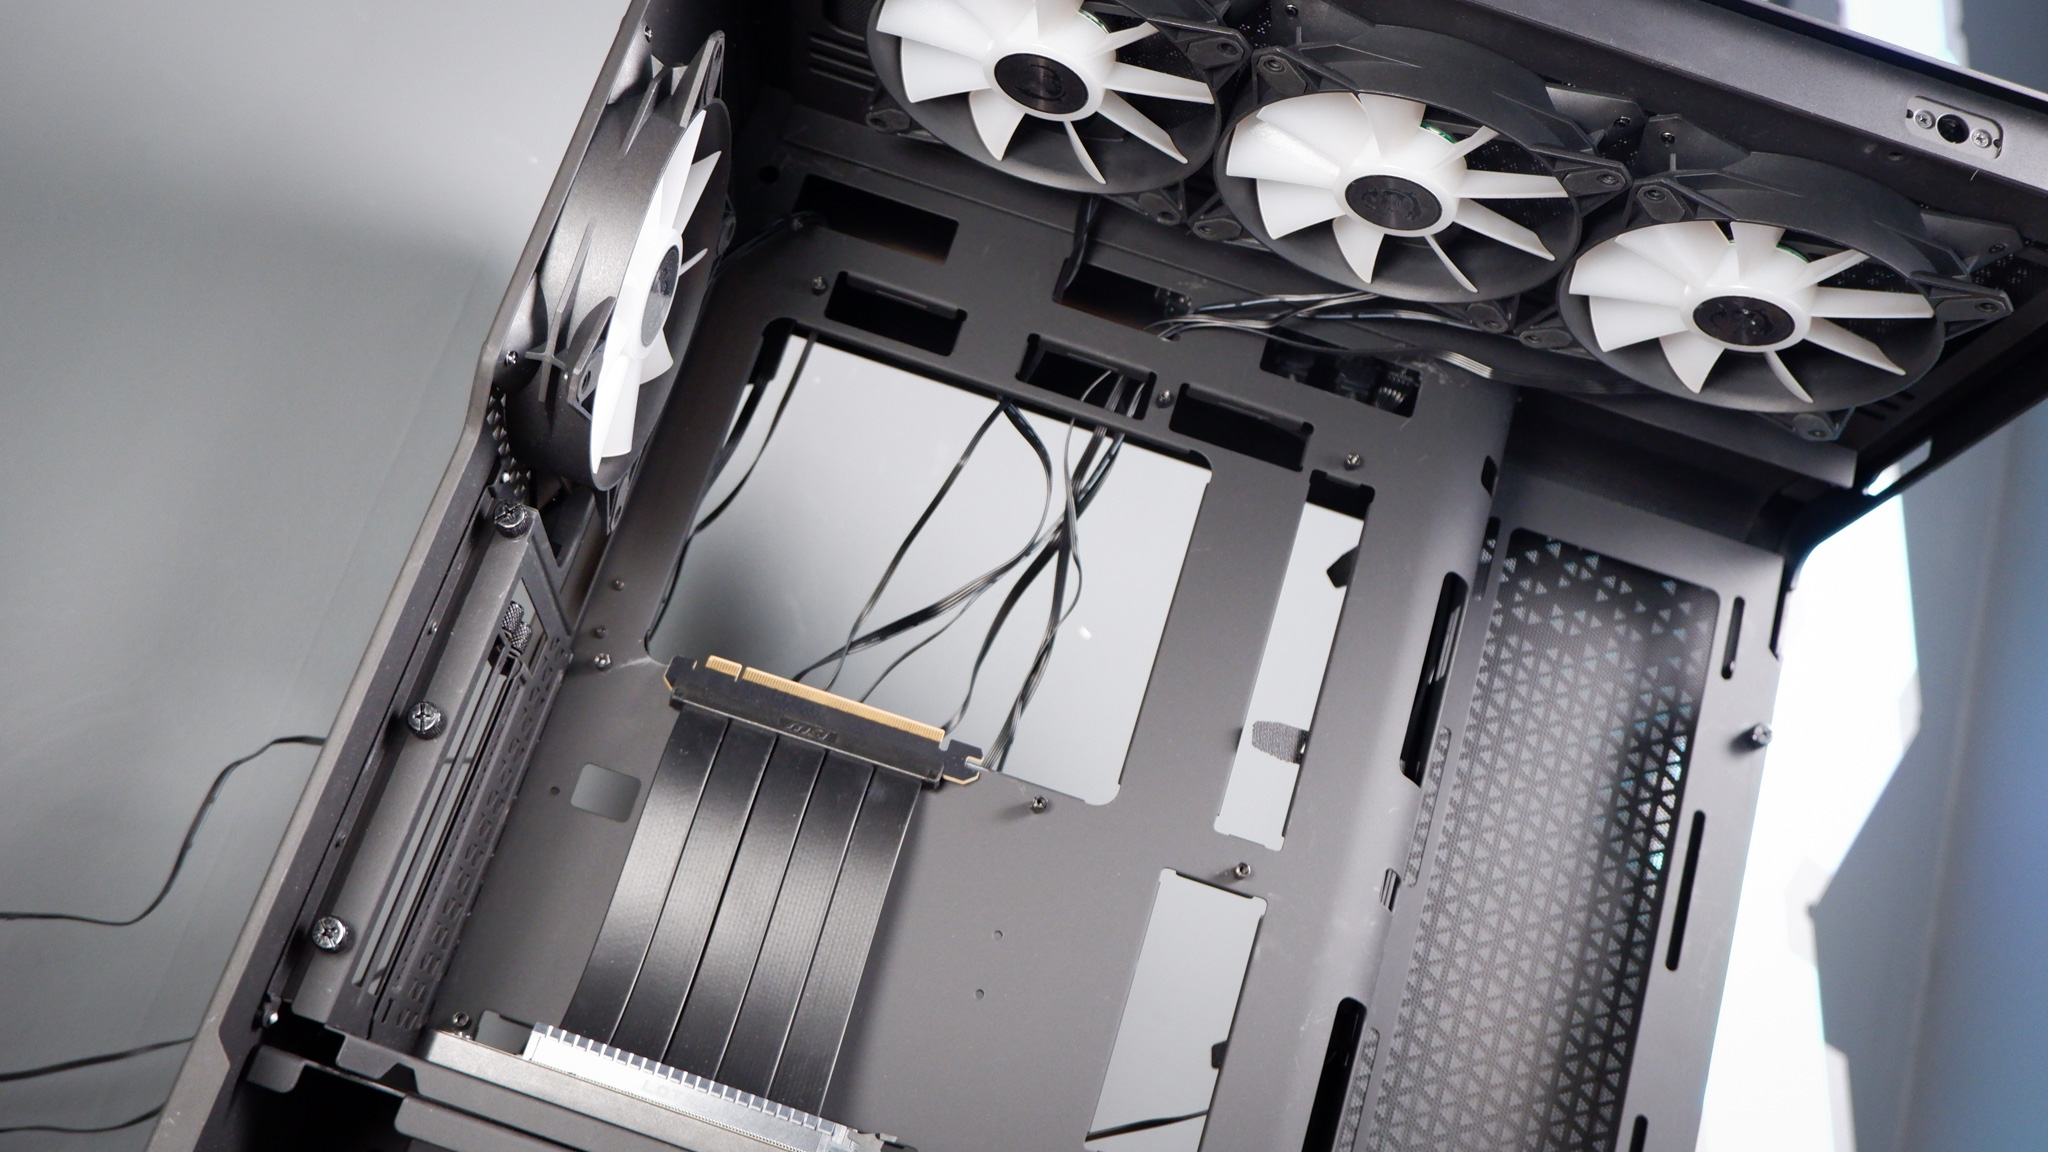
Every MSI MPG F120 ARGB fan has two cables. There are 10 fans so that's 20 cables. One is the fan header, the other is an RGB cable. The latter I'm able to daisy-chain together, though convenient for limited headers, this doesn't reduce the number of cables and bulky loops of cables I'm tying together. Luckily the Maestro 700L PZ comes with a sizeable space for cable management and some extra large straps to tie it all down with. Altogether, I get it looking fairly neat back there, but I'd rather not talk about it.
The Maestro 700L PZ isn't just a case with a few extra cutouts for the Project Zero motherboard. It is, in its own right, a rather stunning beast. It comes with a gently curving panoramic side panel that slides off to access all areas of its innards. It has a sort-of floating look going on, with space for fans on all sides blowing inwards, upwards, outwards, and rearwards. The GPU is mounted vertically, too. Altogether, it's a great case to showcase the cable free look, though I can't help but feel a white interior might make more of a point of the lack of cables.
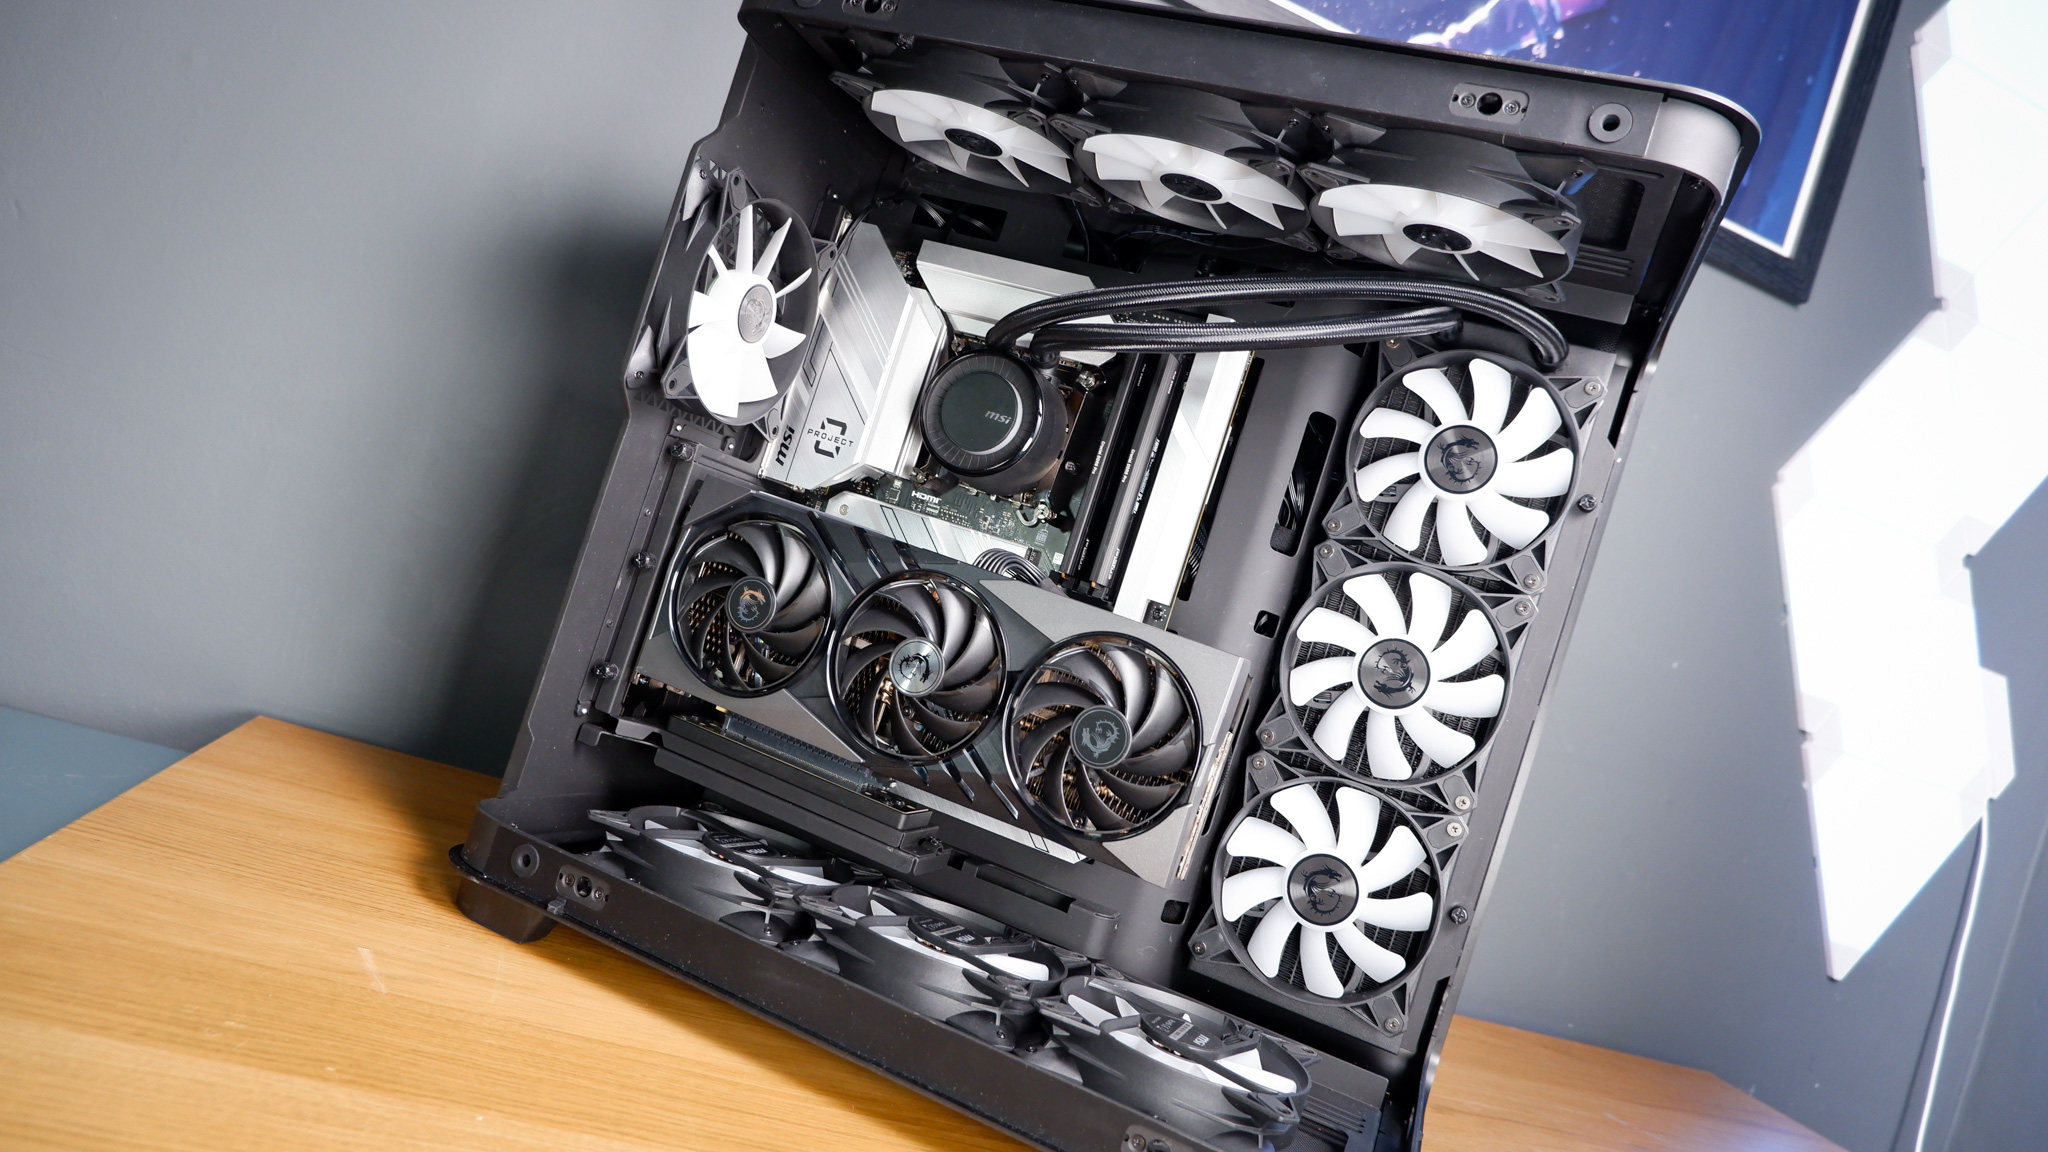
I've aimed to keep distractions to a minimum from the other components: the RAM is a set of plain-looking Crucial DDR5 Pro and the GPU is MSI's GeForce RTX 4070 Ti Super 16G Gaming X Slim. That's a powerful card and the RTX 4070 Ti Super is one of the better choices from the outgoing RTX 40-series, though it's not delivering the wow factor as other cards on the market. That's a good thing in this build, anyways, as it keeps all eyes on the shiny motherboard.
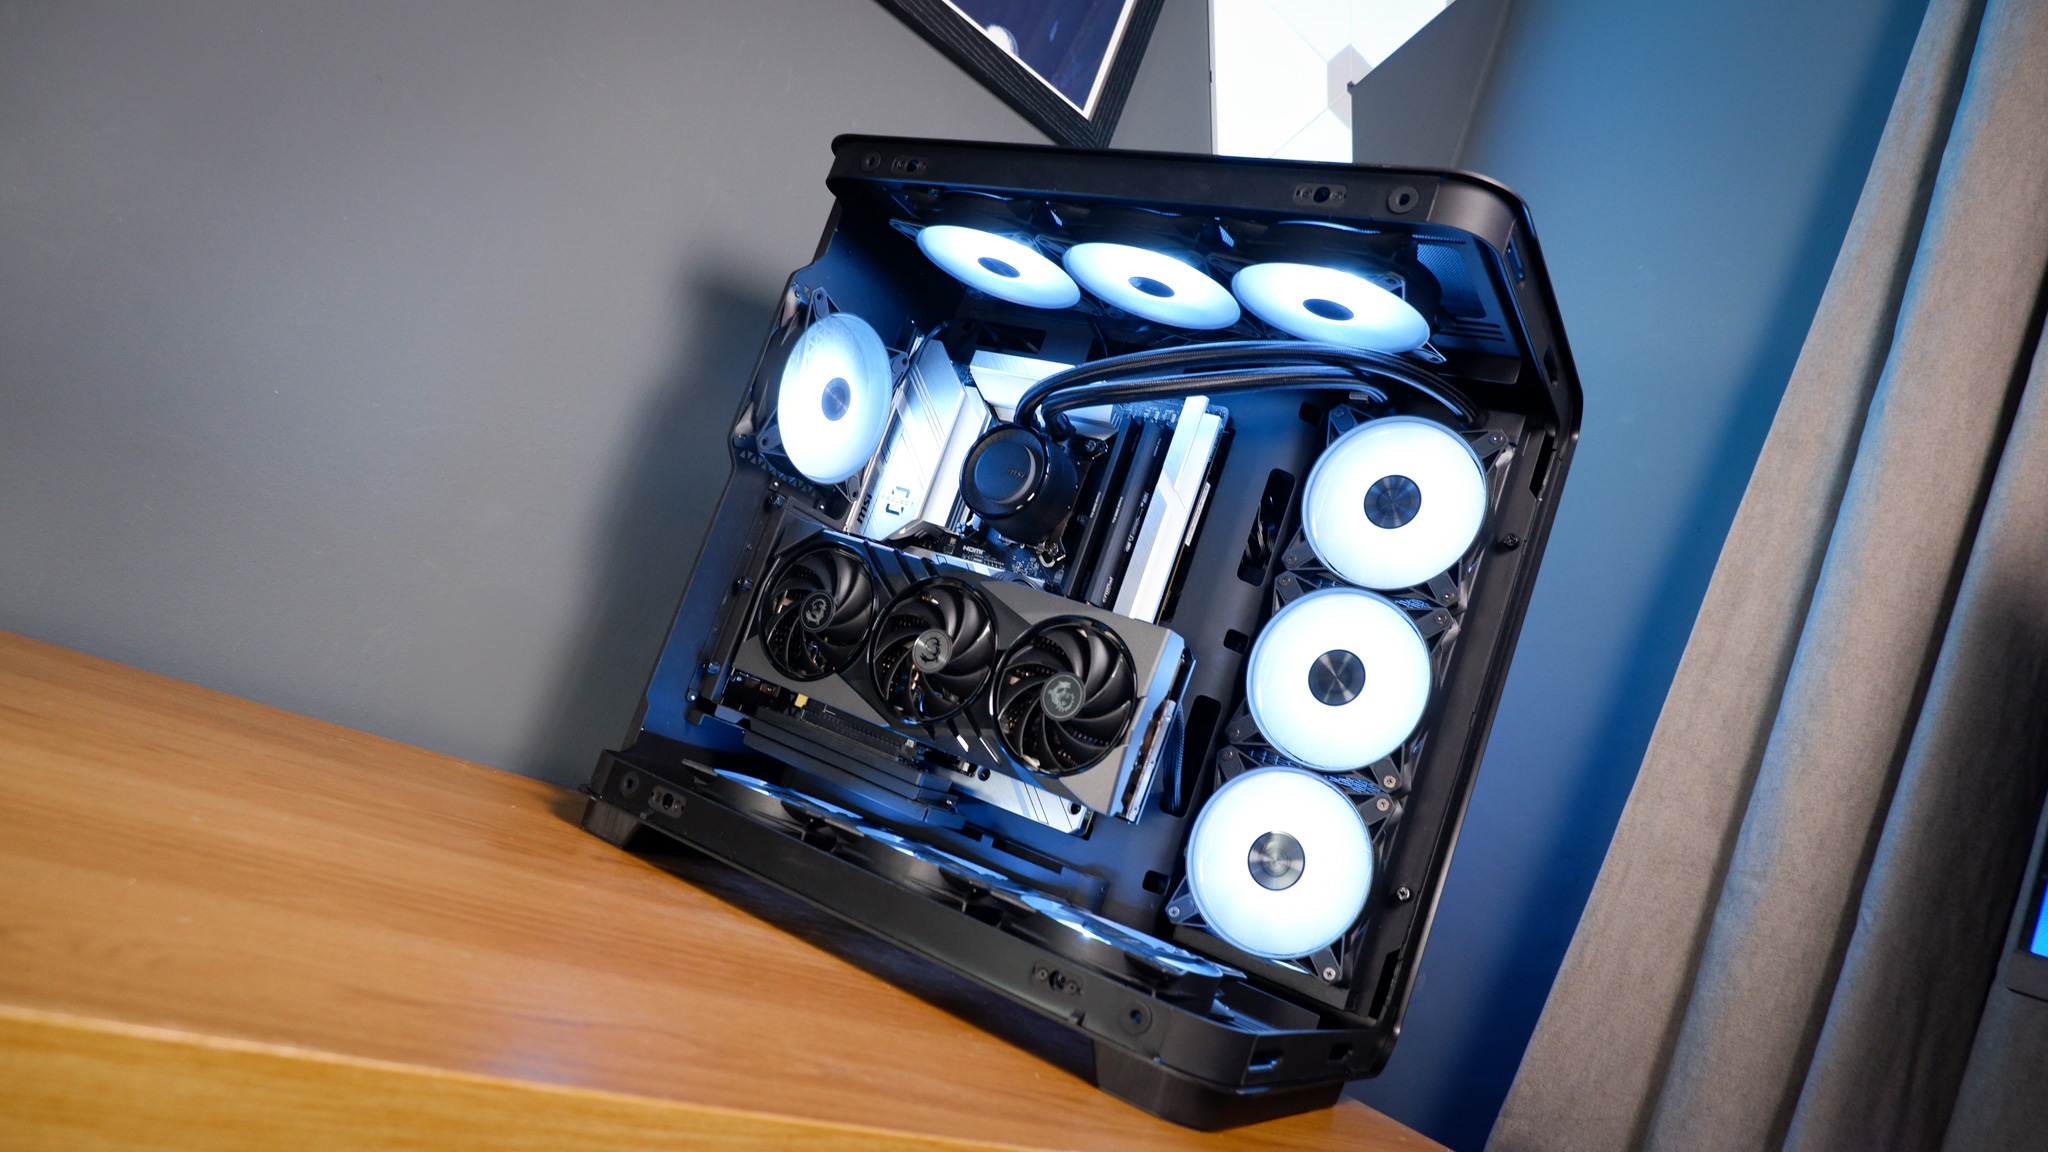
A single cable remains, however. The dastardly GPU has a single PCIe 5.0 power connector to pump it with hundreds of watts of power—luckily the MSI MAG A850GL PCIE5 PSU I'm using offers just one cable, or I'd be staring down an even uglier adapter instead. Though I'm able to tuck slightly out of sight from the vertical GPU mounting, it's noticeably a cable. In hindsight, this is the perfect opportunity for some sort of cable sleeve or connector. However, I've nothing to hand and have to settle for the standard approach of loosely pulling it out of view. It works, to an extent, though this approach does leave Project Zero feeling slightly less special in appearance than I was hoping.
This is likely why MSI has opted to offset the GPU to a more unusual position in its later Project X prototype—a true 'Zero-Cable' design. Though that doesn't do much to make my supposedly cable-free build feel less like it has a visible cable… it quite simply does.
The build
Click through the gallery below for the step-by-step.
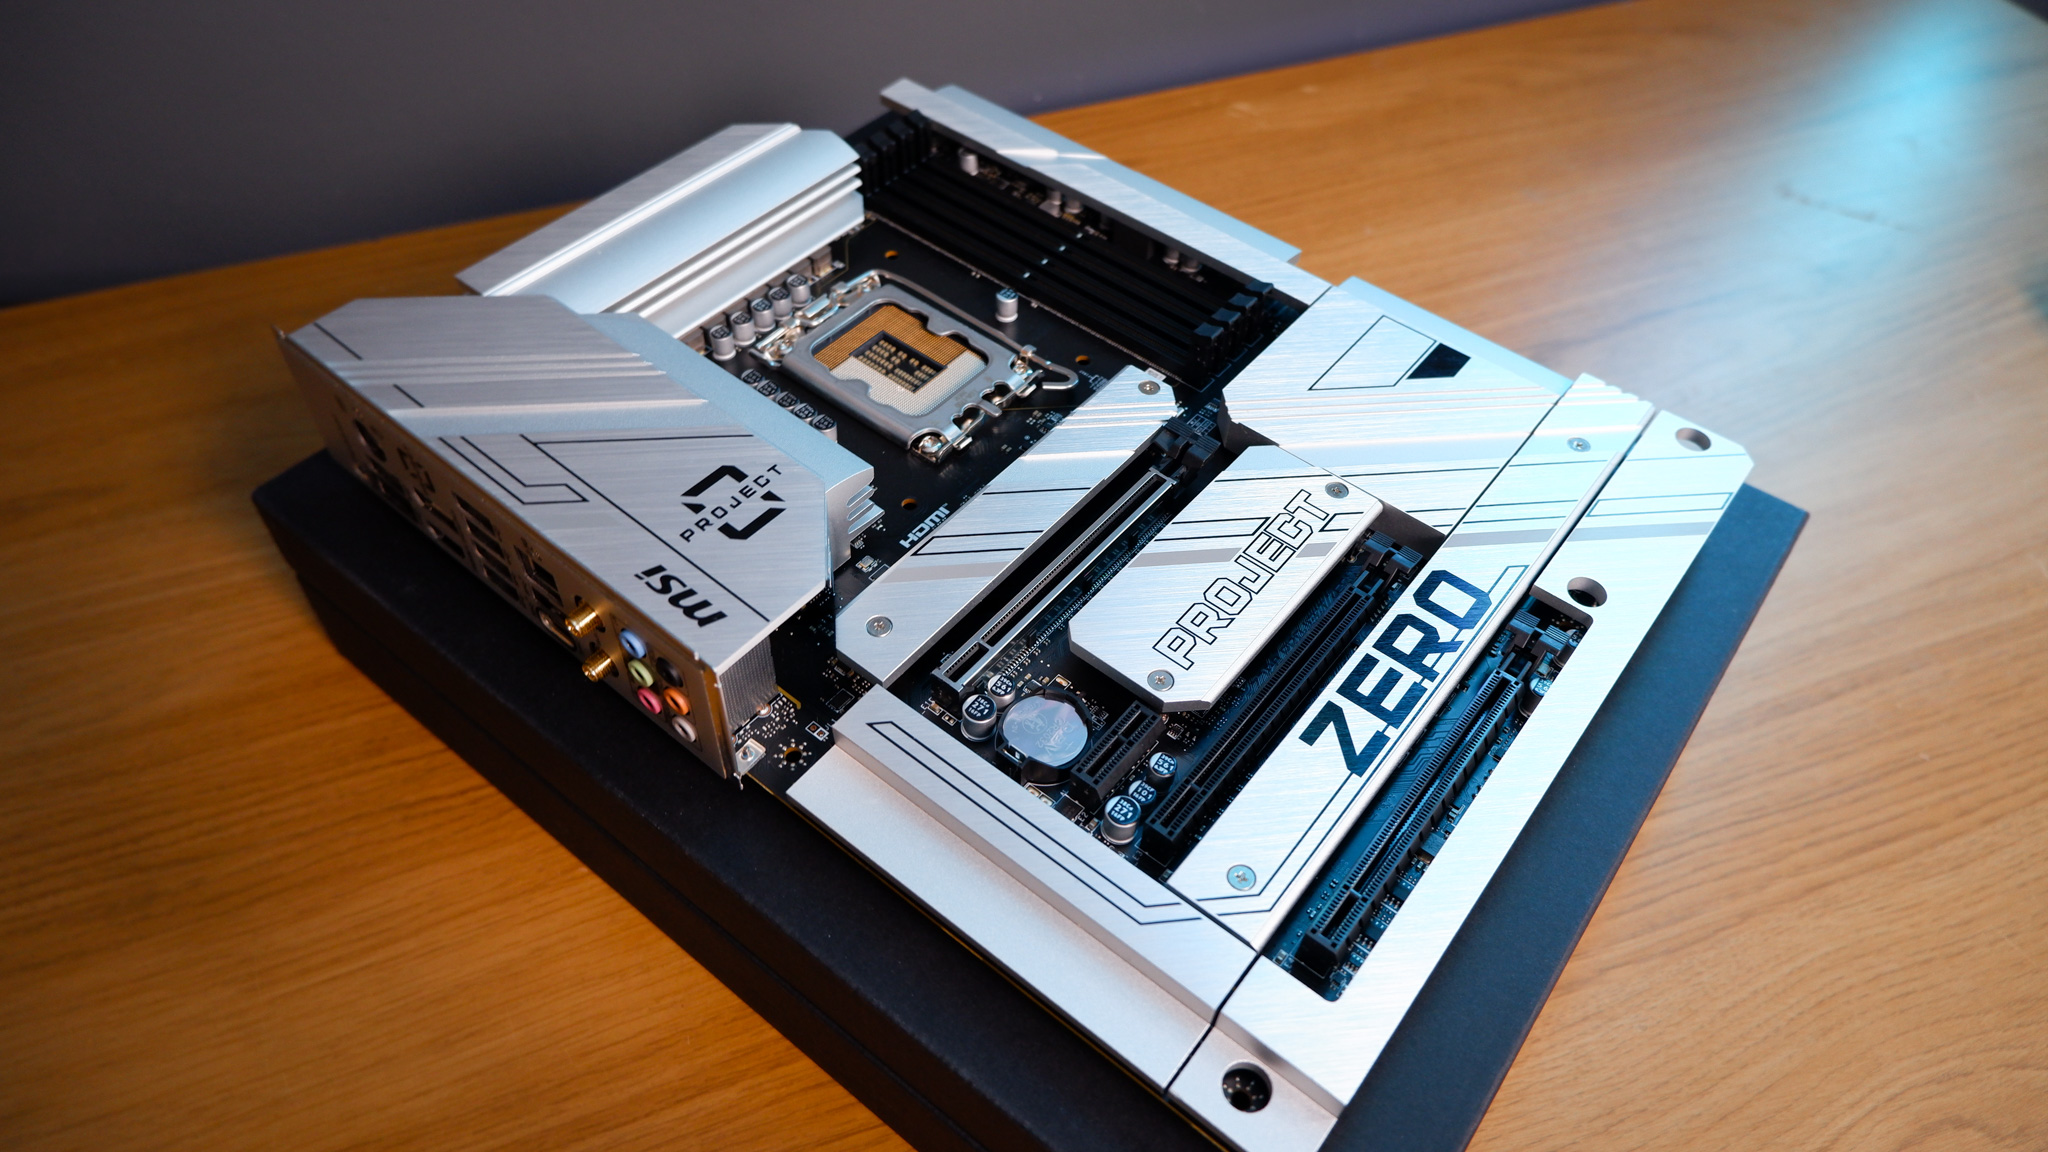
Ready the motherboard
This motherboard looks clean—and it'll stay that way. I'll start this build as I start any other, by plugging in the CPU, RAM, and SSD.
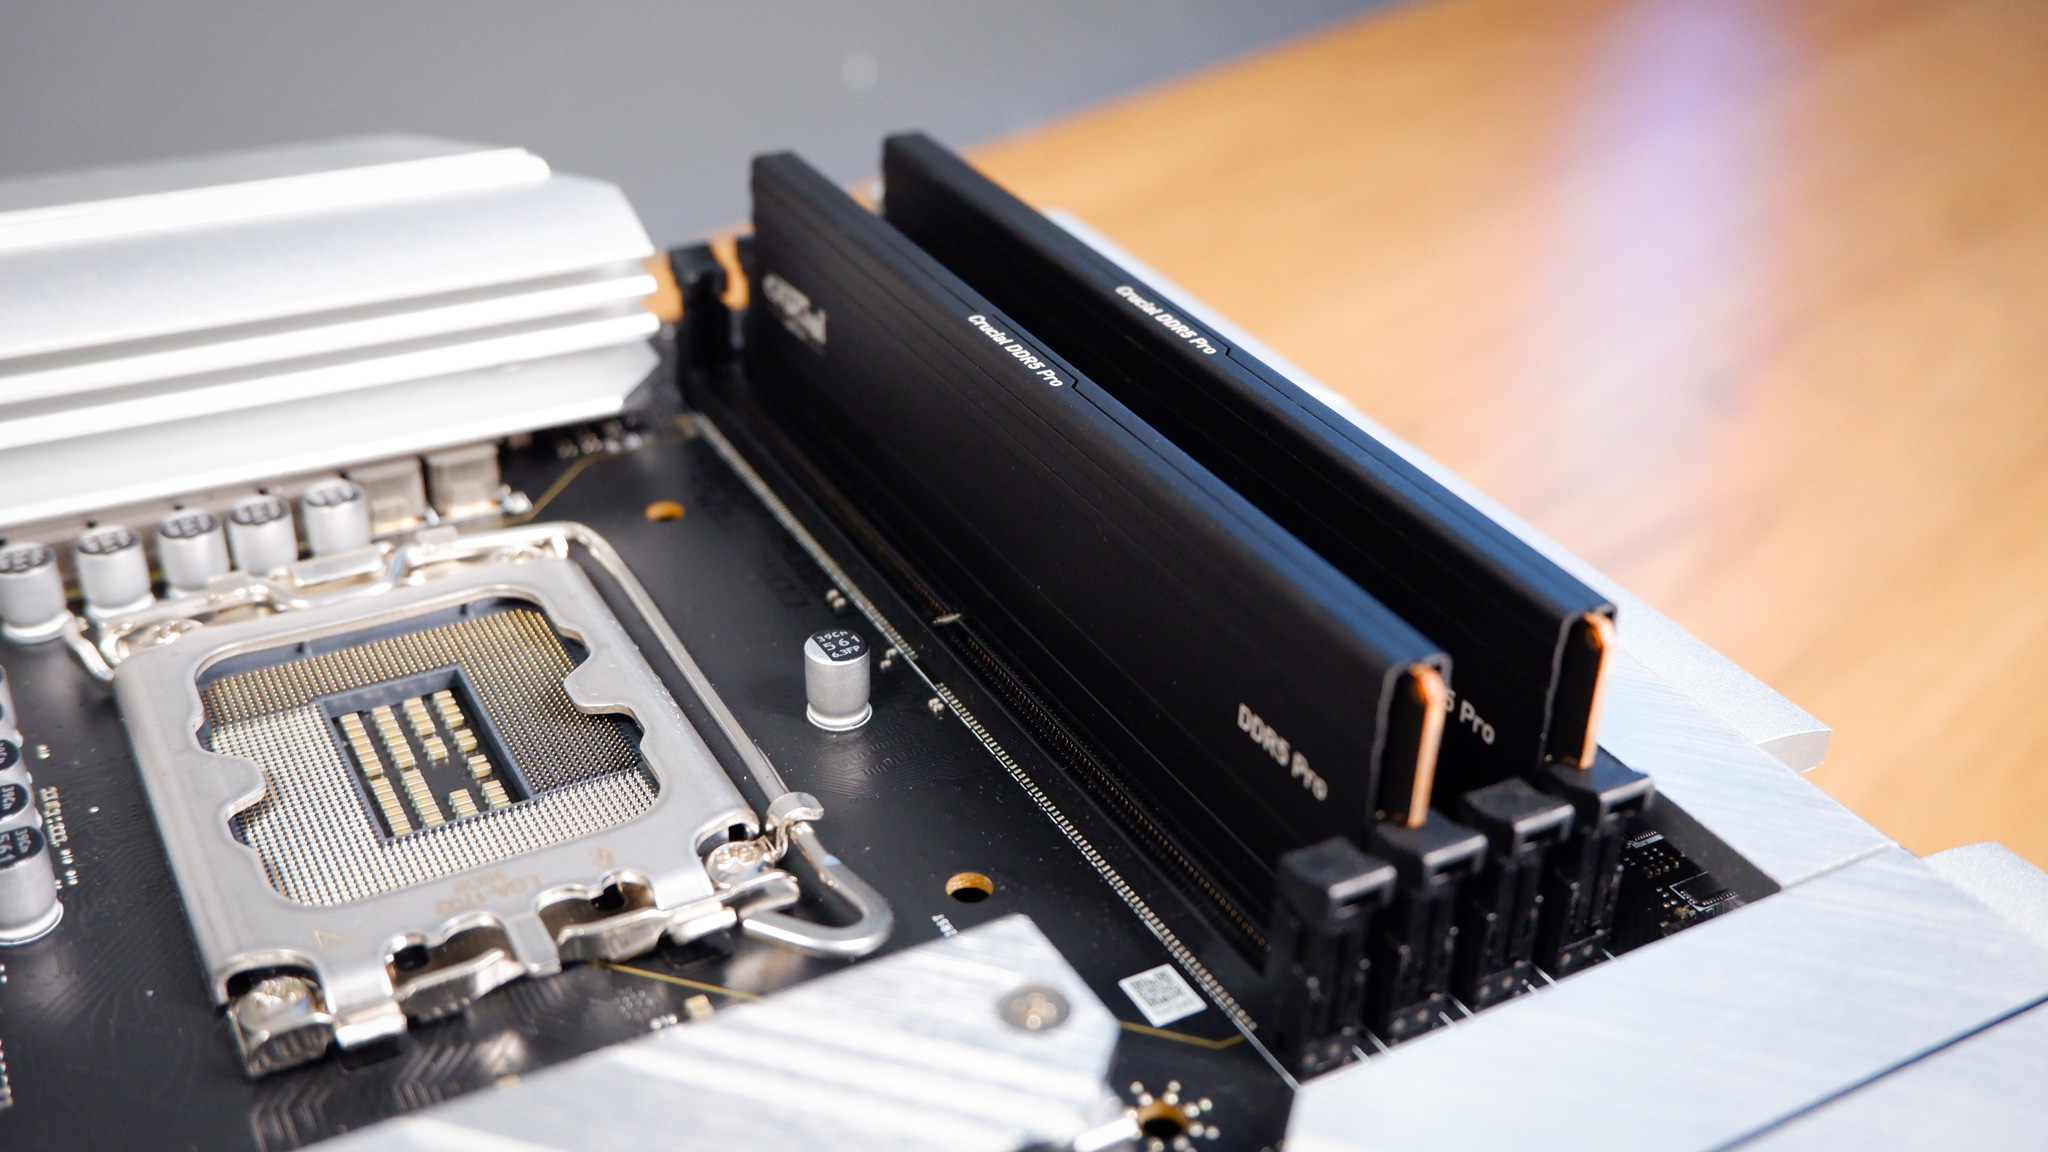
First off, RAM
A pair of Crucial sticks slot in neatly into the A2 and B2 slots. If you're building your first PC, take note of the slots marked in your manual to use first. You want to make sure to use both channels.
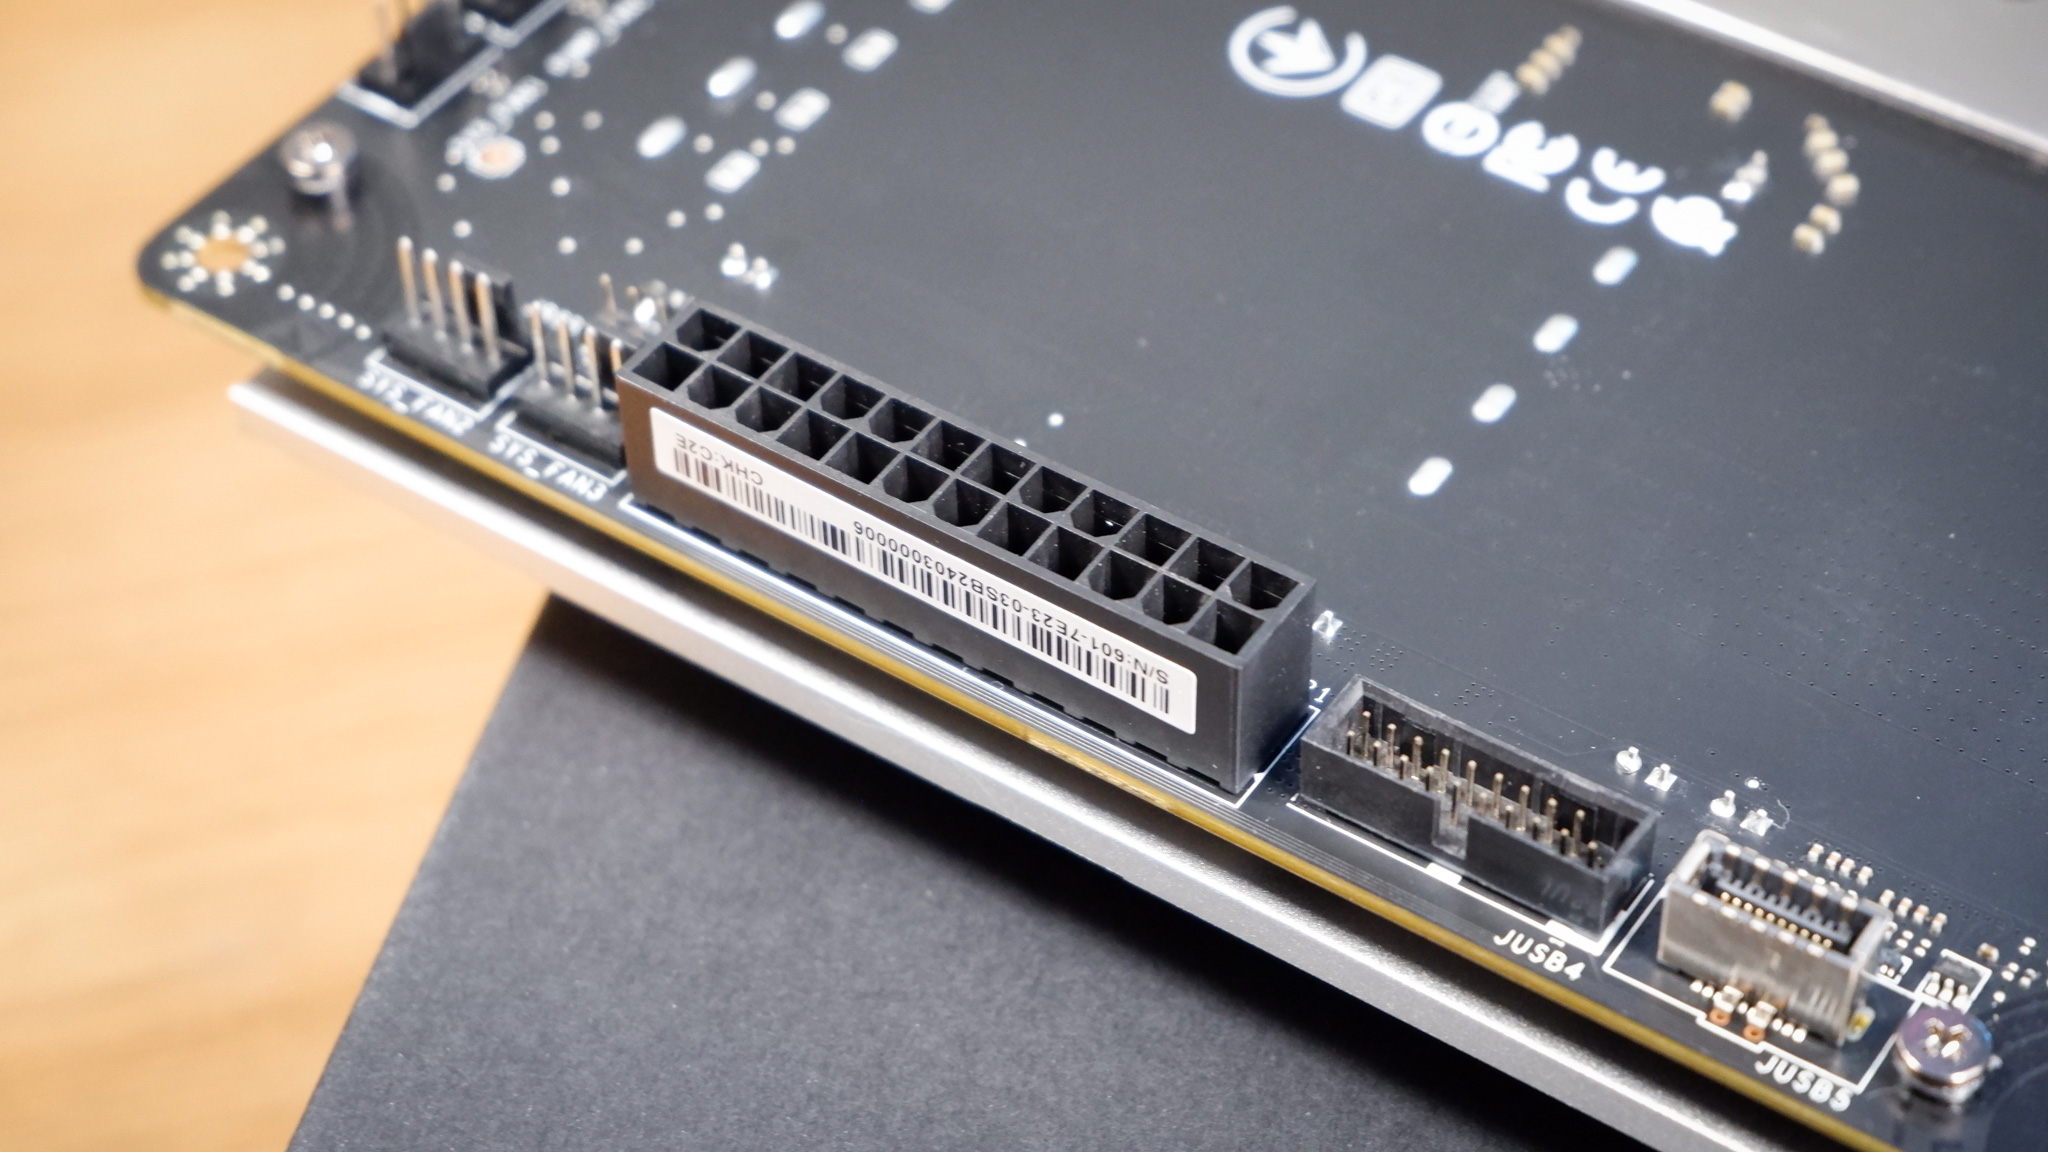
Watch out
I'm being slightly wary of pressing too much on the motherboard without supporting the underside—these connectors lead to a little more bending without due care.
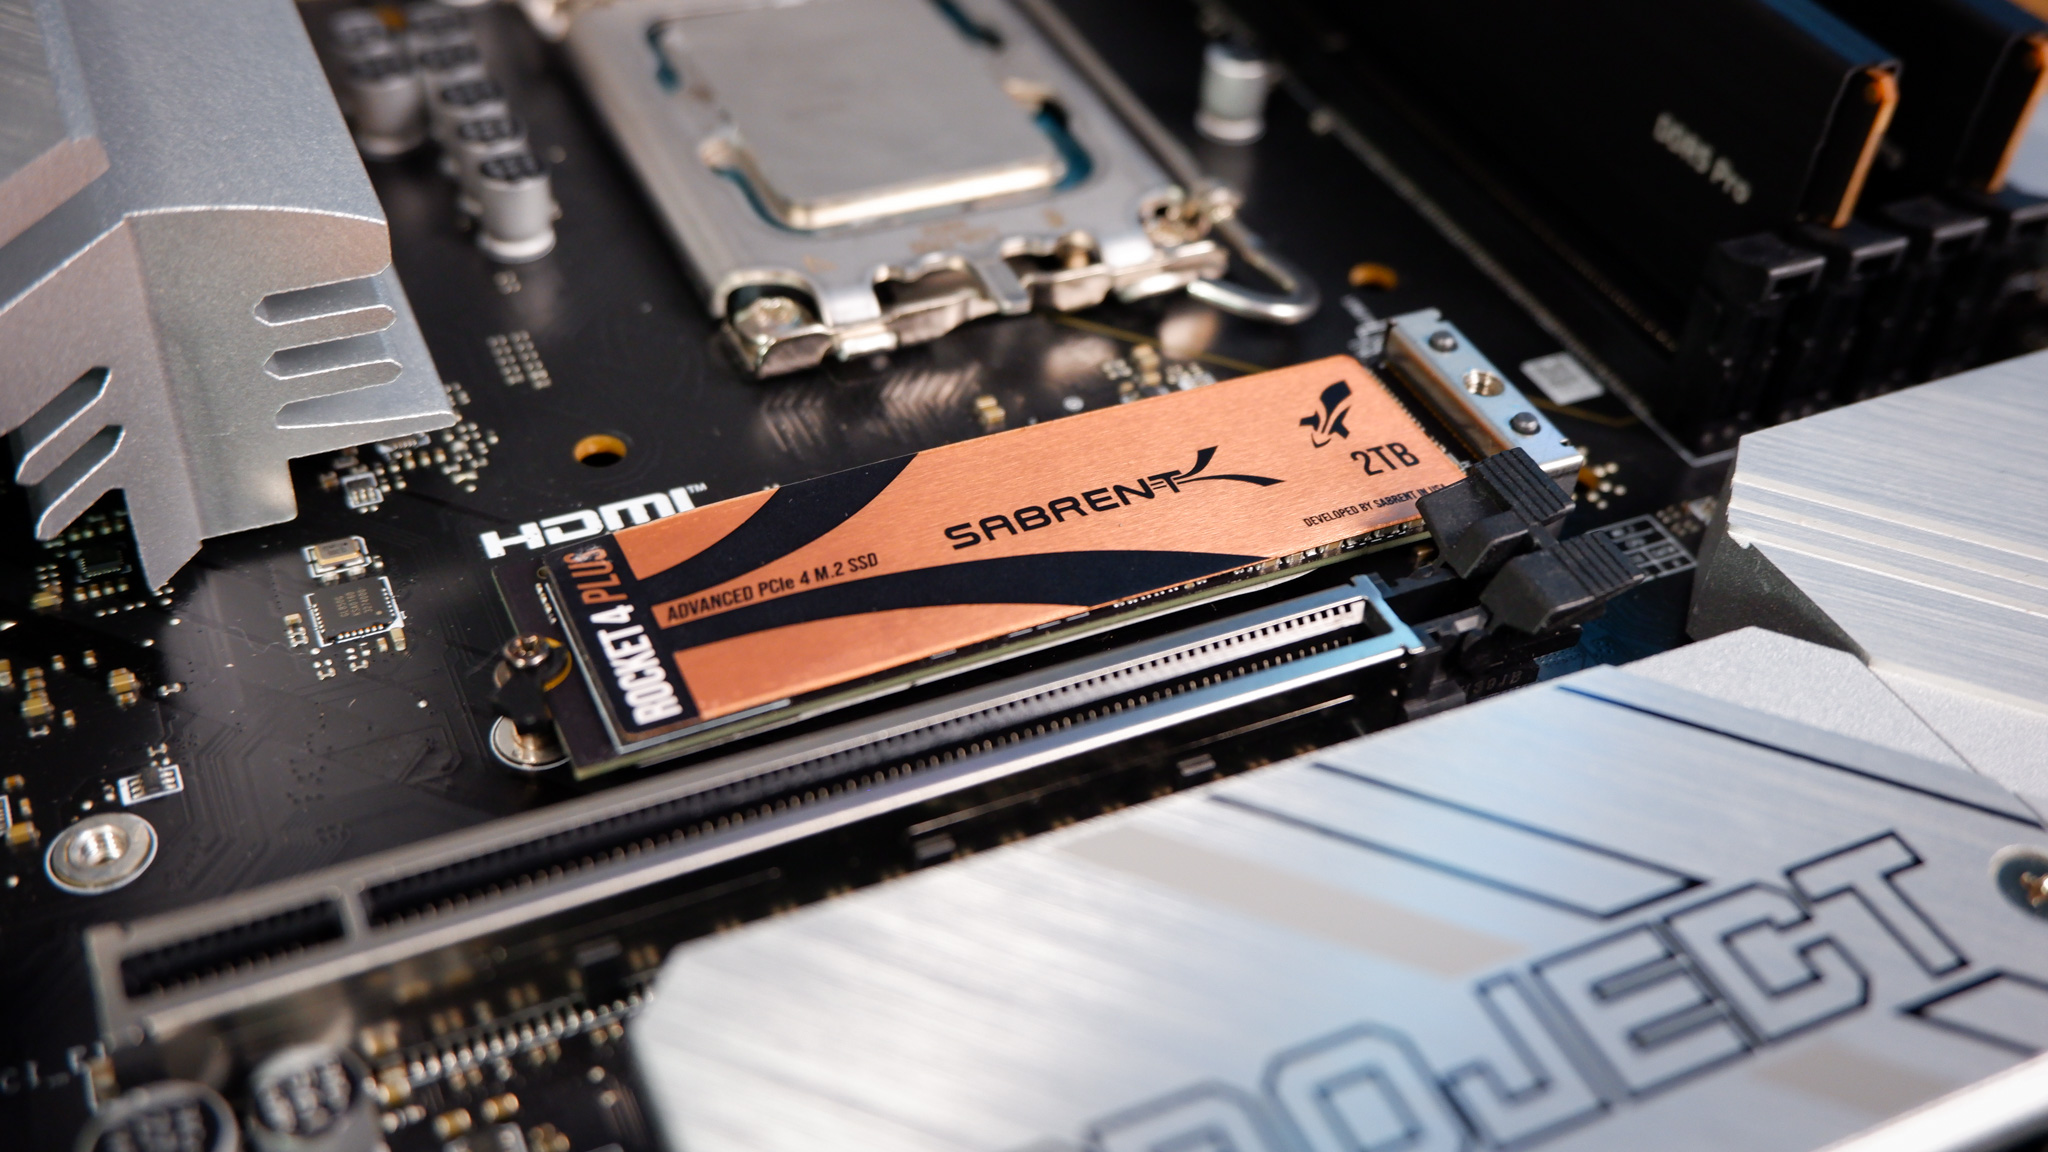
Installing the SSD
Nothing much to report here: I'm sticking a single SSD inside this machine, in the top slot. Top performance, easy install, job done.
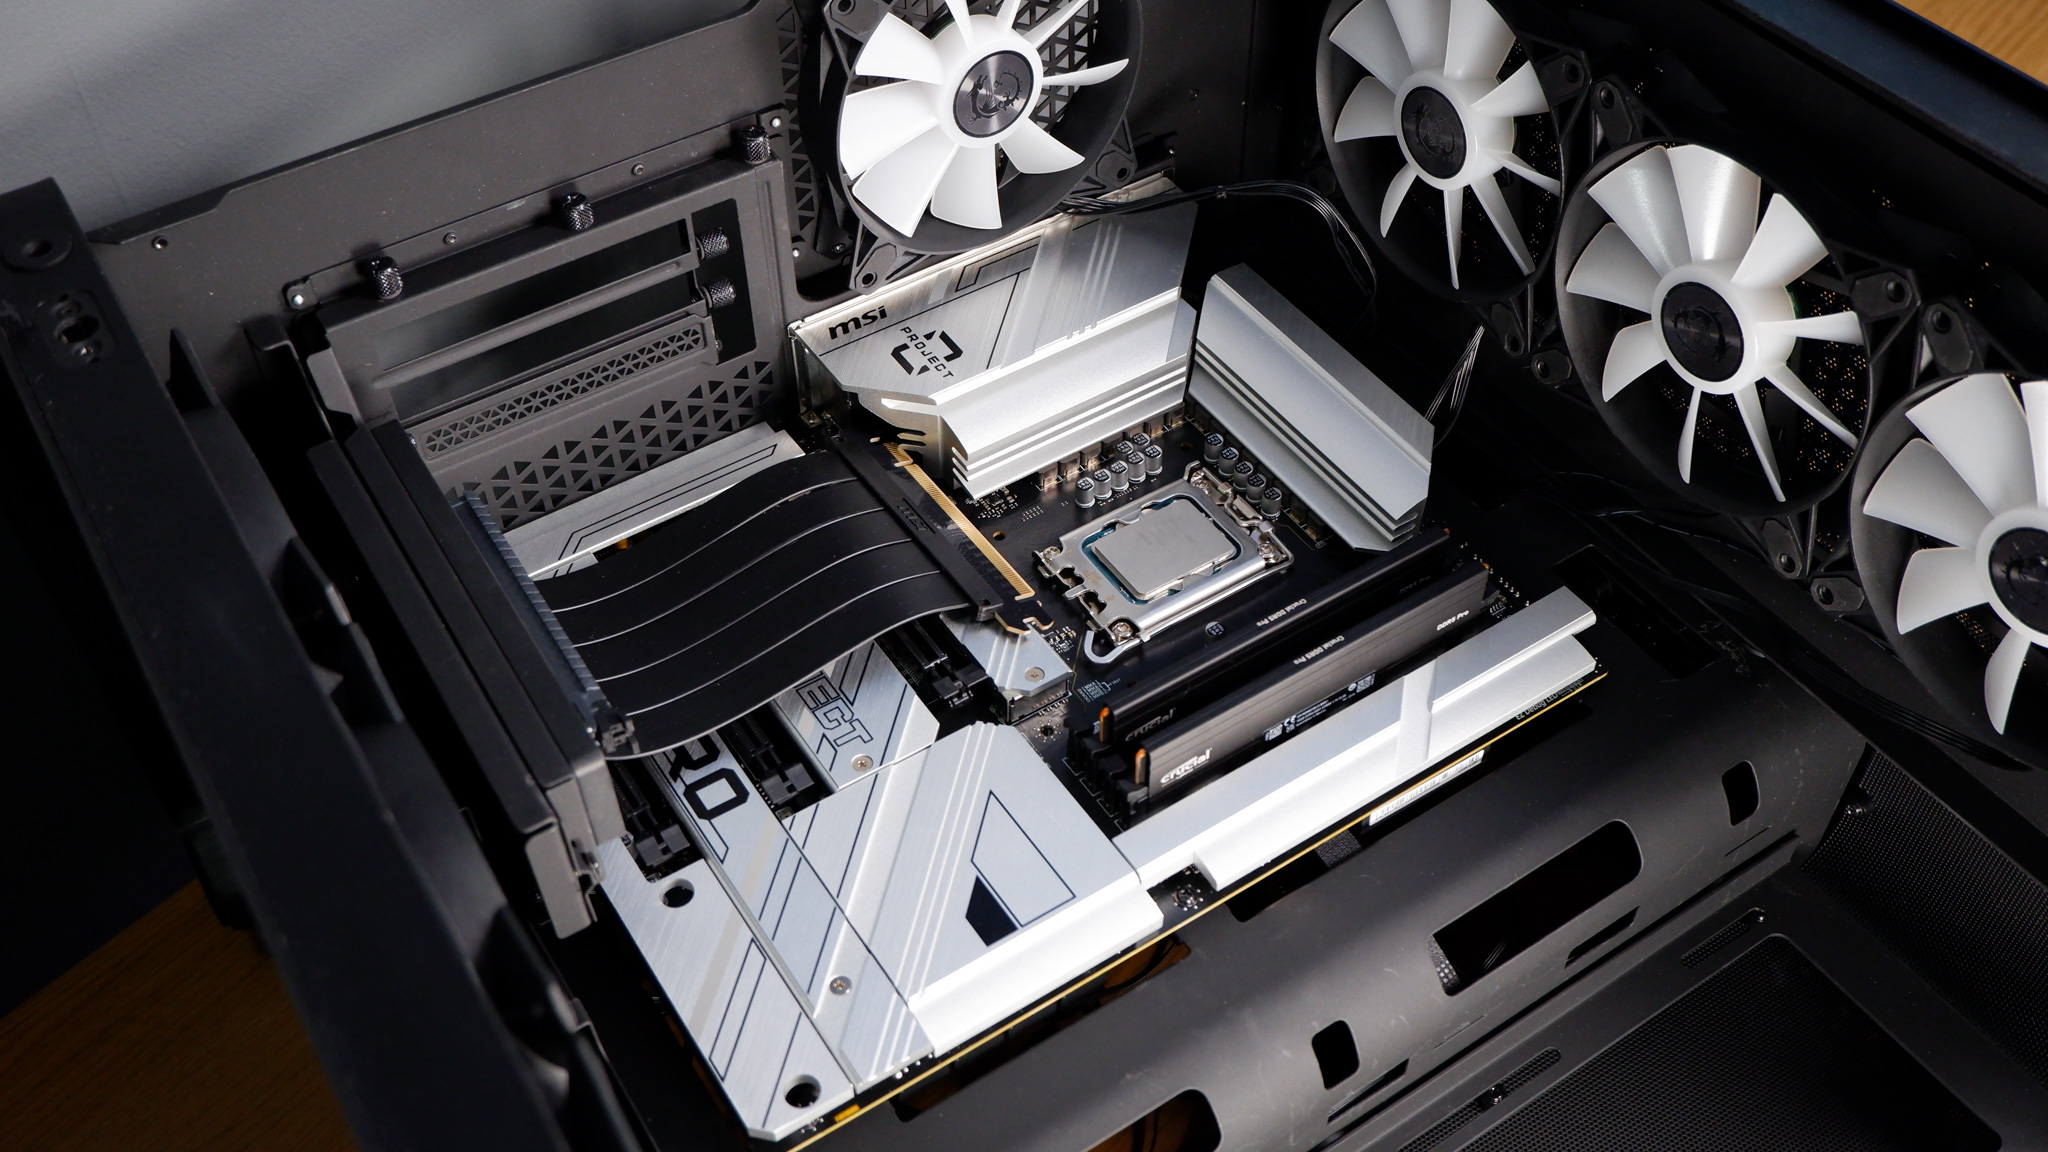
Load the motherboard
The motherboard already looks criminally good inside the Maestro case. Let's try to keep it that way.
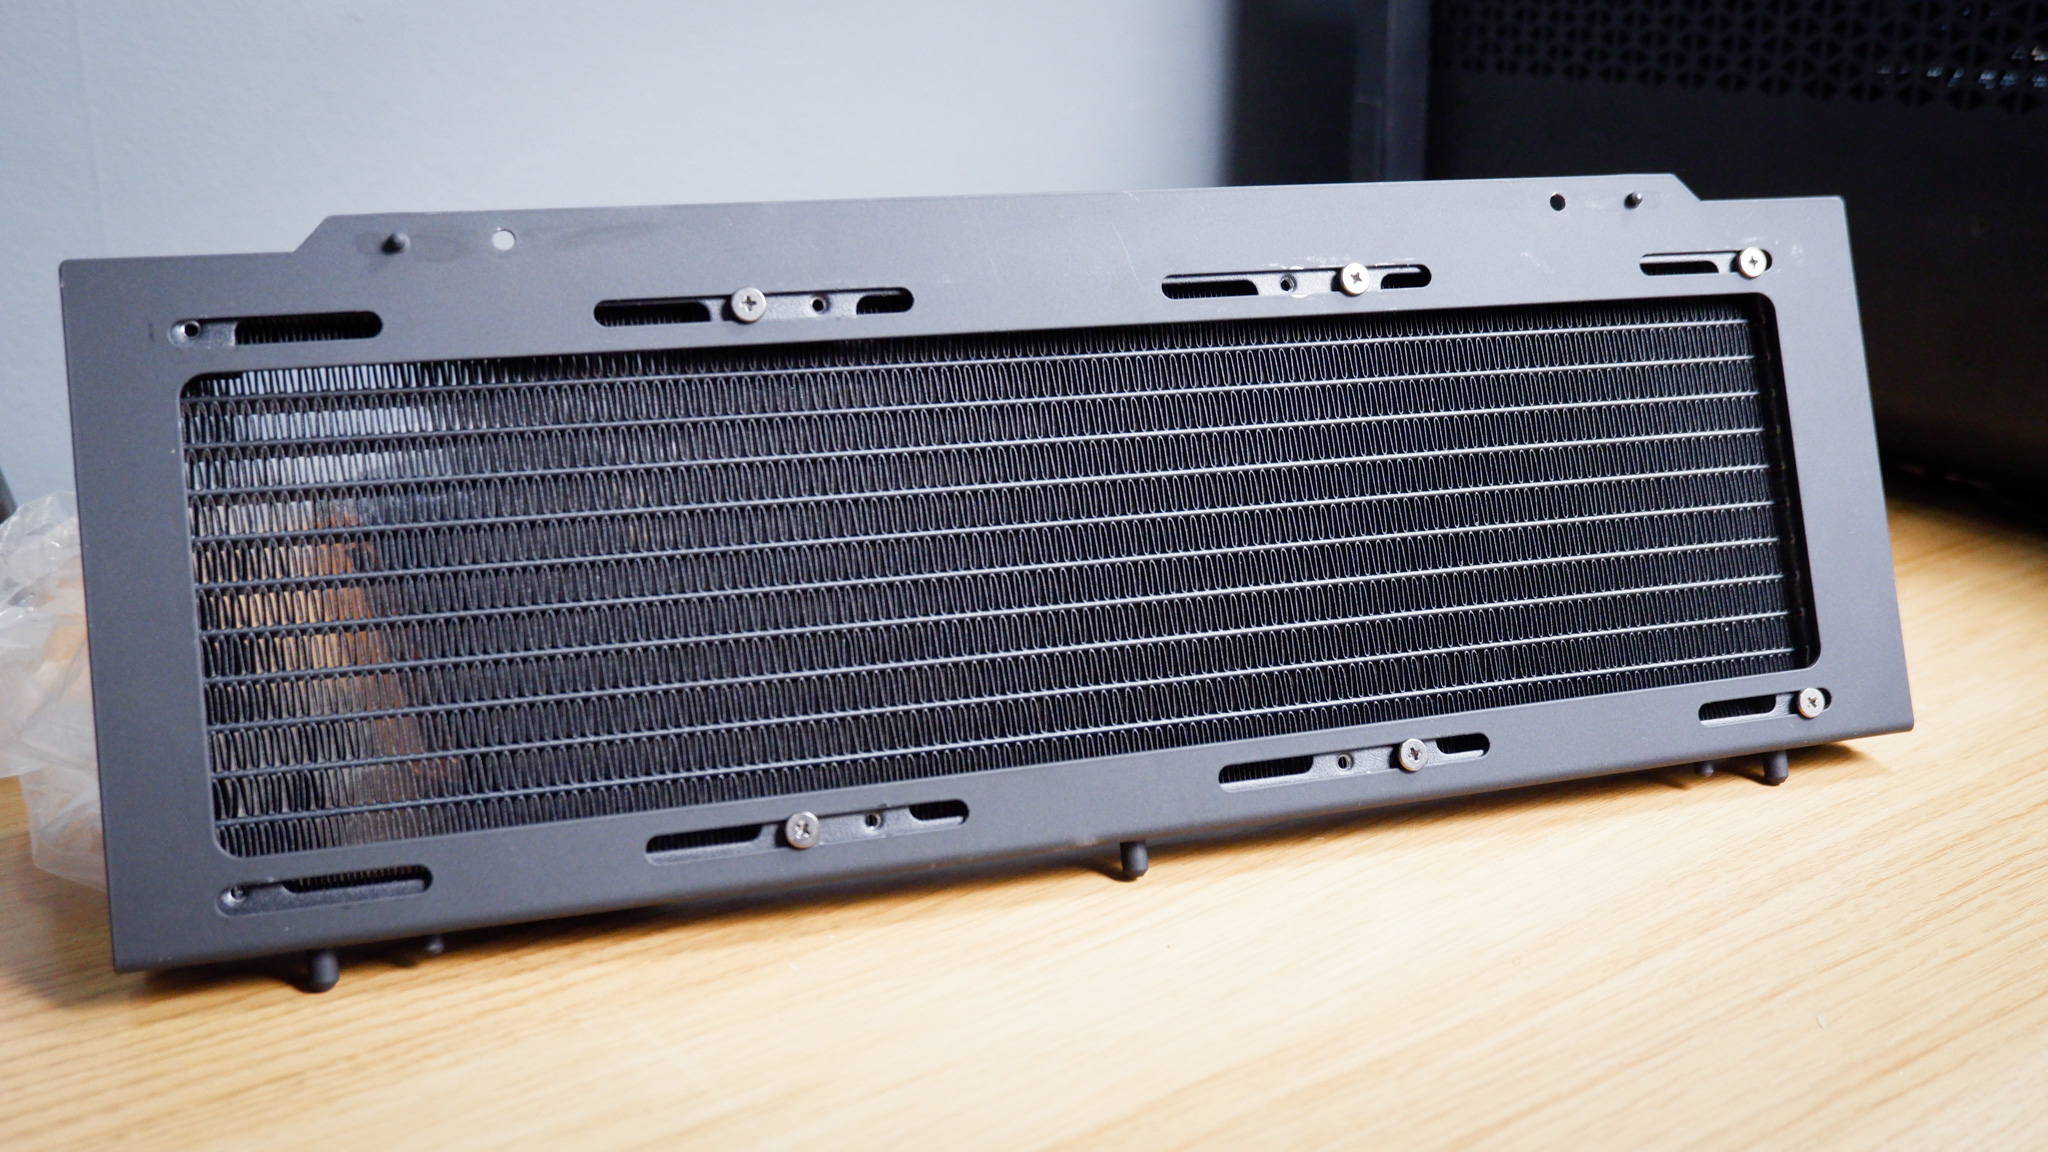
Install the all-in-one cooler
Next up, the cooler. The Maestro chassis comes with a removeable plate to make this easy, which is held in place with a couple of thumbscrews.
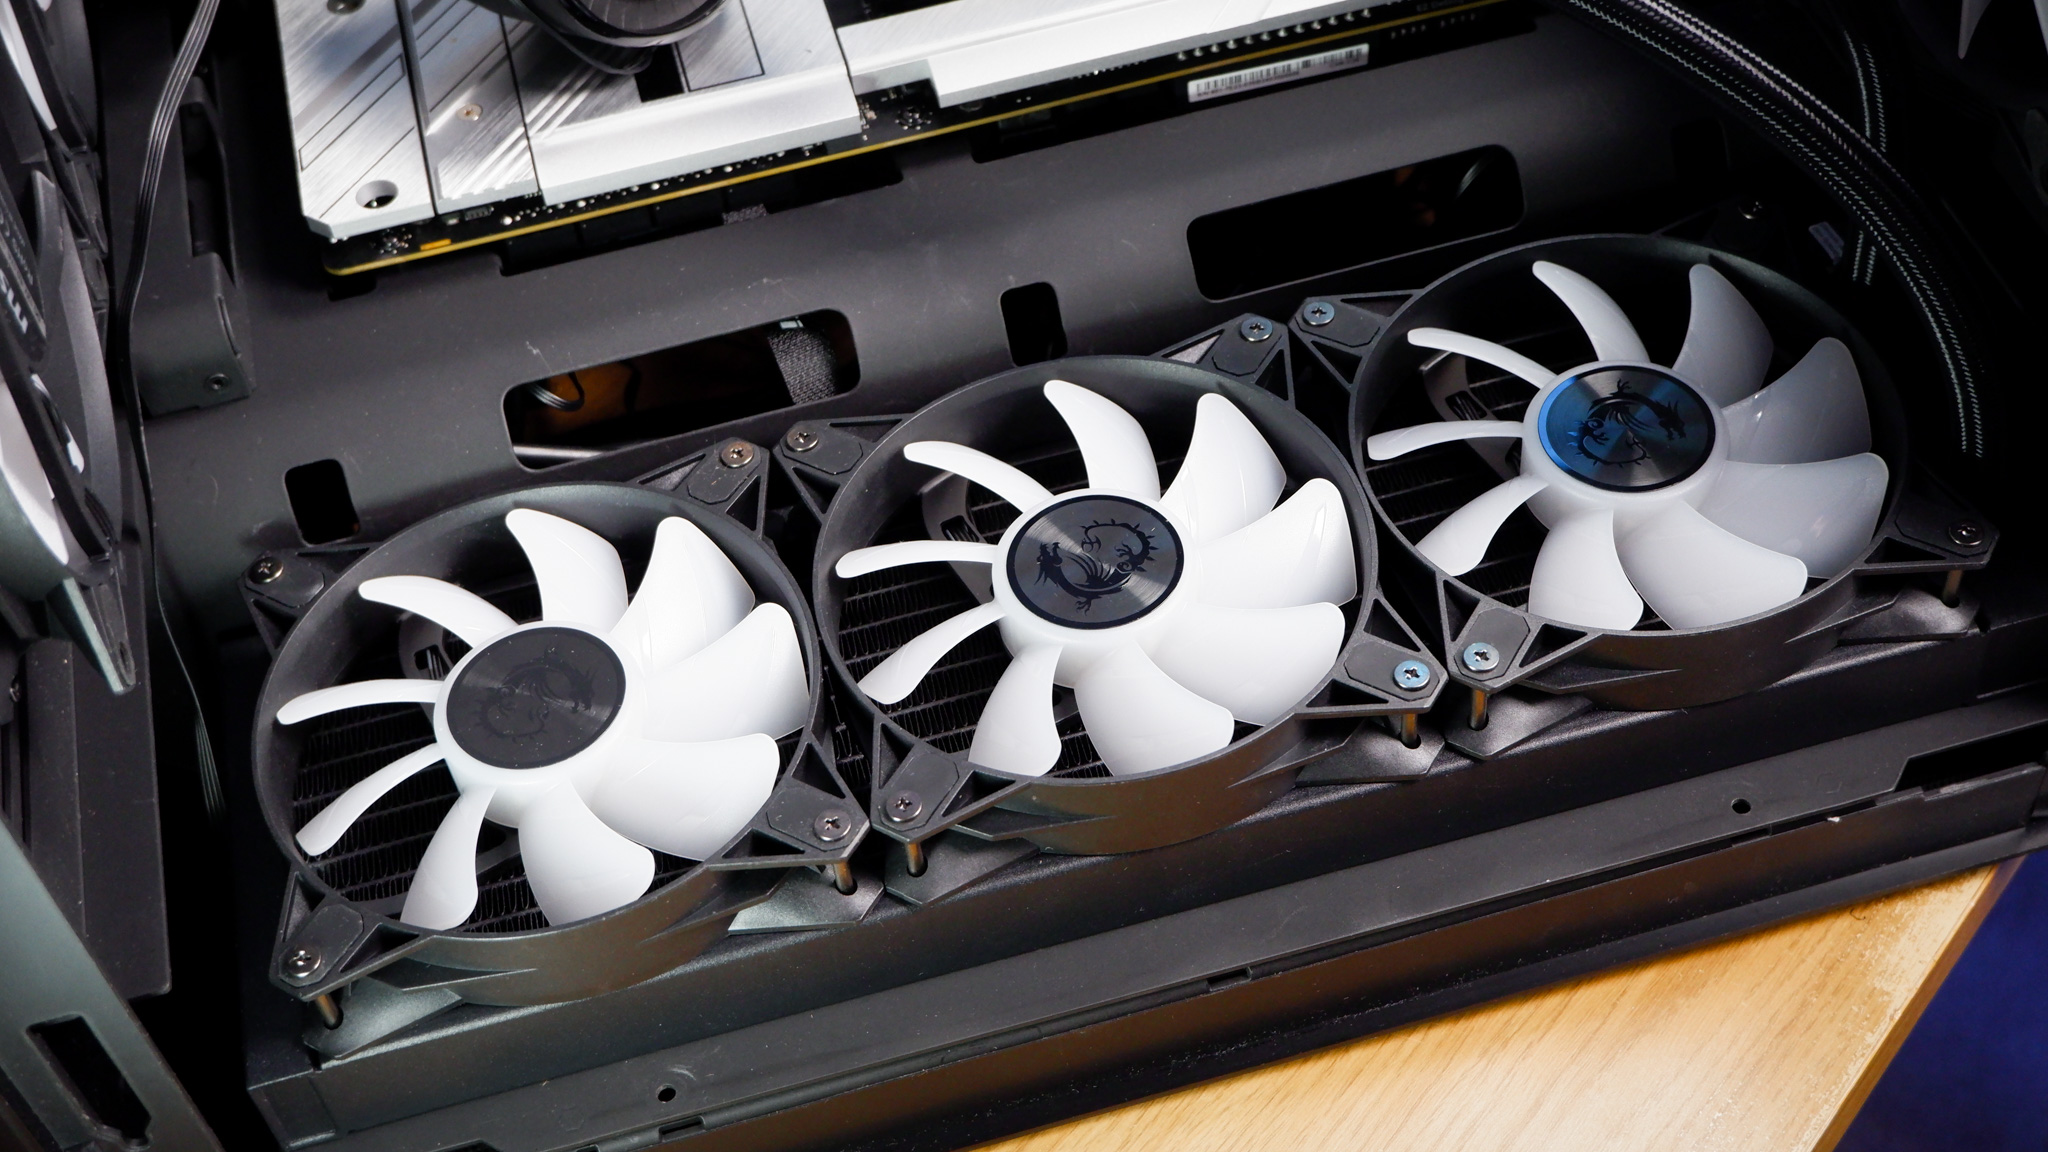
Cooling, sorted
With the cooler attached to the plate, it can be swiftly attached to the case. Each fan included here comes with two cables, which I've fed through the included cut-outs.
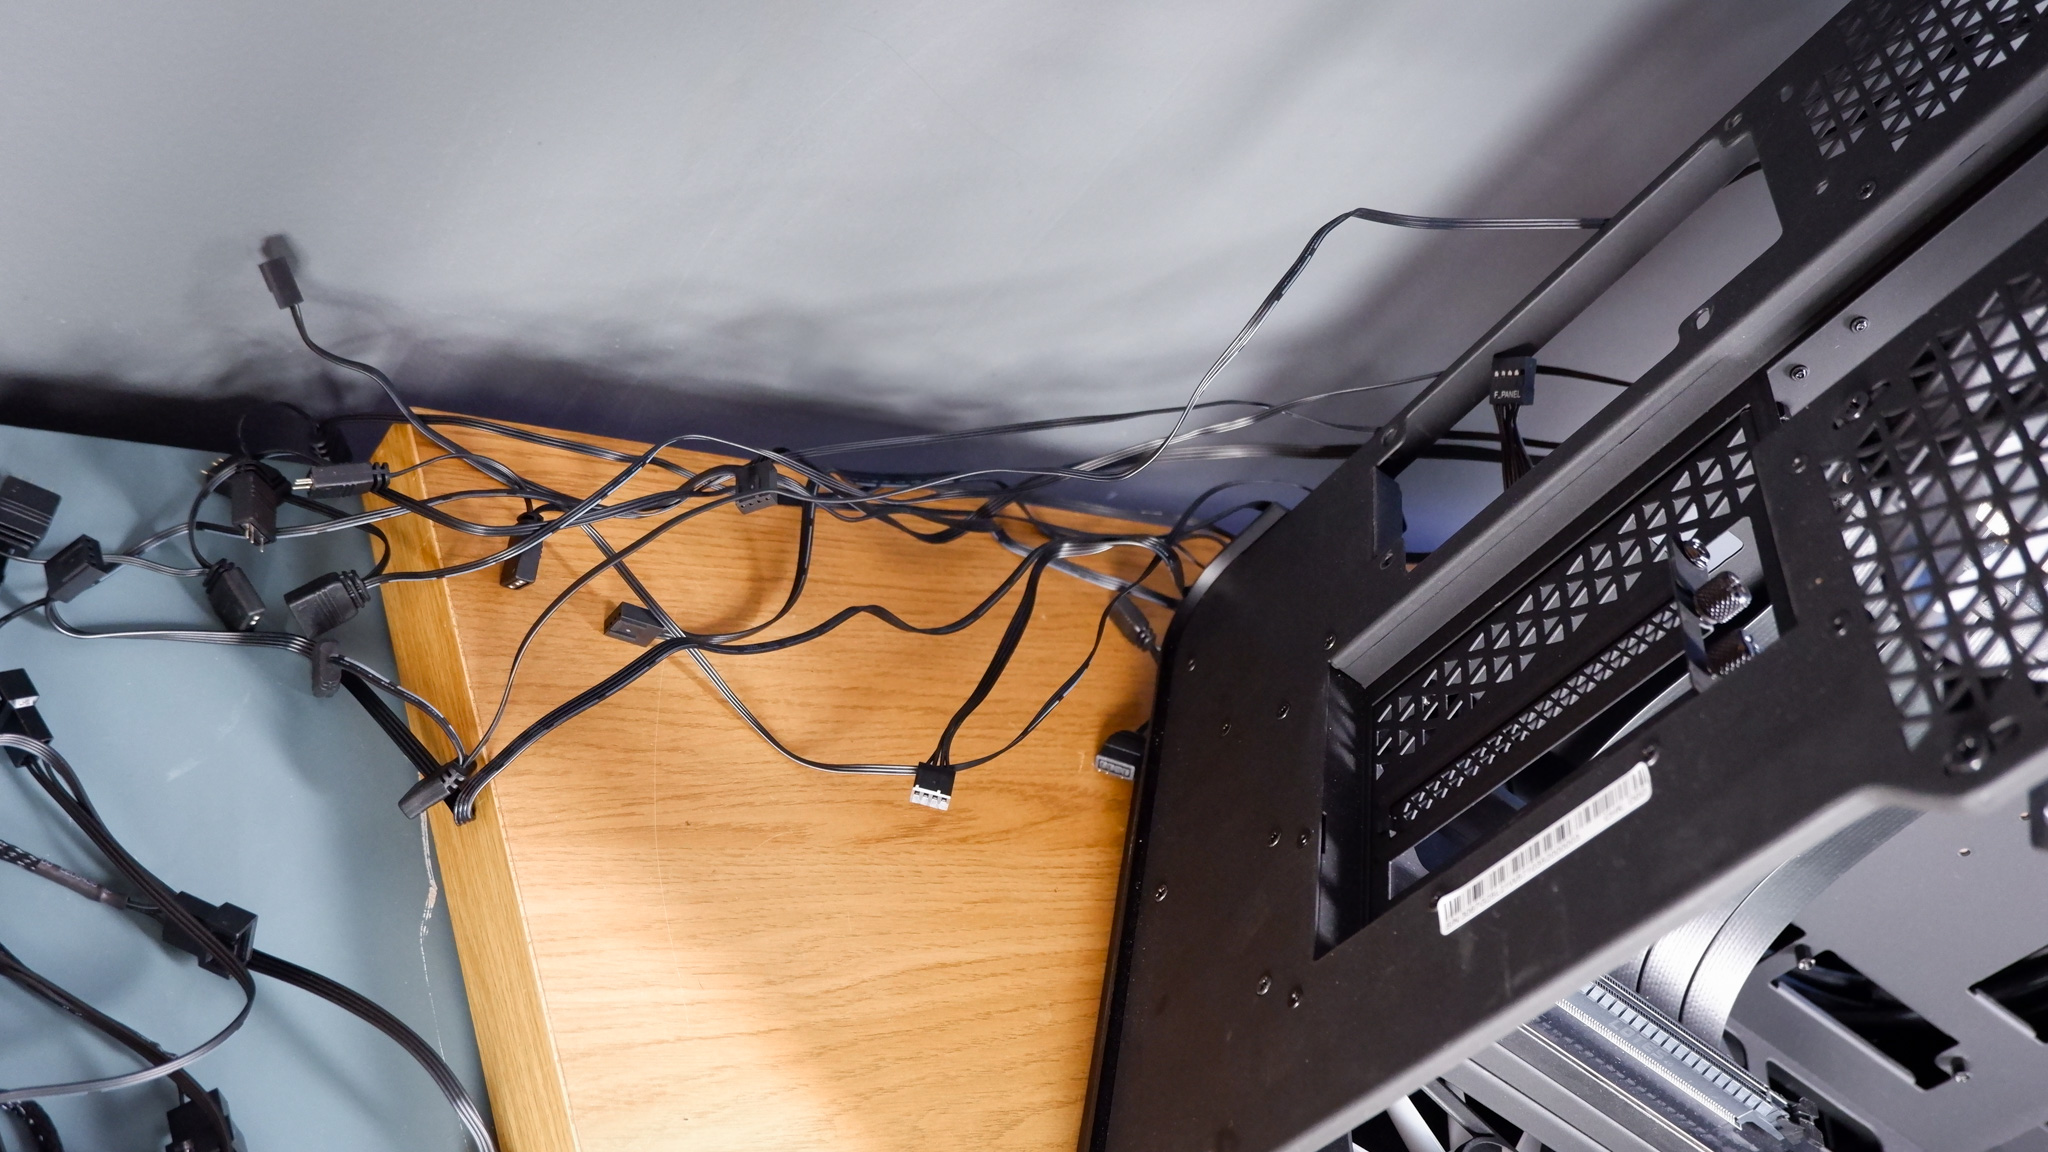
Behold, my mess
With the rear panel removed, you start to see the mess of cables that begin to gather in the rear with every added fan...
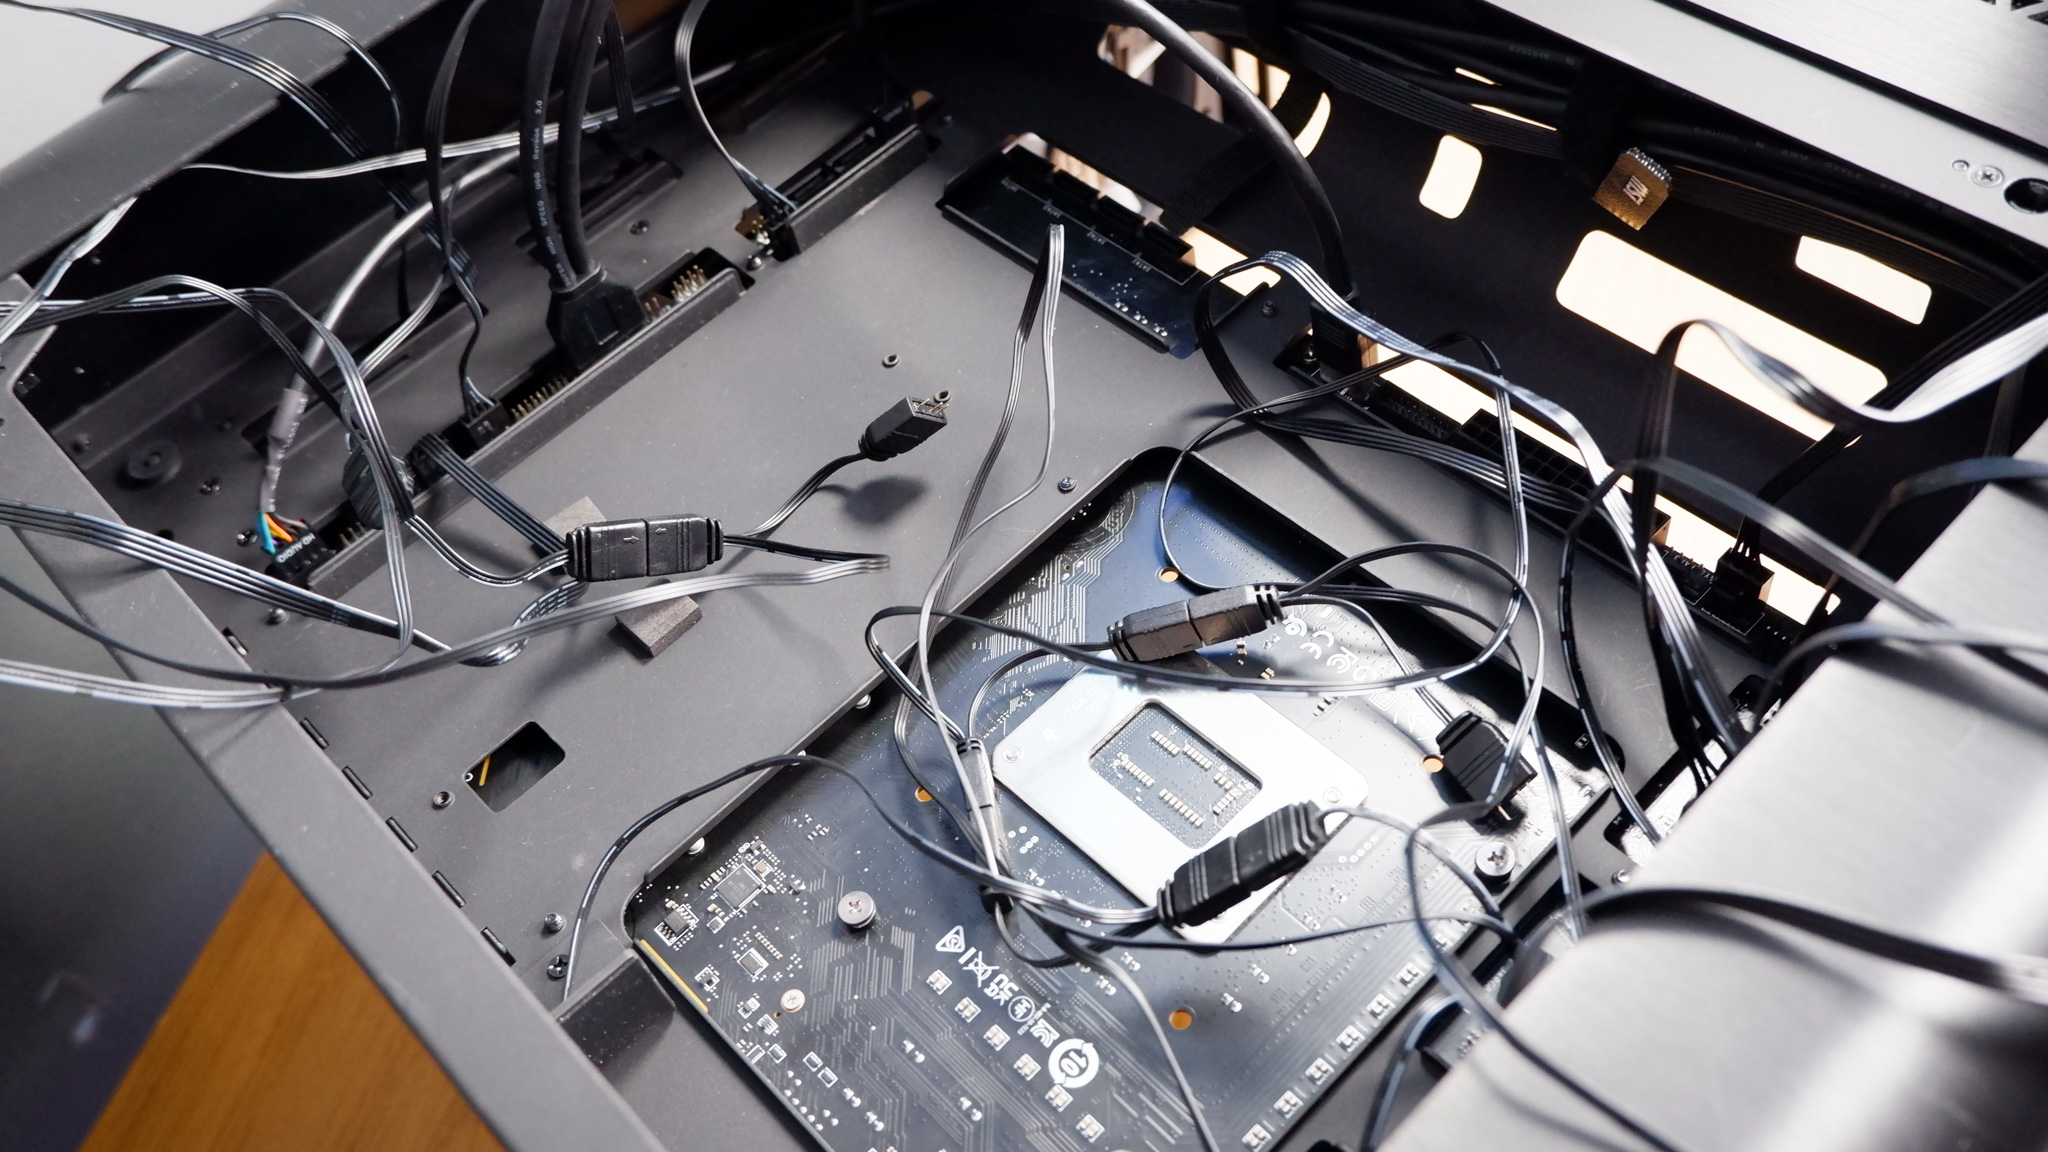
A closer look...
Starting to connect up some of the RGB cables on the MSI MPG F120 ARGB fans here... luckily there are lots of fan headers on the rear of the motherboard for the actual PWM connections.
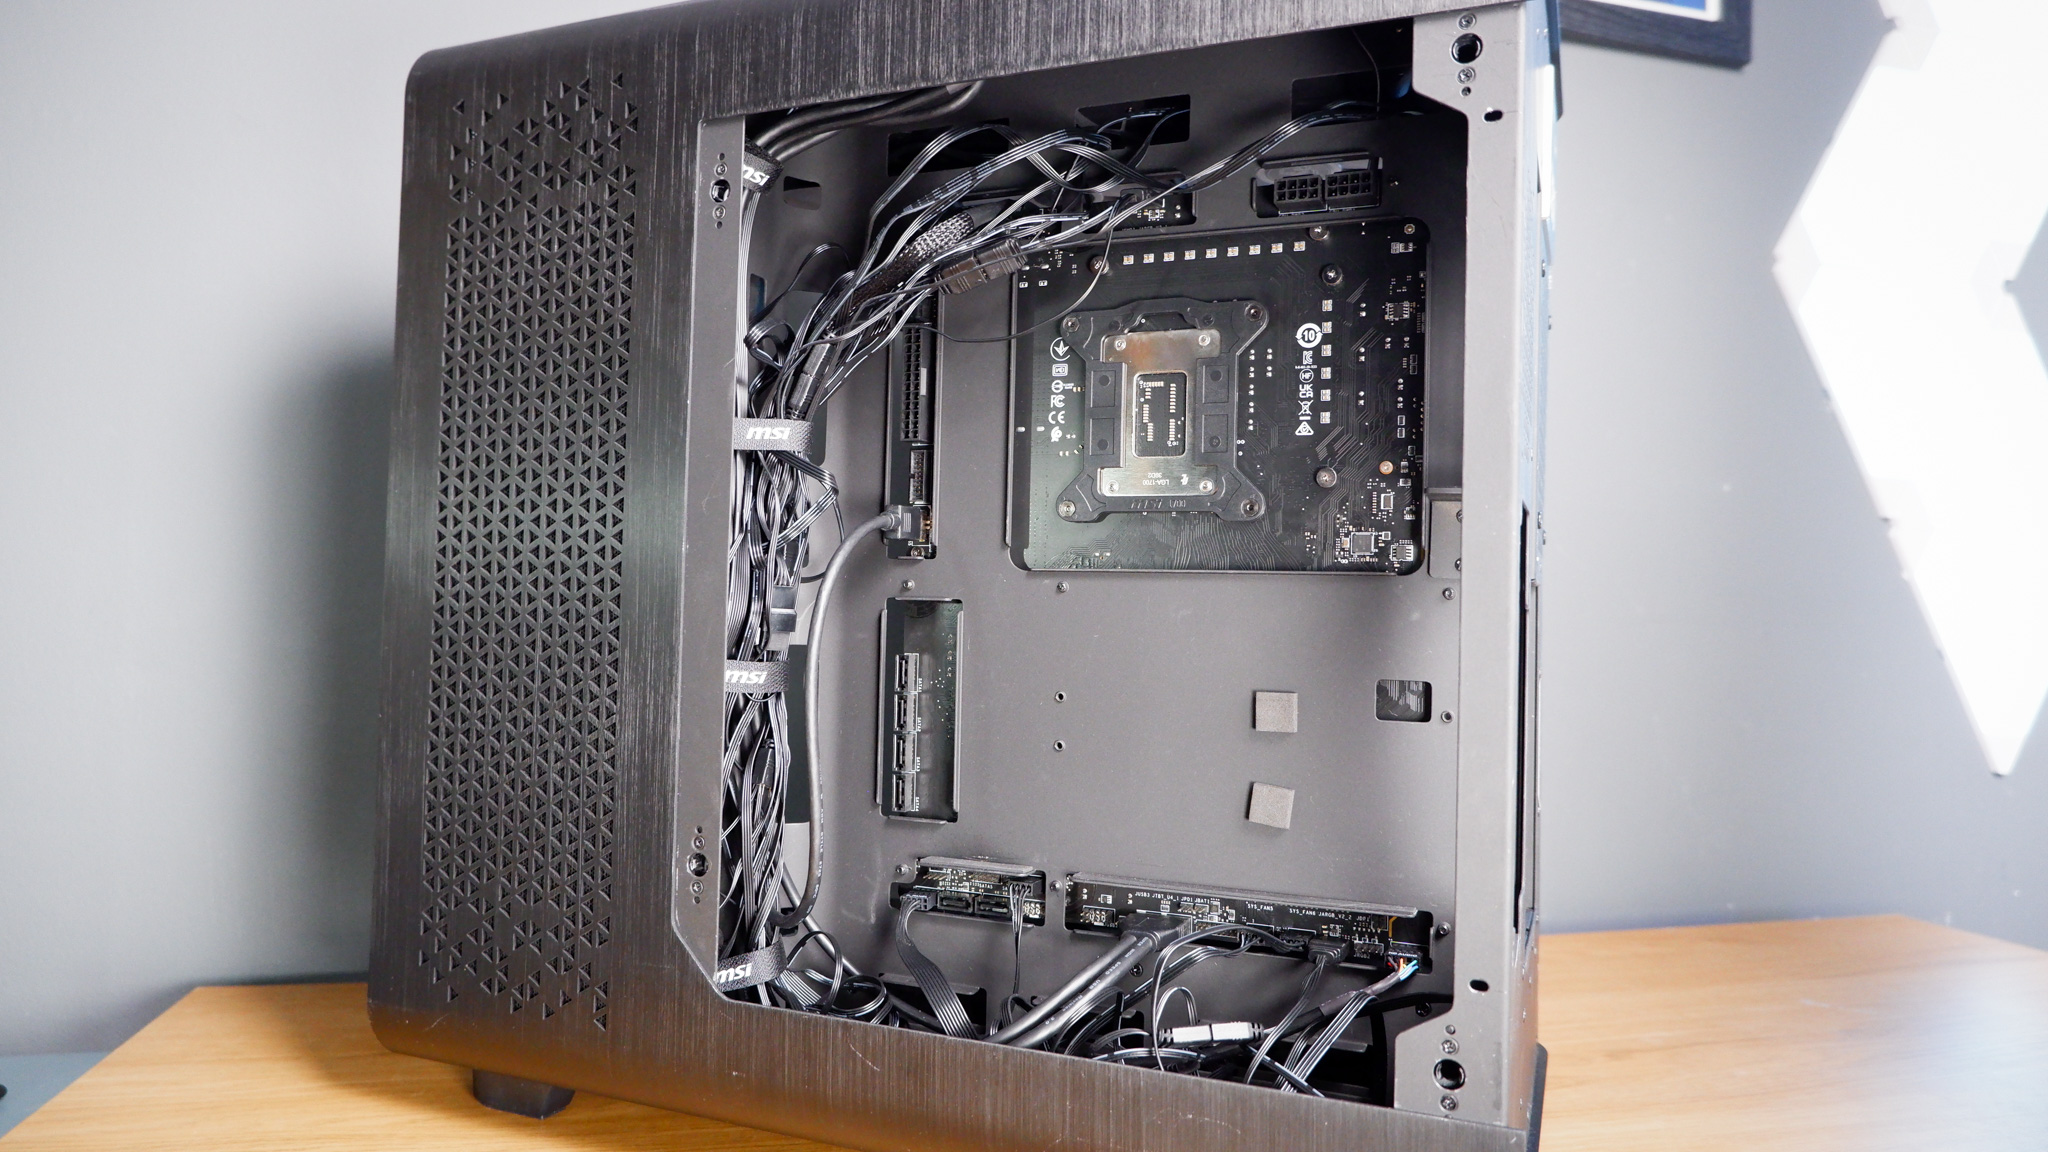
First tidy up
Before the PSU is installed, I've tidied up just a few of the cables and made an effort to keep the rear clean...

And it's a mess again
The MSI MAG A850GL PCIE5 PSU, while modular and pretty compact, makes a bit of a mess of the rear of the case. However, it was easy to reach in and bundle it together.
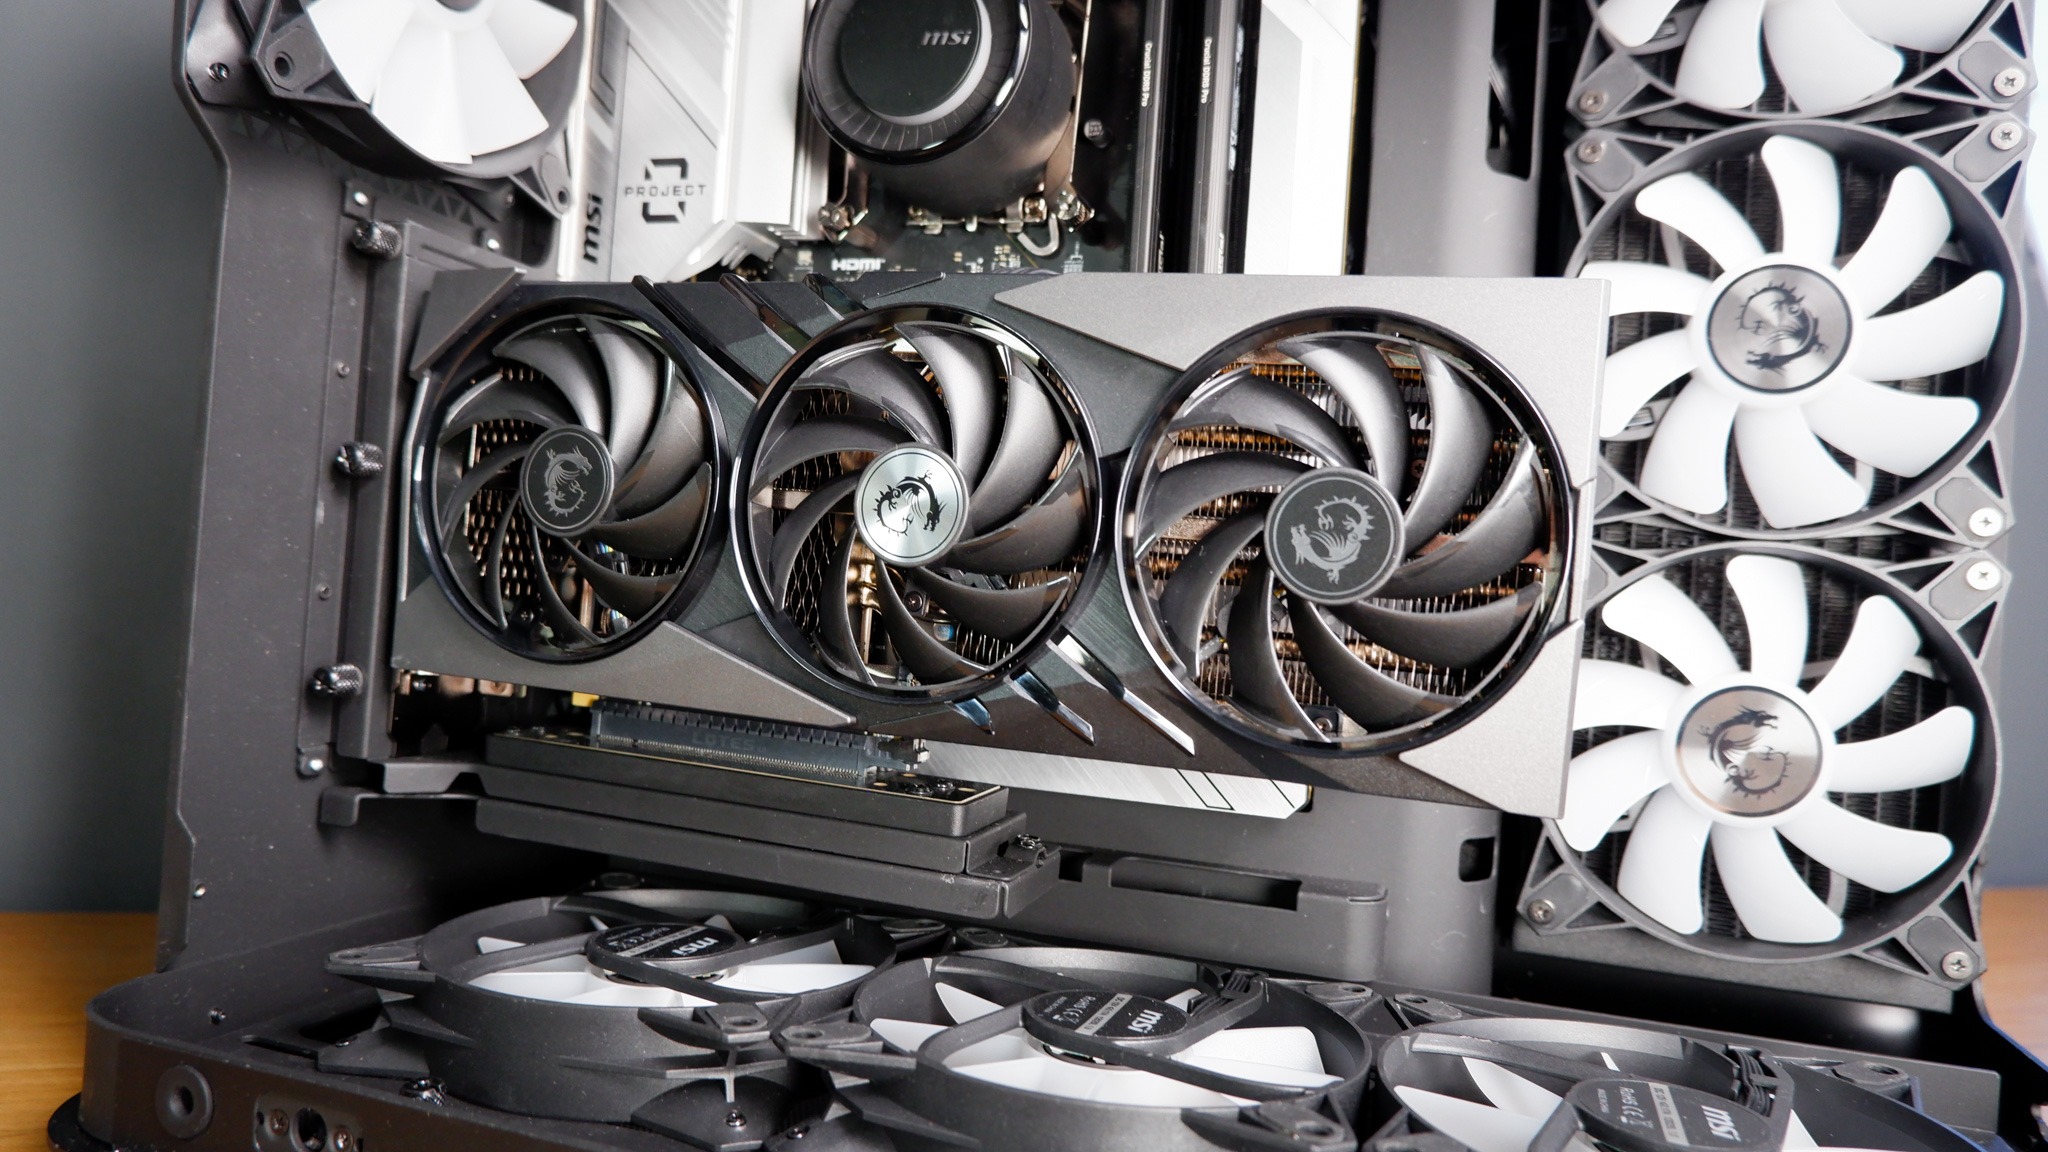
Last step, the GPU
The GPU sits inside a vertical bracket, which holds the PCIe 4.0 riser cable. This is pretty stable, to ensure a good connection, but the thumbscrews help keep the card firmly in place.
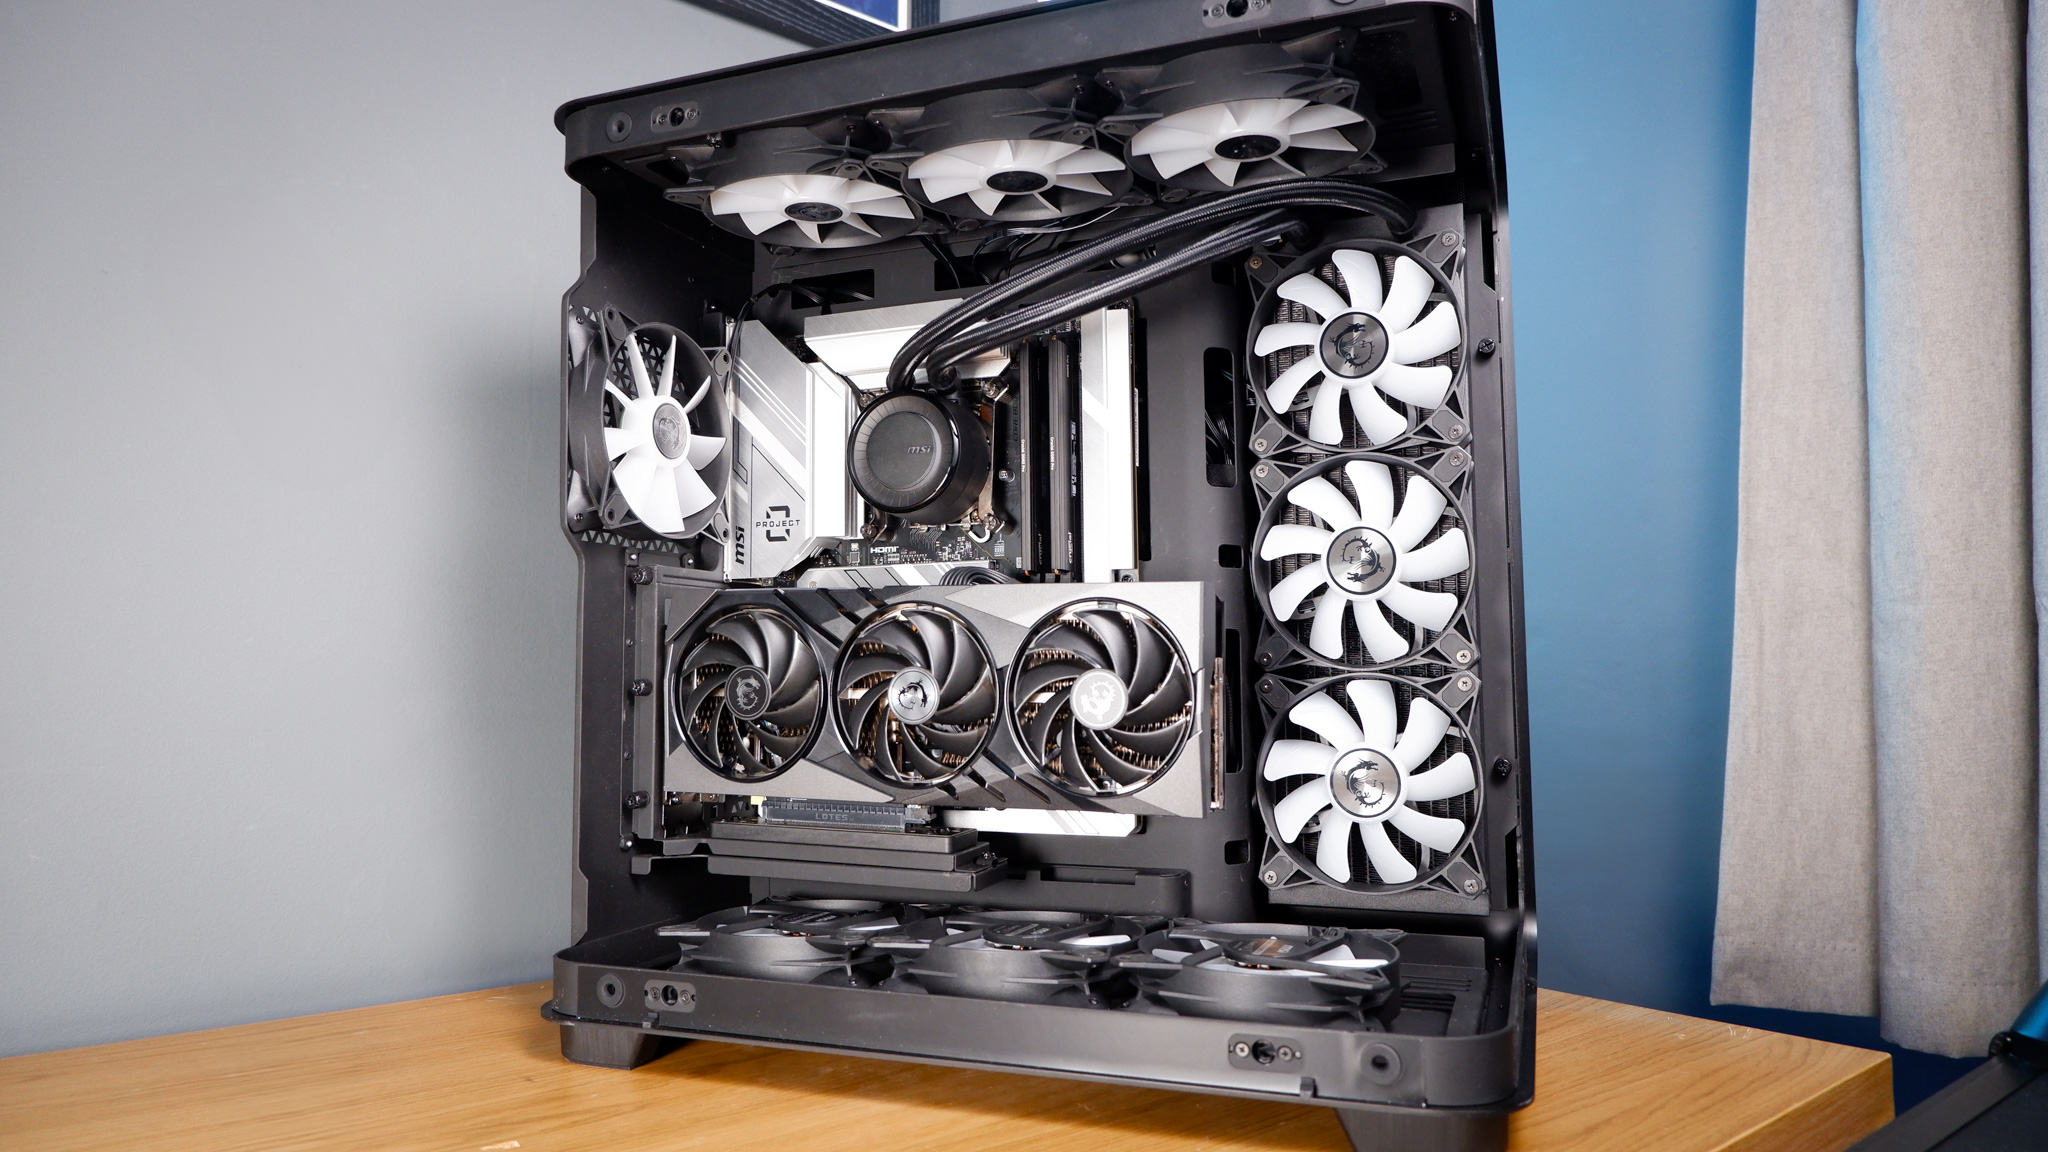
And there it is...
That was... easy? Yeah, I'm pretty much ready to take this PC for a spin in testing now.
The performance
The conclusion
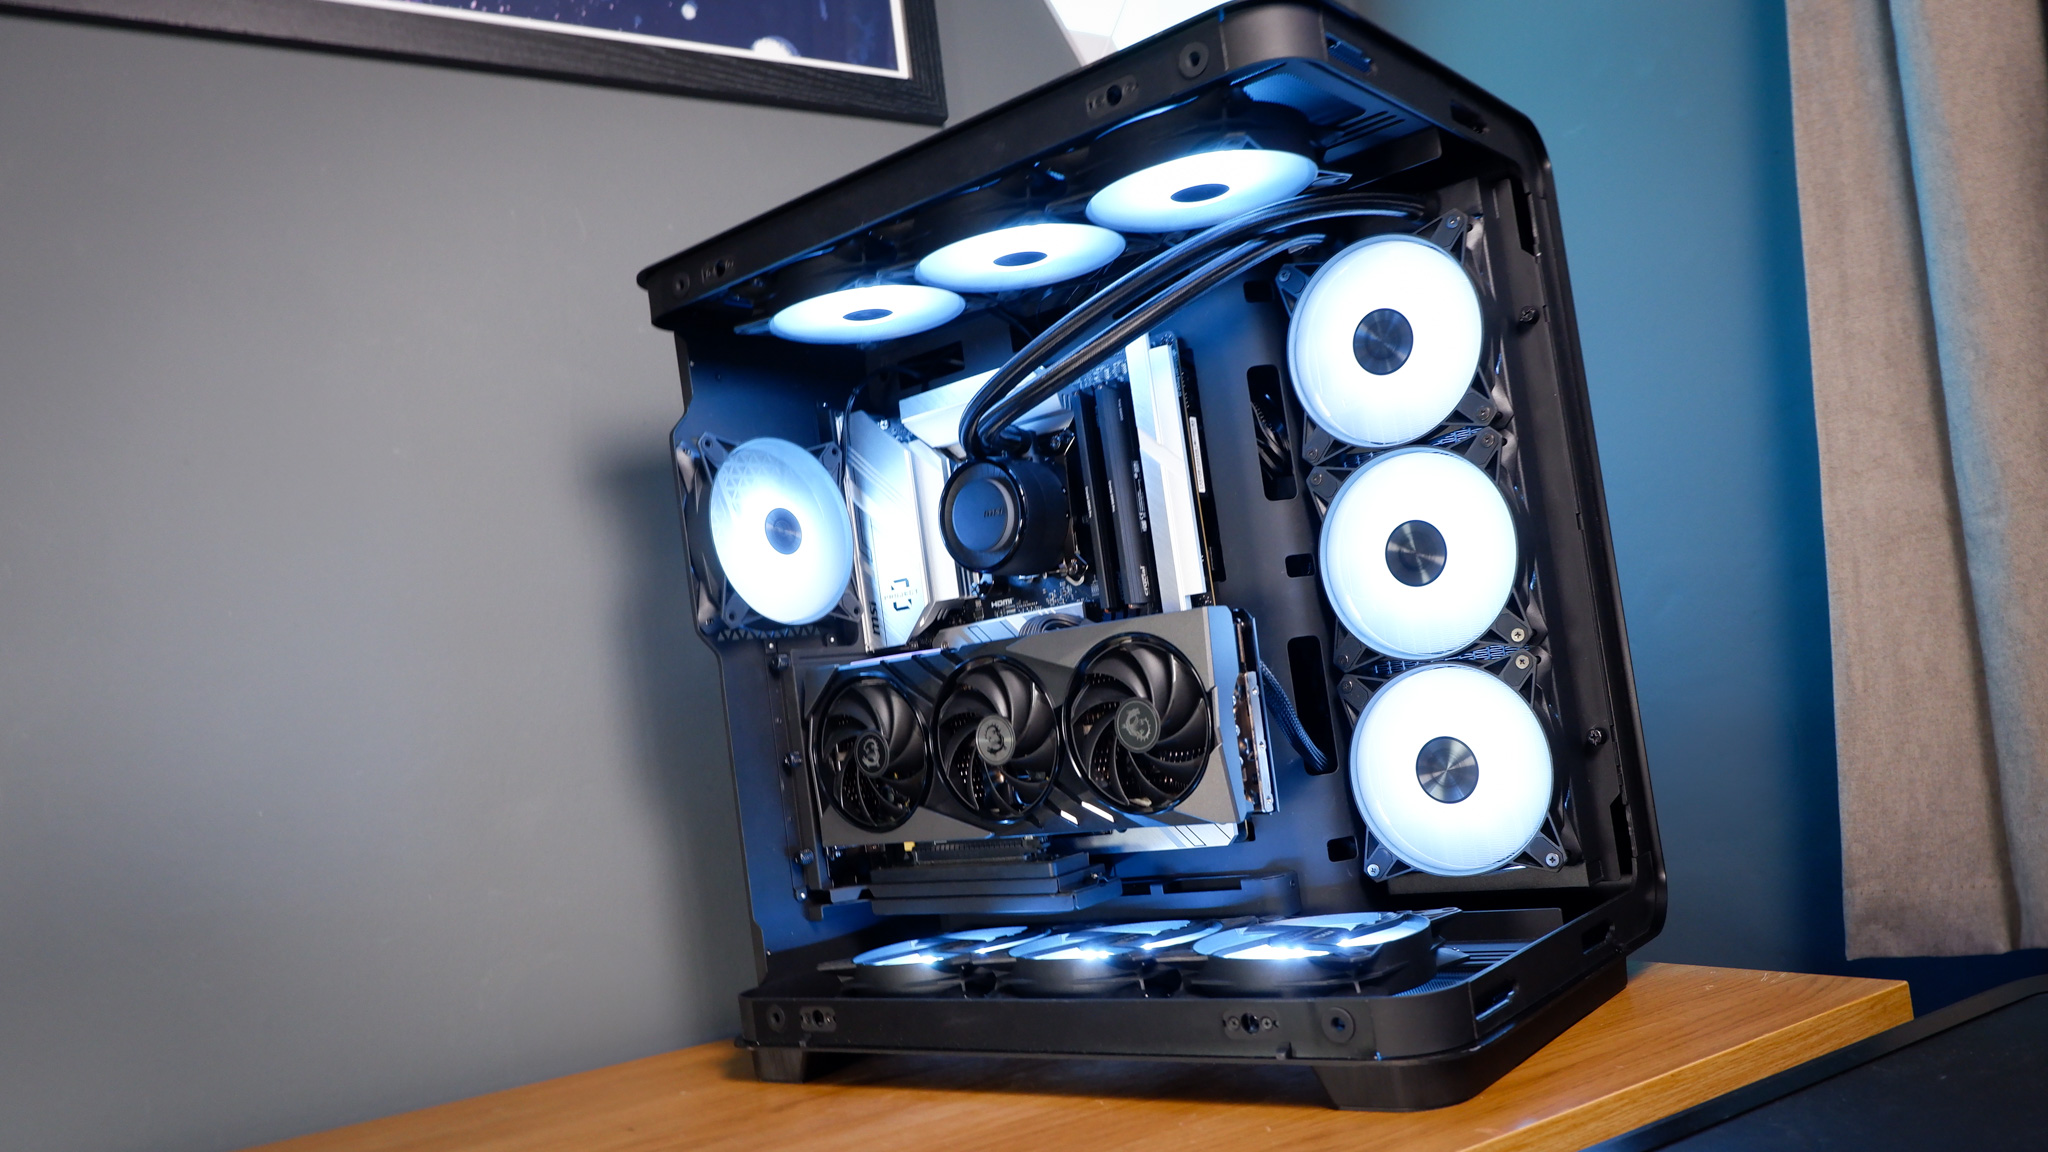
I'm excited by the prospect of a cable-free computer—even one with the cables simply neatly hidden around the back. MSI's Project Zero parts get me some of the way there, though I feel an overwhelming need to get rid of the one remaining cable feeding the GPU. That's something neatly dispatched with Asus' competing system, BTF, which includes a specially crafted connector on both GPU and motherboard to deliver power, but also requires a specially crafted graphics card to work as intended.
As I said last year, I had begun to believe that motherboards with hidden connectors would be the PC hardware trend that actually caught on. I'm admittedly less confident in the short-term success of the system, but overall still pretty rosy on the general concept's longer-term success. At the time it had looked like case manufacturers were jumping on board with compatible cut-outs, but while that's still true, we've lacked the real ecosystem of motherboards and components to get the ball rolling.
That might change with Project X but more so the cheaper Tomahawk motherboards that are on the way with Back-Connect support. If we can rustle up some AMD-compatible boards and what looks to be a healthy, growing ecosystem of parts, I'll jump on the chance for my next gaming PC build. As in, my personal PC—sadly this MSI build's days are numbered.

Jacob earned his first byline writing for his own tech blog. From there, he graduated to professionally breaking things as hardware writer at PCGamesN, and would go on to run the team as hardware editor. He joined PC Gamer's top staff as senior hardware editor before becoming managing editor of the hardware team, and you'll now find him reporting on the latest developments in the technology and gaming industries and testing the newest PC components.
