Getting Started With KODI(XBMC)

Get the most out of your HTPC with KODI
It may have started as a media center for the original Xbox, but KODI (formerly XBMC ) has since evolved into a full-fledged application with a huge library of add-ons generated by diehard fans and users. Available on pretty much every platform you’d want to install it on—Windows, OS X, Linux, Android, iOS, and more—it’s a stellar way to get all of your content onto a big screen without having to deal with a mouse and keyboard, unless you want to.
Before you get started, it’s important to realize that KODI might not be the best option if you rely heavily on streaming services like Netflix, Spotify, or Amazon Instant Video. Most services aren’t officially supported and have flaky implementations that don’t always work. The point of an HTPC, after all, is to make it easier for you to consume media.
Installation and Setup
The first step is getting KODI downloaded and installed. Head on over to the KODI website and download the version that’s appropriate for your hardware.
If you don’t have old hardware lying around to use as an impromptu home theater PC (HTPC), building or buying a dedicated HTPC isn’t a bad idea. With options like the KODI-compatible Raspberry Pi starting at only $25, you can get a decent system up and running without breaking the bank— unless you want to .
The ideal HTPC is small, quiet, and suitably fast. You don’t need the latest and greatest hardware, but having a processor capable of playing 720p or 1080p video is essential. Hard-drive space is another key component if you aren’t going to stream content online or over your local network.
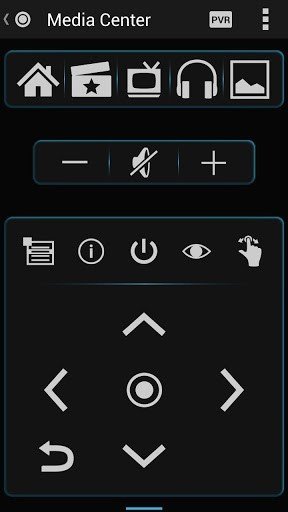
Alongside the computer, you’ll want some sort of remote control. If you’ve got one lying around, you’ll probably be able to get it working with KODI. You’ve also got the option of using your smartphone to control KODI remotely. Official KODI remotes are available on both iOS and Android and are a great way to control playback without resorting to a keyboard and mouse.

Yatse isn’t an official remote, but it does support streaming to your Android device.
The biggest gaming news, reviews and hardware deals
Keep up to date with the most important stories and the best deals, as picked by the PC Gamer team.
That’s not to say that a keyboard and mouse aren’t useful, because a good wireless keyboard with an integrated track pad can be a lifesaver. Having said that, the KODI interface is designed to be navigated with d-pad controls and works best with a remote.
Audio and Video Settings
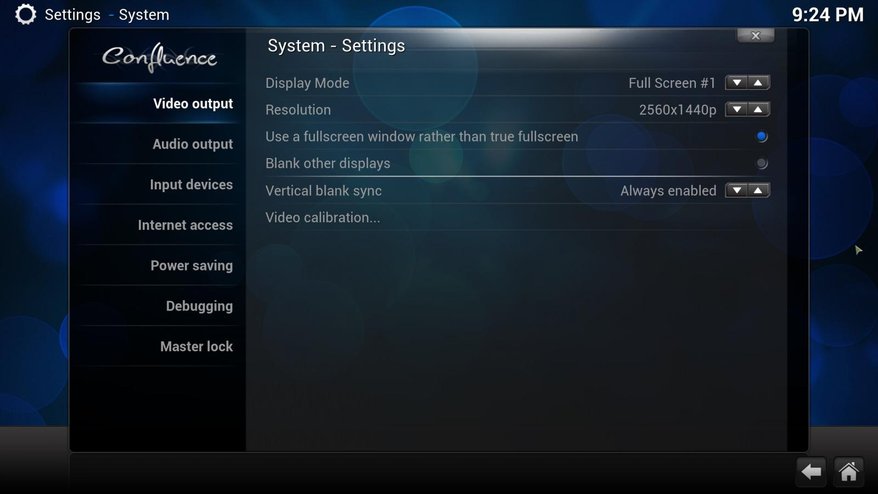
KODI does a great job of setting itself up when you first start it up, but you’ll want to make sure that all of your audio and video settings are correct. Scroll over to the System tab of the home menu and select Settings. Once you’re in the Settings menu, drill down into the System tab on the left to access KODI’s basic settings.

Make sure that KODI is set to an appropriate resolution for your monitor or TV. If you’re running KODI on a system hooked up to multiple displays, you can set KODI to blank other displays and select which screen KODI should be displayed on. Move onto the Audio output tab to fiddle with your audio settings. Here you can choose your audio output, what your speaker setup is, and whether or not your setup supports various technologies—Dolby Digital, DTS, TrueHD, DTS-HD, et cetera.
Importing Your Content
Now that you’ve got KODI up and running, your next step should be to make all of your content available on your HTPC. It could just be a matter of copying over the terabytes of movies and music you’ve collected over the years, or installing an add-on or two to access online streaming services.

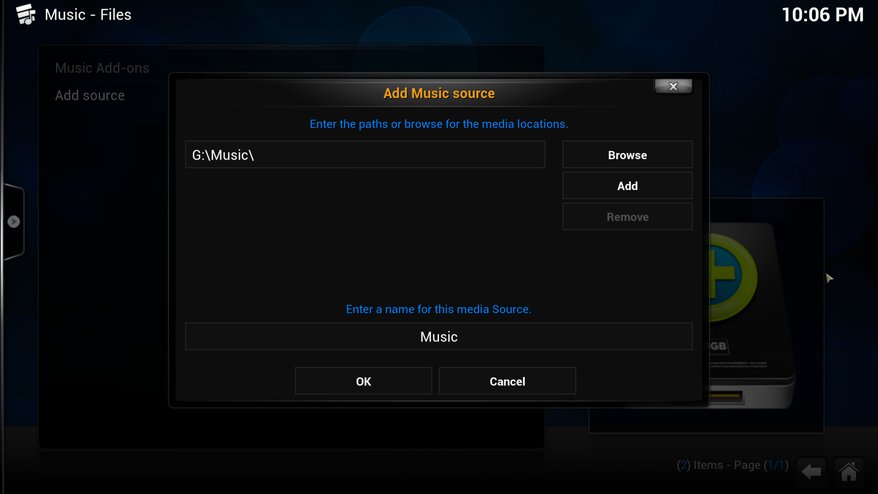
KODI may not find all of your media automatically, but adding new sources is a cinch.
If you’ve got all of your media stored locally, the process is really simple. Drill down into the Music or Video menus and click Add source, browse for the folder containing your music, and add it to the list as a source. With the default skin, click the play button on the bottom-left to access detailed playback controls.
Read-on to learn about our favorite add-ons, services, and skins.

