Best Ranger build in Path of Exile 2
Hunt some heads, get some bread.

Keep up to date with the most important stories and the best deals, as picked by the PC Gamer team.
You are now subscribed
Your newsletter sign-up was successful
Want to add more newsletters?
Lightning Arrow Deadeye is one of those rock solid builds that's almost always a decent leaguestarter in Path of Exile 1; a tried and true setup that's zoomie, fun to play, and efficient. Its sister here in Path of Exile 2 is similar—strong for leveling, great for mapping, and if you really wanna put the time and currency in, a truly disgusting breach farmer.
That's the version of the build we'll be focusing on today. I'm going to assume you mostly know about the endgame, have at least one character in maps, and know how to farm a bit of currency. This is a great build to transition into if you already have a Deadeye in the endgame and you want to take your currency farming to the next level, or want a project that will net you excellent returns.
One improvement to this build in the sequel is its ability to deal with bosses. This is something that Lightning Arrow Deadeye traditionally struggles with, but you will absolutely melt all pinnacle bosses with this character. Mechanics? Who said anything about mechanics? By the time the Arbiter of Ash is done monologuing, he's super dead.
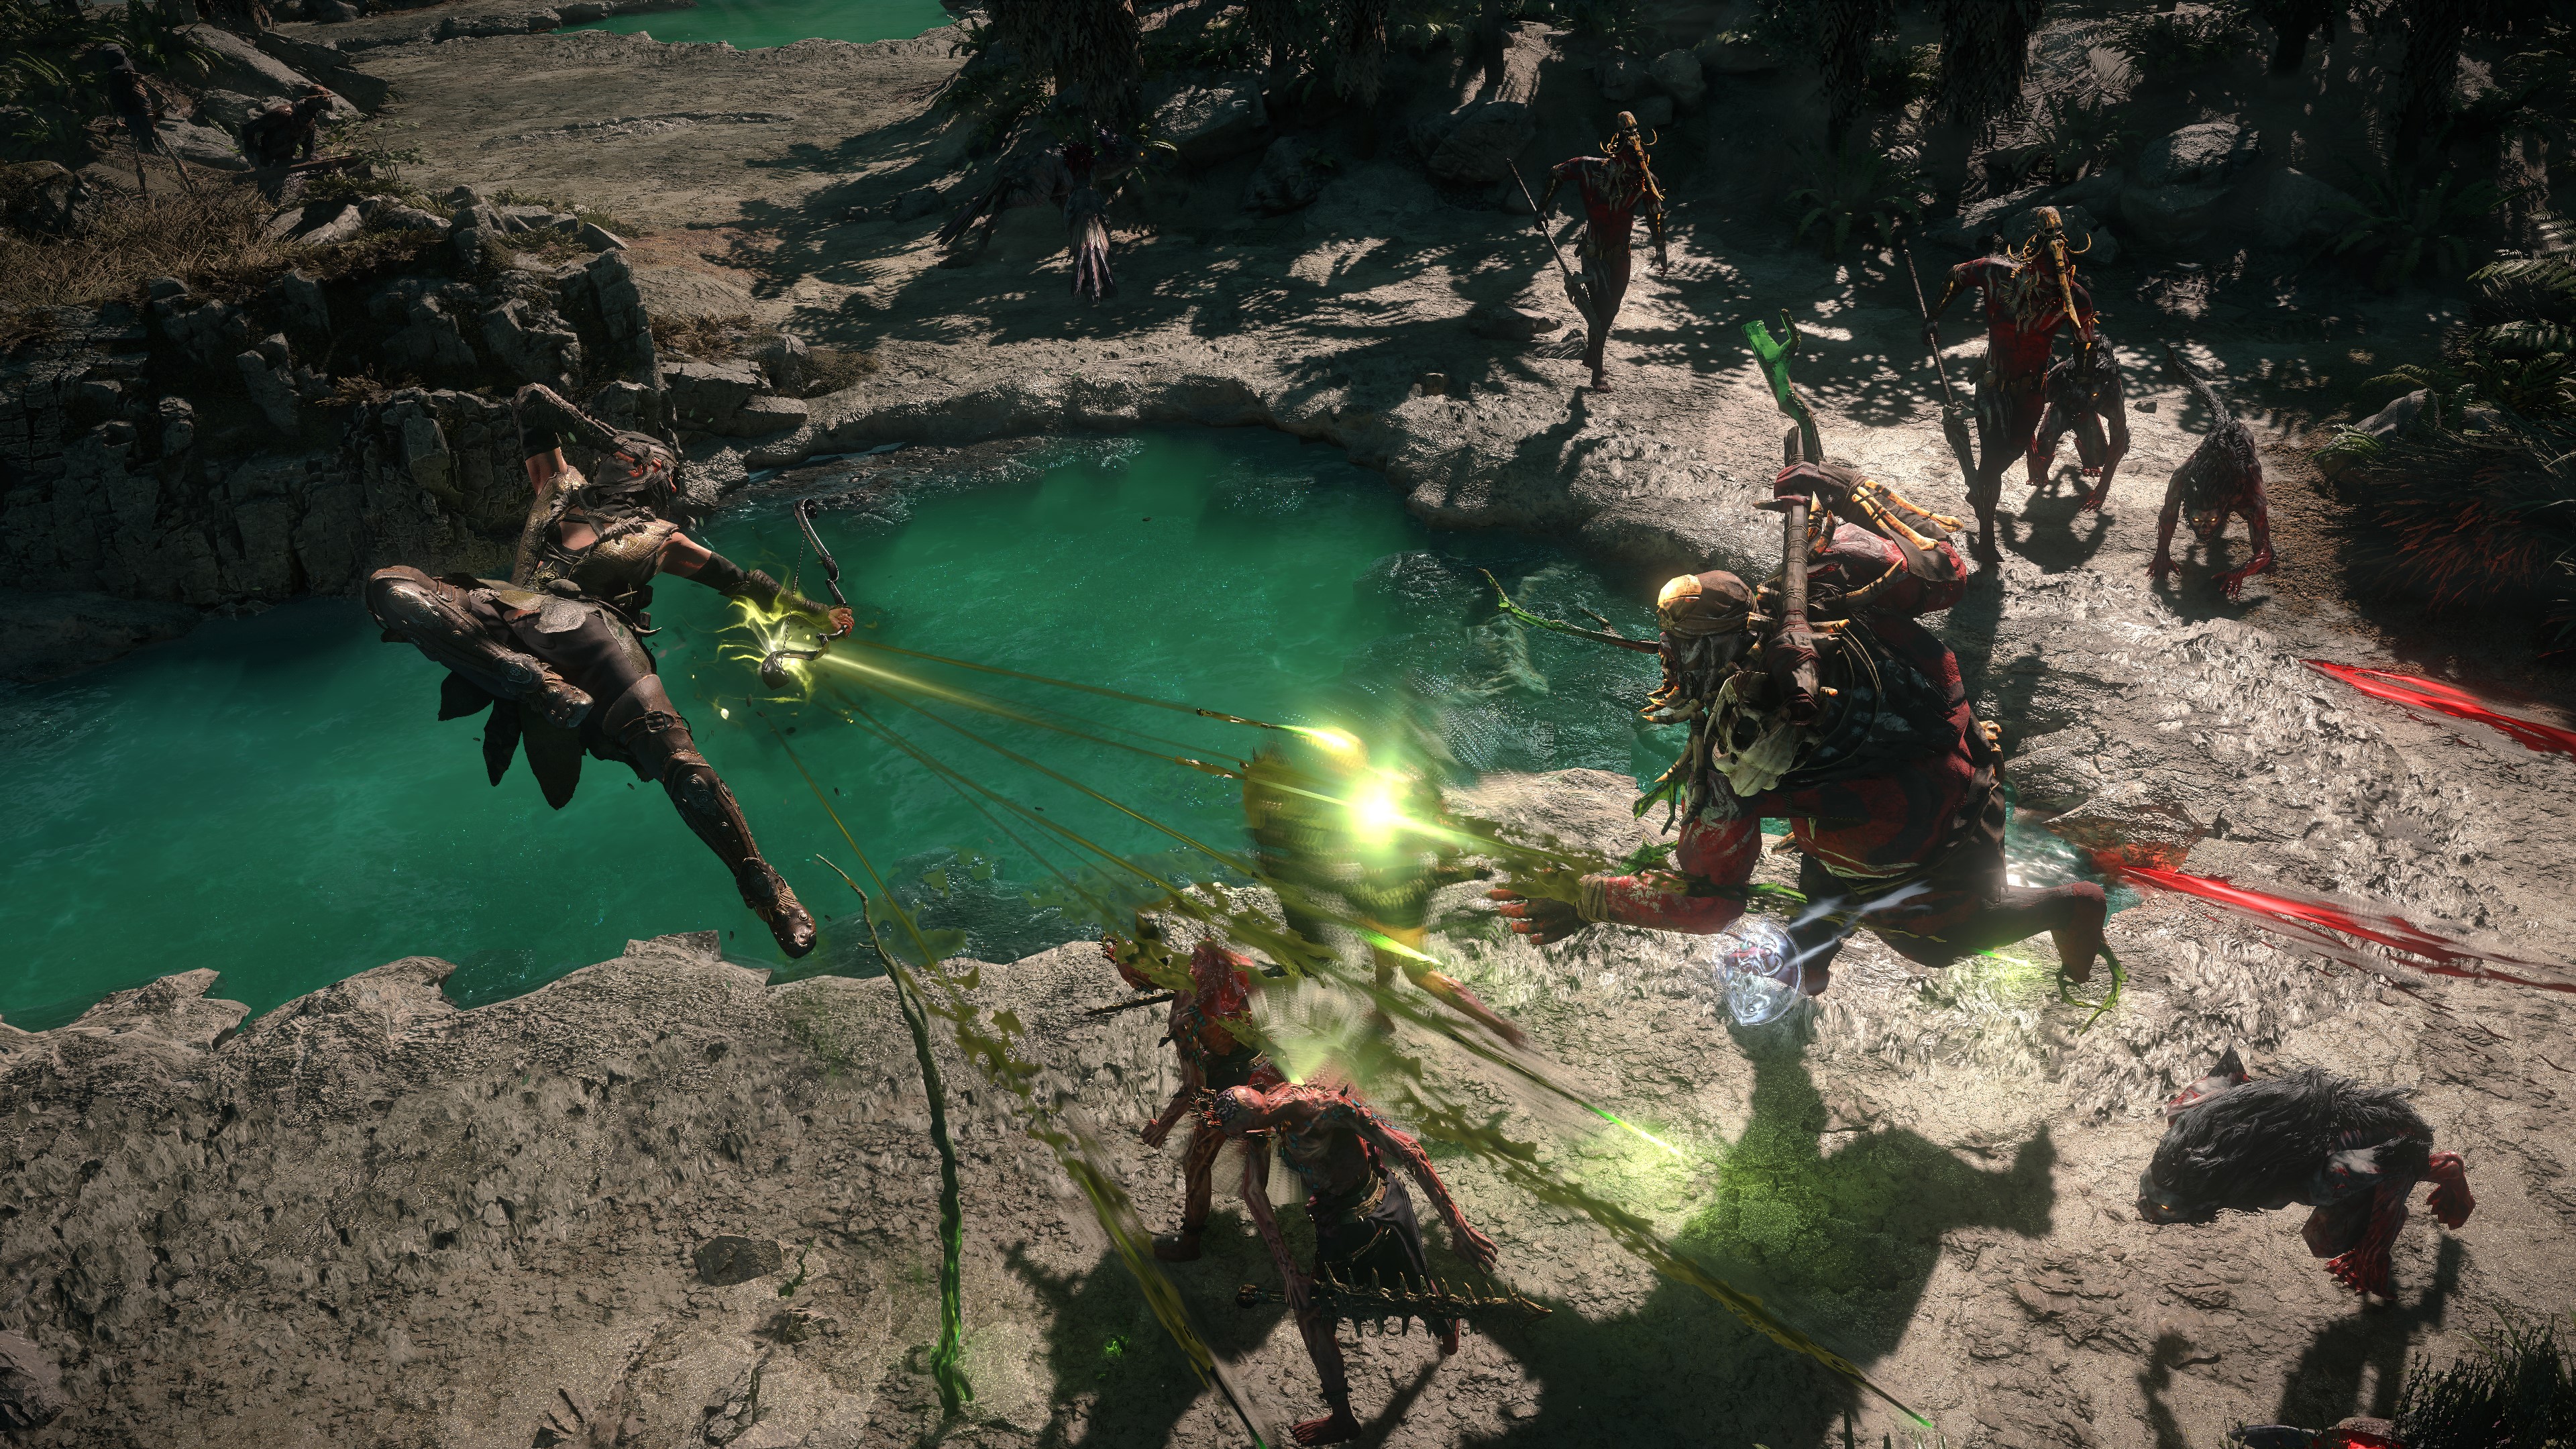
For stuff that isn't bosses, we primarily use Lightning Arrow as both our damaging skill and a way to trigger Herald of Thunder and Herald of Ice. These two skills interact with one another deliciously, exploding whole screens of monsters at a time—perfect for those juicy juicy breaches.
Path of Exile 2 Sorceress build: Making magic
Path of Exile 2 Monk build: Flow like water
Path of Exile 2 Warrior build: Shock and awe
Path of Exile 2 Witch build: Summoned army
Lightning Arrow Deadeye
I'm basing the build on Fubgun's excellent Mobalytics guide, and you can watch the video above for his "budget" version. It may seem a little wacky to think of 26 divines as a budget build, but compared to his final version it's pretty cheap. You can also get started for much less than that, and once you're farming breaches, the currency comes quickly.
Key skills
Lightning Arrow is the meat and potatoes of the build, and you get it on the Riverbank right at the beginning of the game. It'll convert some of our physical damage to lightning (more on that later), and shoot some chaining beams at nearby enemies. This, combined with Lightning Rod, is basically all you'll need for mapping.
Note that this is not a leveling build! You'll want to swap to this setup when you're ready to start tackling t15s and your character is somewhere around level 90. Fub's got a leveling build posted as well, if you need it.
Keep up to date with the most important stories and the best deals, as picked by the PC Gamer team.
Lightning Arrow
- Martial Tempo: Supported skills have 25% more attack speed
- Ice Bite: Gain 35% of damage as cold damage for 3 seconds on freezing an enemy with supported skill
- Overcharge: Supported skills have 50% less shock duration, but 75% increased magnitude of shocks
- Primal Armament: Supported skills deal 25% more weapon elemental damage
- Inspiration: Supported skills have 40% less cost
This is probably a good time to talk about cold damage. Ideally you'll want our Lightning Arrow to be capable of both freezing and shocking, thus proccing both Heralds. Using infusions they'll then also trigger one another, resulting in devastation.
There are a few ways to get cold damage but the best is making sure you get enough flat cold on your bow, quiver, and rings. You can anoint your amulet with Essence of the Mountain, which is an excellent, albeit a little costly, option. If you really want to spend some currency go for an Against the Darkness jewel with "notable passive skills in radius also grant gain 2% of damage as extra cold damage" (4d at time of writing). Put it in between Unbound Forces and Kite Runner.
Martial tempo makes the skill feel cozy, and Inspiration is there to make sure we don't blow through all of our mana. You'll also want to make sure to get either a chonky mana on kill roll somewhere or a % mana on kill jewel. Potentially both if possible. Make sure to upgrade the quality of this early since the extra beam helps a lot.
Lightning Rod
- Scattershot: Supported skill fires 2 additional projectiles, but deals 20% less damage and has 20% less attack speed
- Concentrated Effect: Supported skills have 40% more area damage, but 50% less area of effect
- Close Combat: Supported skills deal 25% more attack damage to enemies within 1 meter of you
- Rising Tempest: Supported skills deal 12% more elemental damage for each skill used recently of a different elemental type
We stack Lightning Rod to the rafters with damage supports because it's our main boss killer. We'll use it a ton leveling and mapping, too—throwing down rods on tough rares or bosses multiplies our Lightning Arrow damage like crazy and melts their faces.
It does even more in this endgame setup. We'll throw down huge fields of rods under bosses and use Orb of Storms and a Cast on Shock/Ball Lightning setup to trigger the rods roughly a bajillion times in two seconds, absolutely deleting pinnacle bosses (and your mana bar).
Herald of Thunder
- Cold Infusion: Supported attacks gain 25% of damage as extra cold damage, but deal 50% less fire and lightning damage
- Glaciation: Supported skills cause 50% more freeze buildup
- Longshot: Supported skills deal 35% more attack damage to enemies further than 7 meters from you
- Lightning Mastery: +1 to level of supported lightning skills
You may be wondering why on earth we'd be socketing our lightning damage Herald with a skill that makes it deal less lightning damage, but I swear it makes sense. The gigabrain math nerds have done all the crunching, and using infusions on the Heralds ends up being the best setup.
With our gems like this, Herald of Thunder will take all that flat cold damage we built on our gear and freeze the heck out of enemies when it procs, almost certainly shattering some of them because it does monster damage on its own. This in turn triggers the Herald of Ice, which we've got set up to shock things, creating a nasty feedback loop. It's glorious.
Herald of Ice
- Lightning Infusion: Supported attacks gain 25% of damage as extra lightning damage, but deal 50% less cold and fire damage
- Conduction: Supported skills have 100% more chance to shock
- Magnified Effect: Supported skills have 40% more area of effect
- Innervate: Attacks gain 35% of damage as extra lightning damage for 3 seconds on killing a shocked enemy with supported skills
I'm not sure there's anything more satisfying in ARPGs than a really good Herald of Ice explosion. This skill does excellent damage on its own so we mostly lean into helping it do more shocking, and it's a good home for the Innervate gem. If you have the means, you can 6-link it with Cold Mastery or Lightning Pen for even more good times.
Wind Dancer
- Blind: 100% chance to blind enemies on hit
Wind Dancer gives us more evasion, helping us feed the ever hungry maw that is Acrobatics. It also procs a knockback when you do get hit, which gives us a nice extra defensive layer when socketed with Blind.
Orb of Storms
- Chain: Supported skills chain +1 time, and 100% more times. Supported skills deal 50% less damage with hits
- Persistence: Supported skills have 40% more skill effect duration
- Unleash: Supported spells gain seals over time, and reoccur for each seal when cast
- Overabundance: Supported skills have +1 to limit, but 50% less skill effect duration
We'll only use Orb of Storms on bosses or particularly sticky rares, but boy does it do work. This skill, so socketed, will drop multiple orbs that all chain, triggering our Lightning Rods super quickly. Since the Lightning Rod is doing all the damage, we can socket this with a bunch of support gems that just let us chain to rods more often.
Cast on Shock
- Ball Lightning: Fires a slow-moving projectile that repeatedly shoots bolts of lightning and nearby enemies
- Deceleration: Supported skills have 30% less projectile speed
- Impetus: Supported skills gain 40% increased energy
- Energy Retention: Skills triggered by supported meta skills have 35% chance to refund half of their energy cost
The last tool in our arsenal is this Cast on Shock setup, which takes our plan of triggering a bunch of Lightning Rods to kill bosses and scales it to the absolute moon. The boss that's getting hit with all those rod beams will get shocked, triggering a bunch of ball lightnings, triggering more rod beams… you get the idea.
Keep these gems at level 11! You'll need 95 int to equip them at that level, and even though we'll take all the extra intelligence we can get to scale our Hand of Wisdom and Action, it doesn't make sense to scale these up any higher, since again, most of the damage is coming from Lightning Rod.
To afford the spirit for everything you'll need to find 50 on gear, whether on your body armor or amulet. You can disable Heralds to activate the cast on shock setup just for bosses, but who wants to fiddle around with all that? You'll also probably need to swap out one of your rings for a Thief's Torment ring when doing pinnacle bosses at higher difficulties, but anything other than the absolute hardest content in the game will get absolutely melted before mana becomes an issue.
Passive tree
There are a bunch of ways to set up your passive tree for this build, so I'll direct you back toward Fubgun's guide for a full rundown. A few notes to get you on the right path, however:
- Early on, focus on attack speed, movement speed, and damage nodes. If you set up your gems correctly, you'll do enough damage that you shouldn't need to worry too much about defense. Dead monsters do no damage! Well, most of the time...
- Master Fletching is one of the craziest nodes on the entire tree, and a reason to do a bow build instead of a dual Herald monk. There's even a version of the build that goes all in on the quiver with a Widowhail, which is certainly an option if your quiver is godlike.
- Feathered Fletching turns additional projectile speed into the best damage scaling affix in the game, so when you get to this part of the tree try and make sure you have a quiver that takes advantage
- Proficiency: Getting enough dexterity early on to keep using the highest levels of your gems is super important. It's also important for equipping juicy gear, so don't feel like those attribute nodes are wasted.
- Lightning Rod: We're not a crit build (gotta leave room for rarity!), so Lightning Rod becomes a gigantic damage multiplier. Lucky means that the game rolls twice when determining how much damage your attack does, which with the huge ranges of lightning damage is a substantial increase.
- Acrobatics: I've mentioned it a few times already, but it bears some attention. This node is incredibly powerful, allowing us to dodge even undodgeable attacks. It comes at a cost, however: 70% less evasion rating. As a result we'll wanna go hard on evasion rating on the passive tree. Every % makes a huge difference, and if you go from 65% chance to dodge to 75%, you'll notice it.
Ascendancy
Gathering Winds will be the first nodes you pick up in act 2 when you complete your first Ascendancy trial. Tailwind is an exceptional buff, and one of the main reasons we want to be a Deadeye in the first place. The extra movement speed is vital for traversing the huge maps, and every extra bit of evasion we get is key to keeping our defenses high with Acrobatics allocated.
The next four points will go toward getting our additional projectile with Endless Munitions. We'll take Point Blank as our travel node, because setting up our Lightning Rod / Orb of Storms / Cast on Shock deathball works great when it does an additional 20% damage.
Finally, we'll circle back and take Wind Ward for an additional defensive layer as we push toward the endgame. Less damage taken per Tailwind is a great benefit to have, as this build can be a bit squishy.
Gear and stat priorities
| Bow | Bow attacks fire an additional arrow / % increased physical damage / adds physical damage / adds cold damage / attack speed / + to level of all projectile skills |
| Quiver | Adds cold damage / % increased arrow speed / % increased projectile speed / % increased damage with bow skills / attack speed / + to level of all projectile skills / dex or int |
| Body Armour | + to evasion rating / % increased evasion rating / life / % to resistances / + to Spirit |
| Gloves | Use Hand of Wisdom and Action unique gloves |
| Boots | % increased movement speed / + to evasion rating / % increased evasion rating / life / % to resistance / rarity / dex or int |
| Rings | Adds cold damage / life / rarity / % to resistances |
| Amulet | Life / rarity / dex and int / % to resistances |
| Helmet | + to evasion rating / % increased evasion rating / life / % to resistances / rarity / dex or int |
| Belt | Use Headhunter unique belt |
For your bow, you'll want the best physical dps you can find, ideally with a big chunk of flat cold as well. Ironically, with the conversion from Lightning Arrow, physical damage is better than lightning damage! + to skills, attack speed, and additional arrows are all huge dps buffs too. If you get all of them, well, congrats on ascending to godhood.
Another option for your bow is Widowhail. This bow gives 150-250% increase of effect of your quiver, but has basically no stats of its own. A 240+ Widowhail corrupted with three sockets (ele damage Soul Cores) can rival some of the best bows in the game if you have an excellent quiver.
Speaking of quiver, you want all the deeps; Flat phys, flat cold, bow skills, attack speed, and % damage. Again, this is an excellent place to spend currency. With Master Fletching allocated you get even more leverage out of these affixes, so go nuts.
For gloves, you'll want the Hand of Wisdom and Action. You can get a cheap pair for like 2d at time of writing, and they're by far the best choice (farm them from Xesht on difficulty one if you're solo self found).
For the rest of your armor slots, look to max your resistances (50 chaos is fine-ish) and get lots of life and evasion rating. Make sure to get as much movement speed as you can on your boots as well.
Rings are a great spot to pick up flat cold, so make sure to get the best rolls you can. If your resistances are in good shape, you can get a lot more damage here with intelligence or attack speed, and this is a good place to get rarity (you'll want at least 100 for good breach farming, ideally 150-200 before diminishing returns make you drop off a cliff).
Pick up a Thief's Torment ring (~30ex) for pinnacle bosses. It's the only source of mana on hit in the game, and otherwise you run the risk of gassing out before they're dead, especially if your damage isn't very good.
Amulets are a great source of stats—with Hand of Wisdom and Action, intelligence becomes one of our strongest damage stats, so keep that in mind. You can also pick up + to level of projectile skills here, life and resistances, rarity, pay 280d for Astramentis, you know… whatever you want really. Also Anoint Essence of the Mountain for additional cold damage.
Headhunters only cost four div! It's a lot worse than it was in PoE1, but on this build farming breaches, it's still a ton of fun. Slap that puppy on, put breach tablets with quant in all your towers, and let her rip. The divines will rain like droplets of candy from the heavens. Have fun!
Russ has been playing PC games since the top of the line graphics were in ASCII and has been obsessed with them just about as long. After a coordinated influence campaign to bamboozle his parents into getting a high speed internet connection to play EverQuest, his fate was well and truly sealed. When he's not writing about videogames, he's teaching karate, cooking an overly complicated dish, or attempting to raise his daughter with a well rounded classical education (Civilization, Doom, and Baldur's Gate, of course). He's probably mapping in Path of Exile right now.


