Best Switch Axe build in Monster Hunter Wilds
Carve through the Forbidden Lands with two ways to cut.

If you're seeking the best Switch Axe build for Monster Hunter Wilds, you've no doubt been seduced by the only thing cooler than swinging around a big axe: swinging around a big axe that is also a big sword.
Switch Axe is somewhere in the middle ground of Monster Hunter weapon complexity. Axe mode offers high mobility and chunky hits, while Sword Mode slows your movement speed in exchange for high damage combos that build to explosive finishers. Juggling the playstyles and managing your meters takes some getting used to, but mastering the Switch Axe makes for some of the flashiest attacks in Monster Hunter.
Below, I'll give you a primer on playing Switch Axe in Wilds so you can get comfortable with your own morphing monster macerator. Then I'll lay out some weapon and armor build suggestions so you can carve through the Forbidden Lands with ease, whether you're chopping or slicing.
Looking for more hunting tips? Check out our Monster Hunter Wilds guide hub for all the G-Rank advice we've crafted so far.
How to play Switch Axe in Monster Hunter Wilds
Switch Axe is essentially a weapon about storing up energy and then unleashing it for high damage. In the more nimble Axe Mode, your attacks will fill your Switch Gauge. In Sword Mode, you move more slowly, but you spend that Switch Gauge energy on high damage attack combos. As you land Sword Mode attacks, you'll build up your Amp Gauge. Once that's filled, you can perform your highest-damage finisher attacks.
That might sound like a lot of meters, but it's more simple than it seems at first brush: You switch into Sword Mode when you've got meter to spend, and you switch back to Axe Mode to refill.
Here's a rundown of how each mode functions, along with some tips for its basic attacks.
Axe Mode tips
- Landing attacks in axe mode will refill your Switch Gauge. On the little Switch Axe meter displayed when you're wielding the weapon, the Switch Gauge is the yellow bar. It'll also refill over time if your weapon's sheathed.
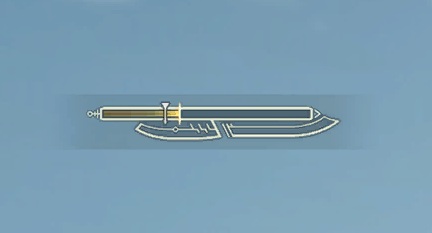
- Press Y for your basic attack combo. This is a three-attack sequence, beginning with an Overhead Slash ending with a lengthy but powerful Spiral Burst Slash. The opening Overhead Slash is great for hitting flying monsters and tails, but if you're moving while pressing Y, the first attack will change into a faster, weaker Forward Slash.
- Pressing B will enter the Wild Swing, a repeatable attack where you spend stamina to continually hack into the monster as long as you mash the B button. Importantly, after swinging at least twice, pressing Y during Wild Swing will perform a Heavy Slam and activate Power Axe Mode. While in Power Axe mode, your Axe Mode attacks do more damage and fill more of your Switch Gauge.
- Press Y+B for an Offset Rising Slash, which can knock monsters out of their attacks if your hit connects right as their attack would land. After a successful knockback, you can follow up with a heavy attack with Y, or perform a strong morphing attack with RT.
- Moving forward while pressing B will perform a Forward Overhead Slash, which does a good chunk of damage and closes a lot of distance; it's often a better opener than your first Y attack if you've got the opening.
- Holding back and pressing B will perform a Fade Slash, which will make you tumble backwards as you slash upwards. It doesn't have invincibility frames like a proper dodge roll, but it's great for making space while getting more damage in.
- Pressing RT will morph into Sword Mode as long as you have at least 30% of your Switch Gauge. Otherwise, it'll perform a reloading animation to manually refill a chunk of your gauge; try to avoid this, because the animation will root you in place.
Morphing mid-combo will immediately perform an attack as you switch into Sword Mode, so you can seamlessly continue your attack sequence.
Sword Mode tips
- Sword mode attacks will spend your Switch Gauge. Trying to attack in Sword Mode with an empty Switch Gauge will automatically return you to Axe Mode.
- Landing attacks in Sword Mode will fill your Amp Gauge. This is the red, blade-shaped meter below your Switch Gauge Bar. Once it's full, you'll enter Amped State, adding damaging explosions to your Sword Mode attacks and providing access to your highest-damage attacks.

- Press Y for your basic Sword Mode attacks. This is a simple three attack sequence for leading into heavier Sword Mode attacks.
- Press B to perform a Double Slash, a fast two-hit attack. If you press B after three Y button attacks, you'll instead perform a Triple Slash, adding an extra hit for even more damage. After either a Double Slash or Triple Slash, pressing B again will perform the Heavenward Flurry, a lengthier attack that fills a lot of Amp Gauge.
- Alternating between Y and B attacks by repeating Y > Y> B offers an infinitely looping, high damage attack combo.
- Press R+Y to perform a Counter Rising Slash, which will shrug off and retaliate against an incoming monster attack if you time it correctly. Once you get comfortable with the timing, it'll let you continue your combos uninterrupted without needing to dodge incoming blows.
- Press B+Y to perform an Element Discharge, which will jab your weapon forward and detonate your gathered energy as you mash the Y button.
If you're in Amped State, holding B+Y will instead perform a Zero Sum Discharge, where you drive your weapon into the monster and latch onto it as it detonates, eventually launching yourself off the monster with a finisher explosion. You can take damage during a Zero Sum Discharge, though, so the high damage comes with an amount of risk if the monster isn't already toppled. - Press RT+B+Y to perform an Unbridled Slash, which charges your weapon for a whirling slash that detonates for extra damage. If you're in Amped State, you can hold RT to charge the weapon further for a Full Release Slash, adding an extra slash and additional explosions.
You can also hold RT to perform an Unbridled Slash or Full Releash Slash during the recovery animation after an Element Discharge. - Press RT to morph back into Axe Mode. Morphing mid-combo will do a double slash as you reenter Axe Mode, which you can weave into following attacks.
Switch Axe Phial Types
Like Charge Blade, every Switch Axe has a Phial Type, which provides additional effects in Sword Mode. Power Phials boost the weapon's physical damage in Sword Mode, while Element Phials increase the weapon's elemental damage. Poison, Paralysis, and Dragon Phials all add what they say on the tin, while an Exhaust Phial lets Sword Mode stun or exhaust the monster, depending on where you're hitting.
In addition to adding extra damage and status types, Phials types fill the Amp Gauge at different rates while attacking in Sword Mode. Power Phial fills the slowest, while Element and Status Phials fill fastest.
Best Switch Axe build in Low Rank
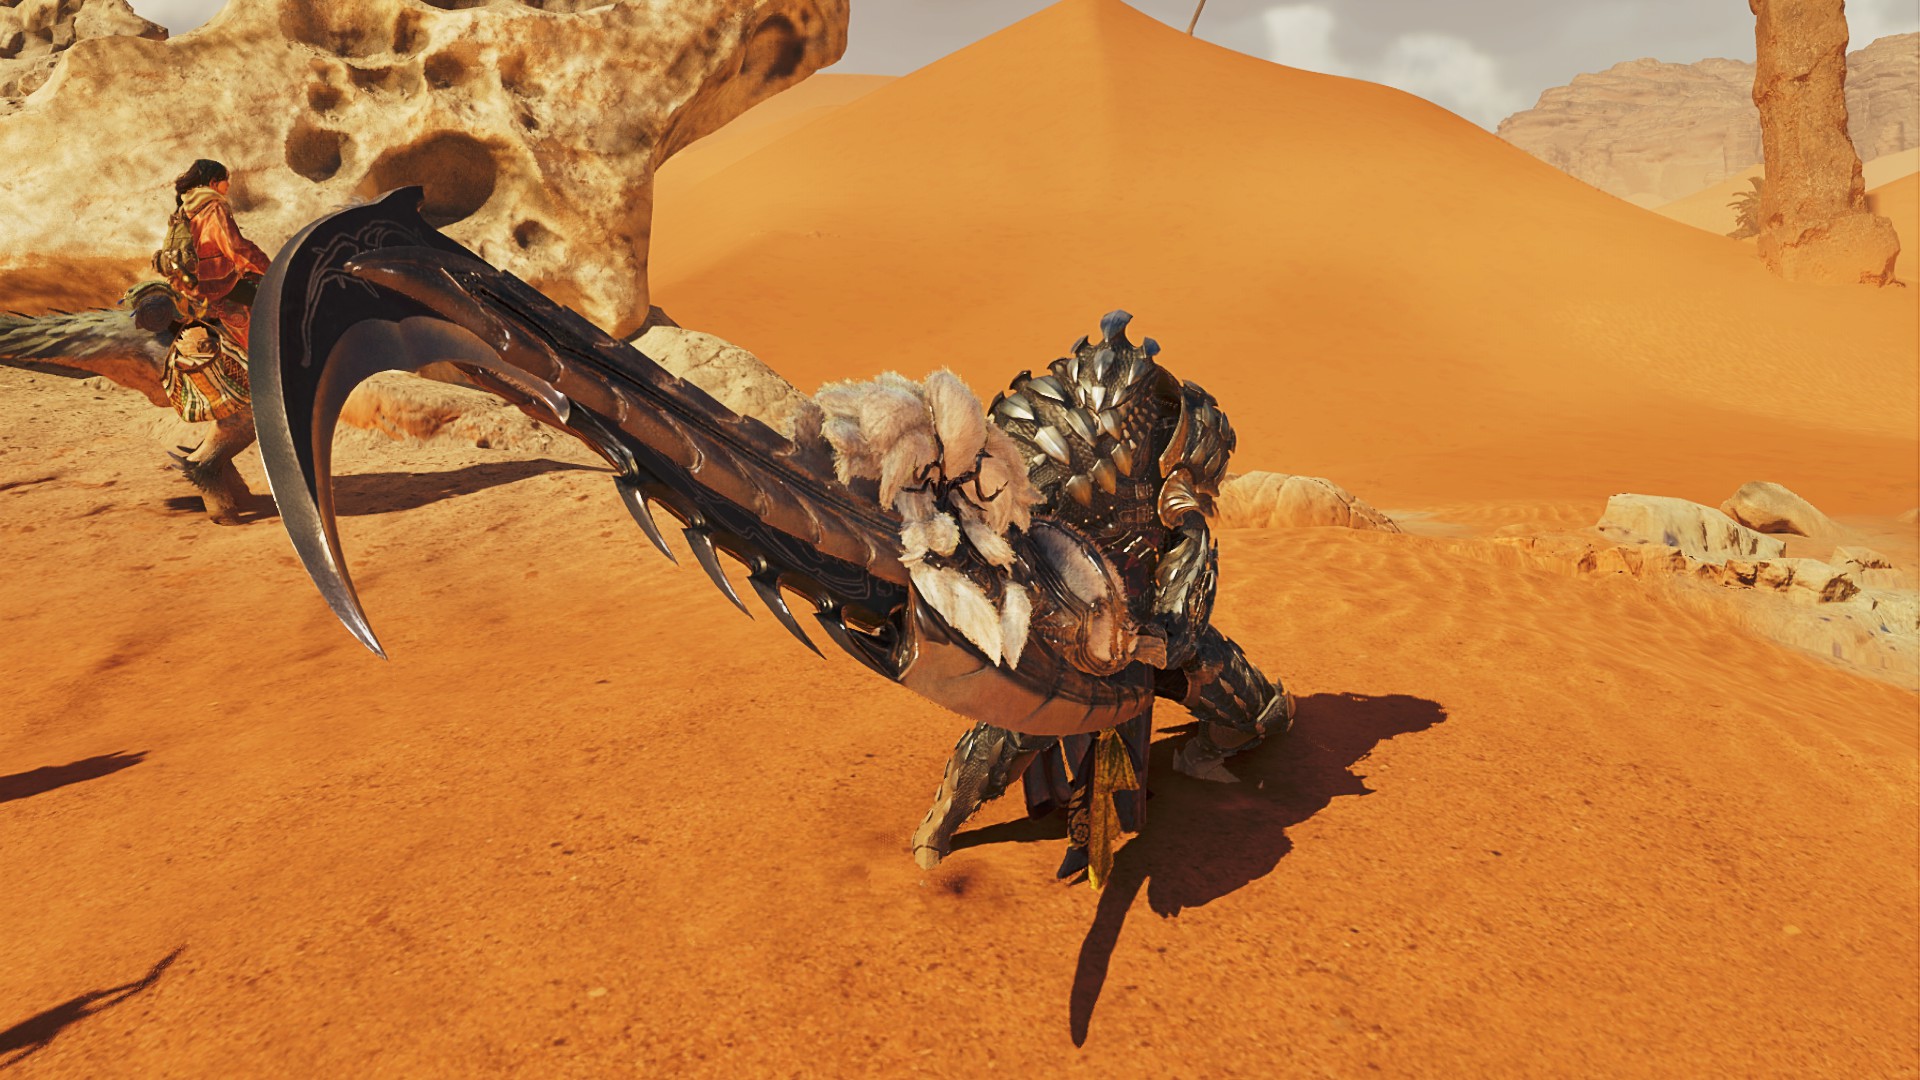
Weapon | Helmet | Chest | Arms | Waist | Legs | Talisman |
Barina Hache I | Alloy Helm | Balahara Mail | Balahara Vambraces | Balahara Coil | Balahara Greaves | - |
Barina Hache II | Ajarakan Helm | Ajarakan Mail | Ingot Vambraces | Balahara Coil | Ajarakan Greaves | Leaping Charm I |
Barina Hache II | G. Rathalos Helm | Ajarakan Mail | G. Rathalos Vambraces | G. Ebony Coil | G. Rathalos Greaves | Leaping Charm I |
Low Rank is a bit light on armor sets with skills that are particularly useful for Switch Axe mechanics, so most of these recommendations are based around providing general comfort, utility, and survivability during hunts.

- First weapon: Barina Hache I
Your goal in the first hours of Wilds should be to get your hands on the Lala Barina Switch Axe, the Barina Hache I. It'll get you a healthy amount of green sharpness and enough affinity for a 10% crit rate. While its Power Phial means getting to Amped State will take longer than other Switch Axes, its built-in Paralysis status build-up will give you extra windows to get there.
- First armor set: Alloy Helm, Balahara Mail, Balahara Vambraces, Balahara Coil, Balahara Greaves
Picking up most of the Balahara set during the early game gives us maxed Evade Extender. It's a lovely skill for any weapon, but the extra dodge roll distance is particularly useful for Switch Axe: rolling is a better option for closing distance than trudging along with the slow Sword Mode movement speed, and the extra roll distance gives us some excellent opportunities for using Axe Mode's opening lunge slashes.
The Alloy Helm and Balahara chestpiece, meanwhile, give us a couple points in Quick Sheathe. Even with Evade Extender, there will be times while in Sword Mode where your best option for survival is just sheathing your weapon and sprinting out of harm's way, and Quick Sheathe makes that, well, quicker.

- Second weapon: Barina Hache II
After entering the Oilwell Basin, fighting a Nerscylla during a brief detour into the Iceshard Cliffs will give us access to materials for upgrading our Lala Barina axe. More attack damage and more Paralysis never hurt anyone.
The upgraded Barina Hache will carry us comfortably into High Rank. But if you want to dabble with an elemental damage axe, you could pick up the respectable Windsunder Axe I after a Hirabami hunt or two. It's got a fast-charging Element Phial, and packs a good chunk of ice damage alongside its physical attack. Only a couple monsters negate ice damage in Wilds, so it's not a bad choice.
- Second armor set: Ajarakan Helm, Ajarakan Mail, Ingot Vambraces, Balahara Coil, Ajarakan Greaves, Leaping Charm I
Our second armor set is worth pursuing once we can craft our first talisman, Leaping Charm I, which lets us drop a few Balahara pieces by providing an alternate source of Evade Extender. With a few Ajarakan items, we can max out the Partbreaker skill, making it easier to break monster bits and—more importantly—deal extra damage when destroying wounds with Focus Strikes.
If you want to keep Evade Extender maxed out, you can hold onto your Balahara arms. Otherwise, you can swap in Ingot Vambraces after some mining to pick up a point in Divine Blessing, which will occasionally weaken some incoming attacks.

- Third armor set: G. Rathalos Helm, Ajarakan Mail, G. Rathalos Vambraces, G. Ebony Coil, G. Rathalos Greaves, Leaping Charm I
Our final set of upgrades before closing our Low Rank adds a layer of offensive oomph. With a few G. Rathalos pieces, we get three points in Weakness Exploit, providing an extra 15% crit chance when hitting a monster's weak points (which you should always be trying to do). We drop our Balahara piece for a G. Ebony Coil, which will give us a single point in the Burst skill, adding a few extra damage points whenever we're landing consecutive attacks—for example, during the Element Discharge's rapid explosions. It's not a huge increase, though, so if you're still most comfortable with extra points in Evade Extender, hanging onto that Balahara Coil is a fine option.
Best Switch Axe build in High Rank
Weapon | Helmet | Chest | Arms | Waist | Legs | Talisman |
Barina Hache III | Kut-Ku Helm β | Rathian Mail α | Kut-Ku Vambraces β | Rathian Coil β | Kut-Ku Greaves β | Leaping Charm II |
G. Veldian Securis II | G. Ebony Helm β | Blango Mail β | G. Ebony Braces β | G. Ebony Coil β | Ajarakan Greaves β | Leaping Charm III |
Indomitable Perceval | G. Ebony Helm β | G. Arkveld Mail β | G. Ebony Braces β | G. Arkveld Coil β | Udra Miregreaves β | Chainblade Charm II |
- Fourth weapon: Barina Hache III
As we march triumphantly into High Rank, we'll get an early upgrade for our Barina Hache as we prepare to say farewell to our long journey with paralysis. We're smarter, stronger, more capable—we're turning our eyes towards pumping out damage. But for now, we'll make the most of paralysis windows before we move into our next phase.
- Fourth armor set: Kut-Ku Helm β, Rathian Mail α, Kut-Ku Vambraces β, Rathain Coil β, Kut-Ku Greaves β, Leaping Charm II
We'll pick up some Kut-Ku pieces here to get a healthy level of Constitution skill points to make our dodge rolling sustainable as we get comfortable with High Rank. From our Rathian pieces, we'll grab the Foray skill, increasing the damage we deal to monsters afflicted with poison or—in our case—paralysis. Our free damage becomes free buffed damage: the best of all worlds.
- Fifth weapon: G. Veldian Securis II
Say goodnight to our Barina Hache; we're moving on to dragon damage. We might need to backtrack for some Low Rank guardian materials to build an earlier stage of this G. Arkveld switch axe, but it'll be worth it when we upgrade it into our endgame axe. As a benefit of the switch, the G. Veldian Securis comes with inherent Focus points, so we'll be reaching our Amped state much faster.
If paralysis is too good for you to leave entirely behind, slap a Lala Barina weapon on your Palico. It'll be enough to secure at least one paralyze during your hunts, so you'll still have a window to get some free damage in.
- Fifth armor set: G. Ebony Helm β, Blango Mail β, G. Ebony Braces β, G. Ebony Coil β, Ajarakan Greaves β, Leaping Charm III
Our armor build is taking a markedly more aggressive turn here. With the G. Ebony pieces, we pick up the Burst skill as we did in Low Rank, except now we have enough of the set to gain the associated set bonus, increasing the Burst stat boost and making the buff last longer. All good things.
From the Blango chestpiece, we grab some points in Agitator, increasing our damage output when the monster enrages, which we all know it will. And the Ajarakan legs give us a bit of Partbreaker, making our Focus Strikes on wounds hit harder.
With the decoration slots available, go ahead and drop some points in Constitution to make our frequent Sword mode rolls more sustainable.

- Endgame weapon: Indomitable Perceval
The shift from the G. Veldian switch axe to the all-natural, organic Arkveld tree means we ditch the negative affinity and see our axe equipped with an Element Phial. It'll charge to our Amped state even faster, and it'll pump out heavy dragon damage once we've done so.
- Endgame armor set: G. Ebony Helm β, G. Arkveld Mail β, G. Ebony Braces β, G. Arkveld Coil β, Udra Miregreaves β, Chainblade Charm II
The endgame set we're setting our eyes on works on similar Burst-based principles as the High Rank set above, except now we've got enough decoration slots and charm upgrades to max both Burst and Flayer.
Flayer does two things for us. It makes wounds easier to create, and it also adds a hidden meter that we fill by dealing damage. Once we reach its cap, our next attack will also deal a heavy chunk of heavy, elementless damage. It's almost like setting off a Blast proc without the need to worry about status buildup.
I'm sure my advice for the remaining decoration slots won't surprise you. I'll always recommend a mix of Evade Extender and Constitution, but I'll leave the exact distribution at your discretion. A few points of Partbreaker will go a long way here, too.
More Monster Hunter Wilds on PC Gamer

- Monster Hunter Wilds Long Sword builds
- Monster Hunter Wilds Great Sword builds
- Monster Hunter Wilds Charge Blade builds
- Monster Hunter Wilds Dual Blades builds
- Monster Hunter Wilds Insect Glaive builds
- Monster Hunter Wilds Hammer builds
- Monster Hunter Wilds Bow builds
- Monster Hunter Wilds Light Bowgun builds
- Monster Hunter Wilds Heavy Bowgun builds
- Monster Hunter Wilds Sword and Shield builds
- Monster Hunter Wilds Lance builds
- Monster Hunter Wilds Gunlance builds
- Monster Hunter Wilds Hunting Horn builds

The biggest gaming news, reviews and hardware deals
Keep up to date with the most important stories and the best deals, as picked by the PC Gamer team.
Lincoln has been writing about games for 11 years—unless you include the essays about procedural storytelling in Dwarf Fortress he convinced his college professors to accept. Leveraging the brainworms from a youth spent in World of Warcraft to write for sites like Waypoint, Polygon, and Fanbyte, Lincoln spent three years freelancing for PC Gamer before joining on as a full-time News Writer in 2024, bringing an expertise in Caves of Qud bird diplomacy, getting sons killed in Crusader Kings, and hitting dinosaurs with hammers in Monster Hunter.
You must confirm your public display name before commenting
Please logout and then login again, you will then be prompted to enter your display name.

