Best Charge Blade builds in Monster Hunter Wilds
Learn how to wield the explosive power of the Charge Blade in this guide.

Introduced in the Nintendo 3DS-exclusive Monster Hunter 4, the Charge Blade is what many hunters consider the most complex weapon in the series. Not only is it the only weapon that actively punishes you for using it wrong, but it has four separate charge gauges to keep track of. Capcom went wild with this one, but thankfully it actually isn’t too difficult to learn. Once you equip the best Charge Blade build in Monster Hunter Wilds you’ll see just what a beast it is: a true jack of all trades weapon able to deal high damage and quick attacks while offering good defensive capabilities. (If only it could shoot bullets, the Charge Blade would truly do it all).
For those new to the Charge Blade, it's split into two modes—a sword and shield and an axe. Your sword and shield mode will charge up the phials that are under your weapon’s sharpness meter, and these charges can be stored in order to power up the axe with an elemental boost, which grants you access to the powerful element discharge moves. From there you can use the phials to power up your shield, sword, and axe to make them even more powerful.
Looking for more hunting tips? Check out our Monster Hunter Wilds guide hub for all the G-Rank advice we've crafted so far.
How to play Charge Blade in Monster Hunter Wilds
You’ll start in sword and shield mode with a regular slash combo on Y and a powerful charge slash from holding B and letting go at the right time. As you attack with this weapon, the outline of the phials will go from white to yellow to red. When yellow or red, you can store the phials (RT + B) as elemental charges (yellow fills three, red fills all five).
- If you go too long without storing the weapon will become overcharged (illustrated by glowing red phials) and your slashes will bounce off the enemy, leaving you unable to combo.
- While the phials are stored you can still earn a charge, and if you store a second batch your charges will become powered up, dealing more damage.
Storing phials will power up your axe form. You can enter axe form in a few ways:
- When sheathed press RT to go straight into axe mode with an attack
- Press RT + Y to do the Morph Slash attack
- Use the Y + B attack three times in a row to use the Amped Element Discharge combo
- When guarding an attack press Y (this powers up your axe upon a Perfect Guard)
- When storing phials (RT + B) press B to do Element Discharge I
Axe mode focuses on slower, stronger attacks and is split across both buttons. The moves mapped to Y are regular axe moves that do not use the phials or elements, while B attacks use up your phials.
- Charged-up attacks will follow each basic hit with a second that does elemental damage, and each B button press uses up one phial.
- You can do the B button moves without charges, but they will be regular axe moves without the follow-up elemental damage.
The ultimate move with the axe is the Amped Element Discharge, a powerful slash that does massive damage and elemental damage. This can be followed up with a second Amped Element Discharge. When your shield is charged, you’ll have access to the extremely powerful Super Amped Element Discharge (Y+B out of an Amped Element Discharge), which does massive damage at the cost of all five phials.
Charging your weapon
Alongside charging your phials you’ll be charging the individual parts of your weapon too, with the abilities to charge your sword and axe returning from Monster Hunter Rise (and they are both now part of your kit as standard, as opposed to being a choice).
Charging your shield is the number one priority. Not only does it decrease stamina consumption and knockback for guarding, but it also allows you to access the sword charge and the axe’s Super Amped Element Discharge attack.
- To charge the shield, press RT at the start of an Amped Element Discharge attack, which will empty your phials into your shield.
Charging your sword gives your sword the same properties as an elemental axe attack, with the regular attack doing slightly higher damage. These attacks don’t use phials, so go ham.
- To charge the sword, hold Y while storing phials (RT + B) after your shield is already charged which performs the Condensed Element Slash attack.
Charging your axe allows you to perform B attacks without using up phials, and the Amped Element Discharge will only use half a phial, giving you twice as many uses. Your Y attacks can also be held down to give the axe a saw effect, dealing multiple smaller hits with every attack.
- You can charge your axe in two ways: By pressing Y after performing a Perfect Guard, or by using a Focus attack on a monster’s wound.
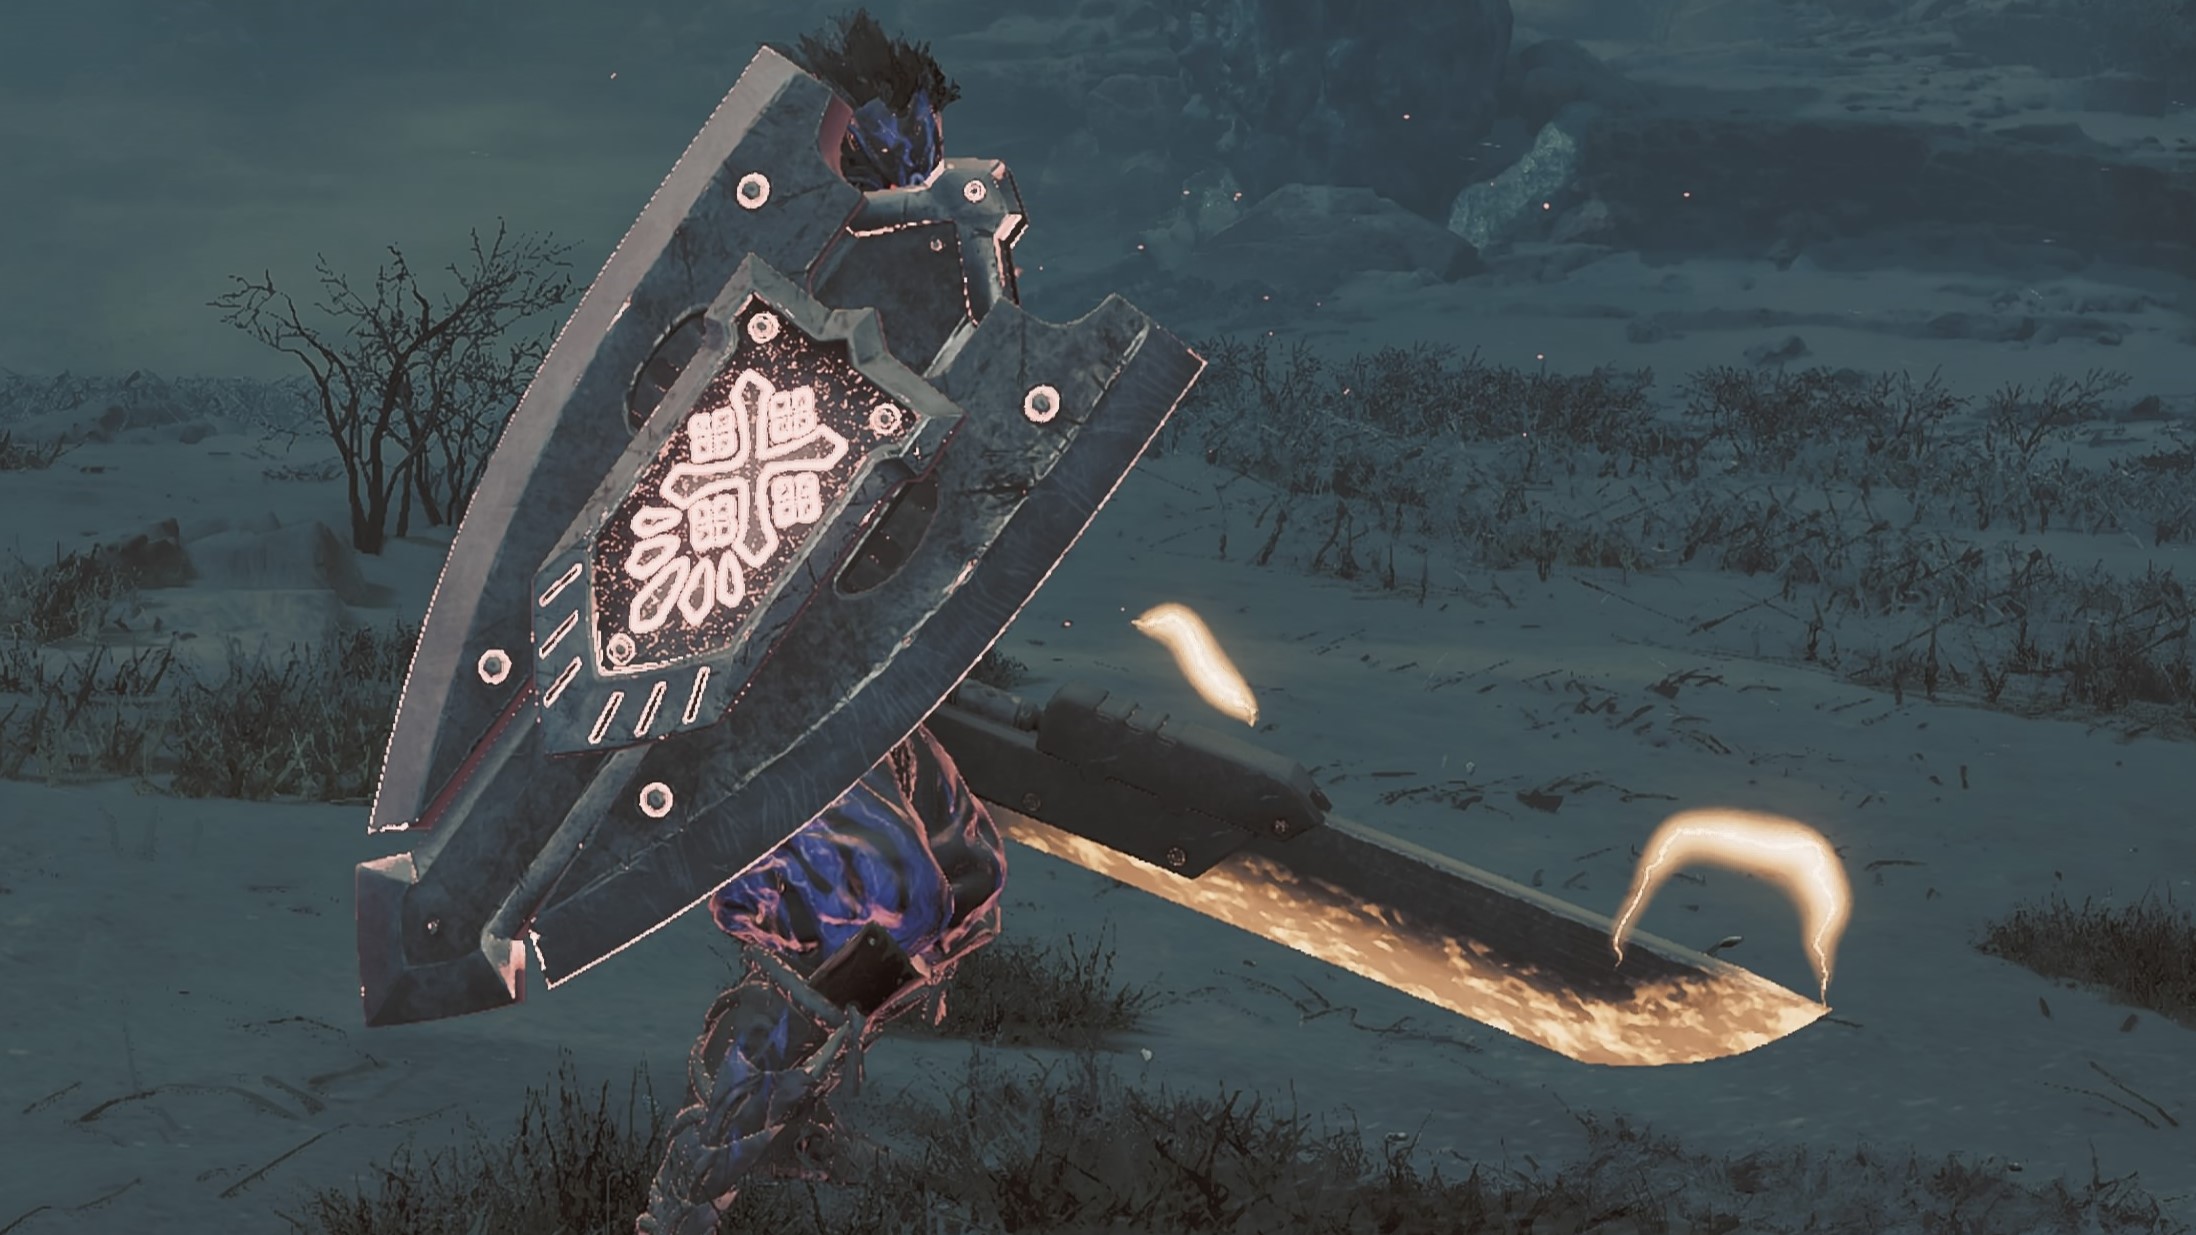
Best Charge Blade Low Rank build
Weapon | Helmet | Chest | Arms | Coil | Legs |
|---|---|---|---|---|---|
Bone Strongarm | Hope Mask | Hope Mail | Hope Braces | Hope Coil | Hope Greaves |
Uth Valeroje I | Ingot Helm | Doshaguma Mail | Doshaguma Braces | Doshaguma Coil | Doshaguma Greaves |
- | - | G.Doshaguma Mail | G. Doshaguma Braces | G. Doshaguma Coil | G. Doshaguma Greaves |
This build is all about the Power Prolonger skill, which will allow your Charge Blade parts to remain powered up for longer than usual, with the armor sets focusing on the Doshaguma’s Might group skill, which rewards you with attack buffs for performing a Power Clash (blocking enough monster attacks to trigger a short QTE that lets you knock them over).

- First Weapon: Bone Strongarm
You’re not going to need to worry too much about crafting a Charge Blade during the early hours of Monster Hunter Wilds, but switch out the Hope Strongarm for a Bone Strongarm straight away, as the latter’s Load Shells skill is super useful for the Charge Blade. This skill will increase the Charge Blade’s reloading speed at level 1, but if you upgrade your Bone Strongarm to one with the Load Shells level 2, it will give you five charges from yellow phials. Use this until you fight Uth Duna.
- First armor set: Hope Mask, Hope Mail, Hope Braces, Hope Coil, Hope Greaves
While you can't go wrong with any of the starting armors, the Hope set is a good pick for Charge Blade users. The Stun Resistance skill will reduce the time you’re affected by the Stun status effect, which is very useful since there’s a good chance you’ll take some hits in Axe mode due to its slower attacks. Divine Blessing will give you the chance to reduce the damage taken from attacks, too. Use this set until you fight the Alpha Doshaguma.

- Second Weapon: Uth Valeroje I
Your second weapon, and probably the last weapon you’ll need in Low Rank. Not only is Uth Valeroje a powerful Charge Blade at 576 attack power, but it also comes with the Water Element, which will help you with the likes of Rompopolo, Rey Dau, and Ajarakan. But the real reason you want this Charge Blade is thanks to the Power Prolonger skill, which allows the Shield, Sword, and Axe charges to stay in play far longer than usual, meaning you can deal higher damage without having to worry about refueling for even longer.
- Second armor set: Ingot Helm, Doshaguma Mail, Doshaguma Braces, Doshaguma Coil, Doshaguma Greaves
The Doshaguma armor set has the group skill Doshaguma’s Might, which gives you a large +10 attack buff after performing a successful Power Clash or Offset Attack. The Charge Blade has a Power Clash, which can be performed by blocking certain big attacks, but no offset (boo!).
After beating Uth Duna and Rompopolo, you’ll have access to the Ingot set. I’d pick up the Ingot Helm as it gives you Divine Blessing back, but it’s not a vital upgrade. The next upgrade I’d recommend comes much later, after you come face to face with the Guardian Doshaguma.

- Third armor set: Ingot Helm, G. Doshaguma Mail, G. Doshaguma Braces, G. Doshaguma Coil, G. Doshaguma Greaves
The Guardian Doshaguma set is basically a straight upgrade from the regular one; it once again features the Doshaguma’s Might bonus, which is as useful as ever. The other skill introduced in this set is Heroics, which gives you attack and defense boosts when your health is at 35% or lower, a great buff when paired with Doshaguma’s Might. This set also features a small decoration slot on the helm and the braces, allowing you to slot in a decoration like the Brace Jewel, which prevents knockback.
This set should be able to take you through to High Rank. The most important thing to get down are those Power Clashes from well-timed blocks, and just learning the mechanics of the Charge Blade itself. Easy-peasy, right?
Best Charge Blade High Rank build
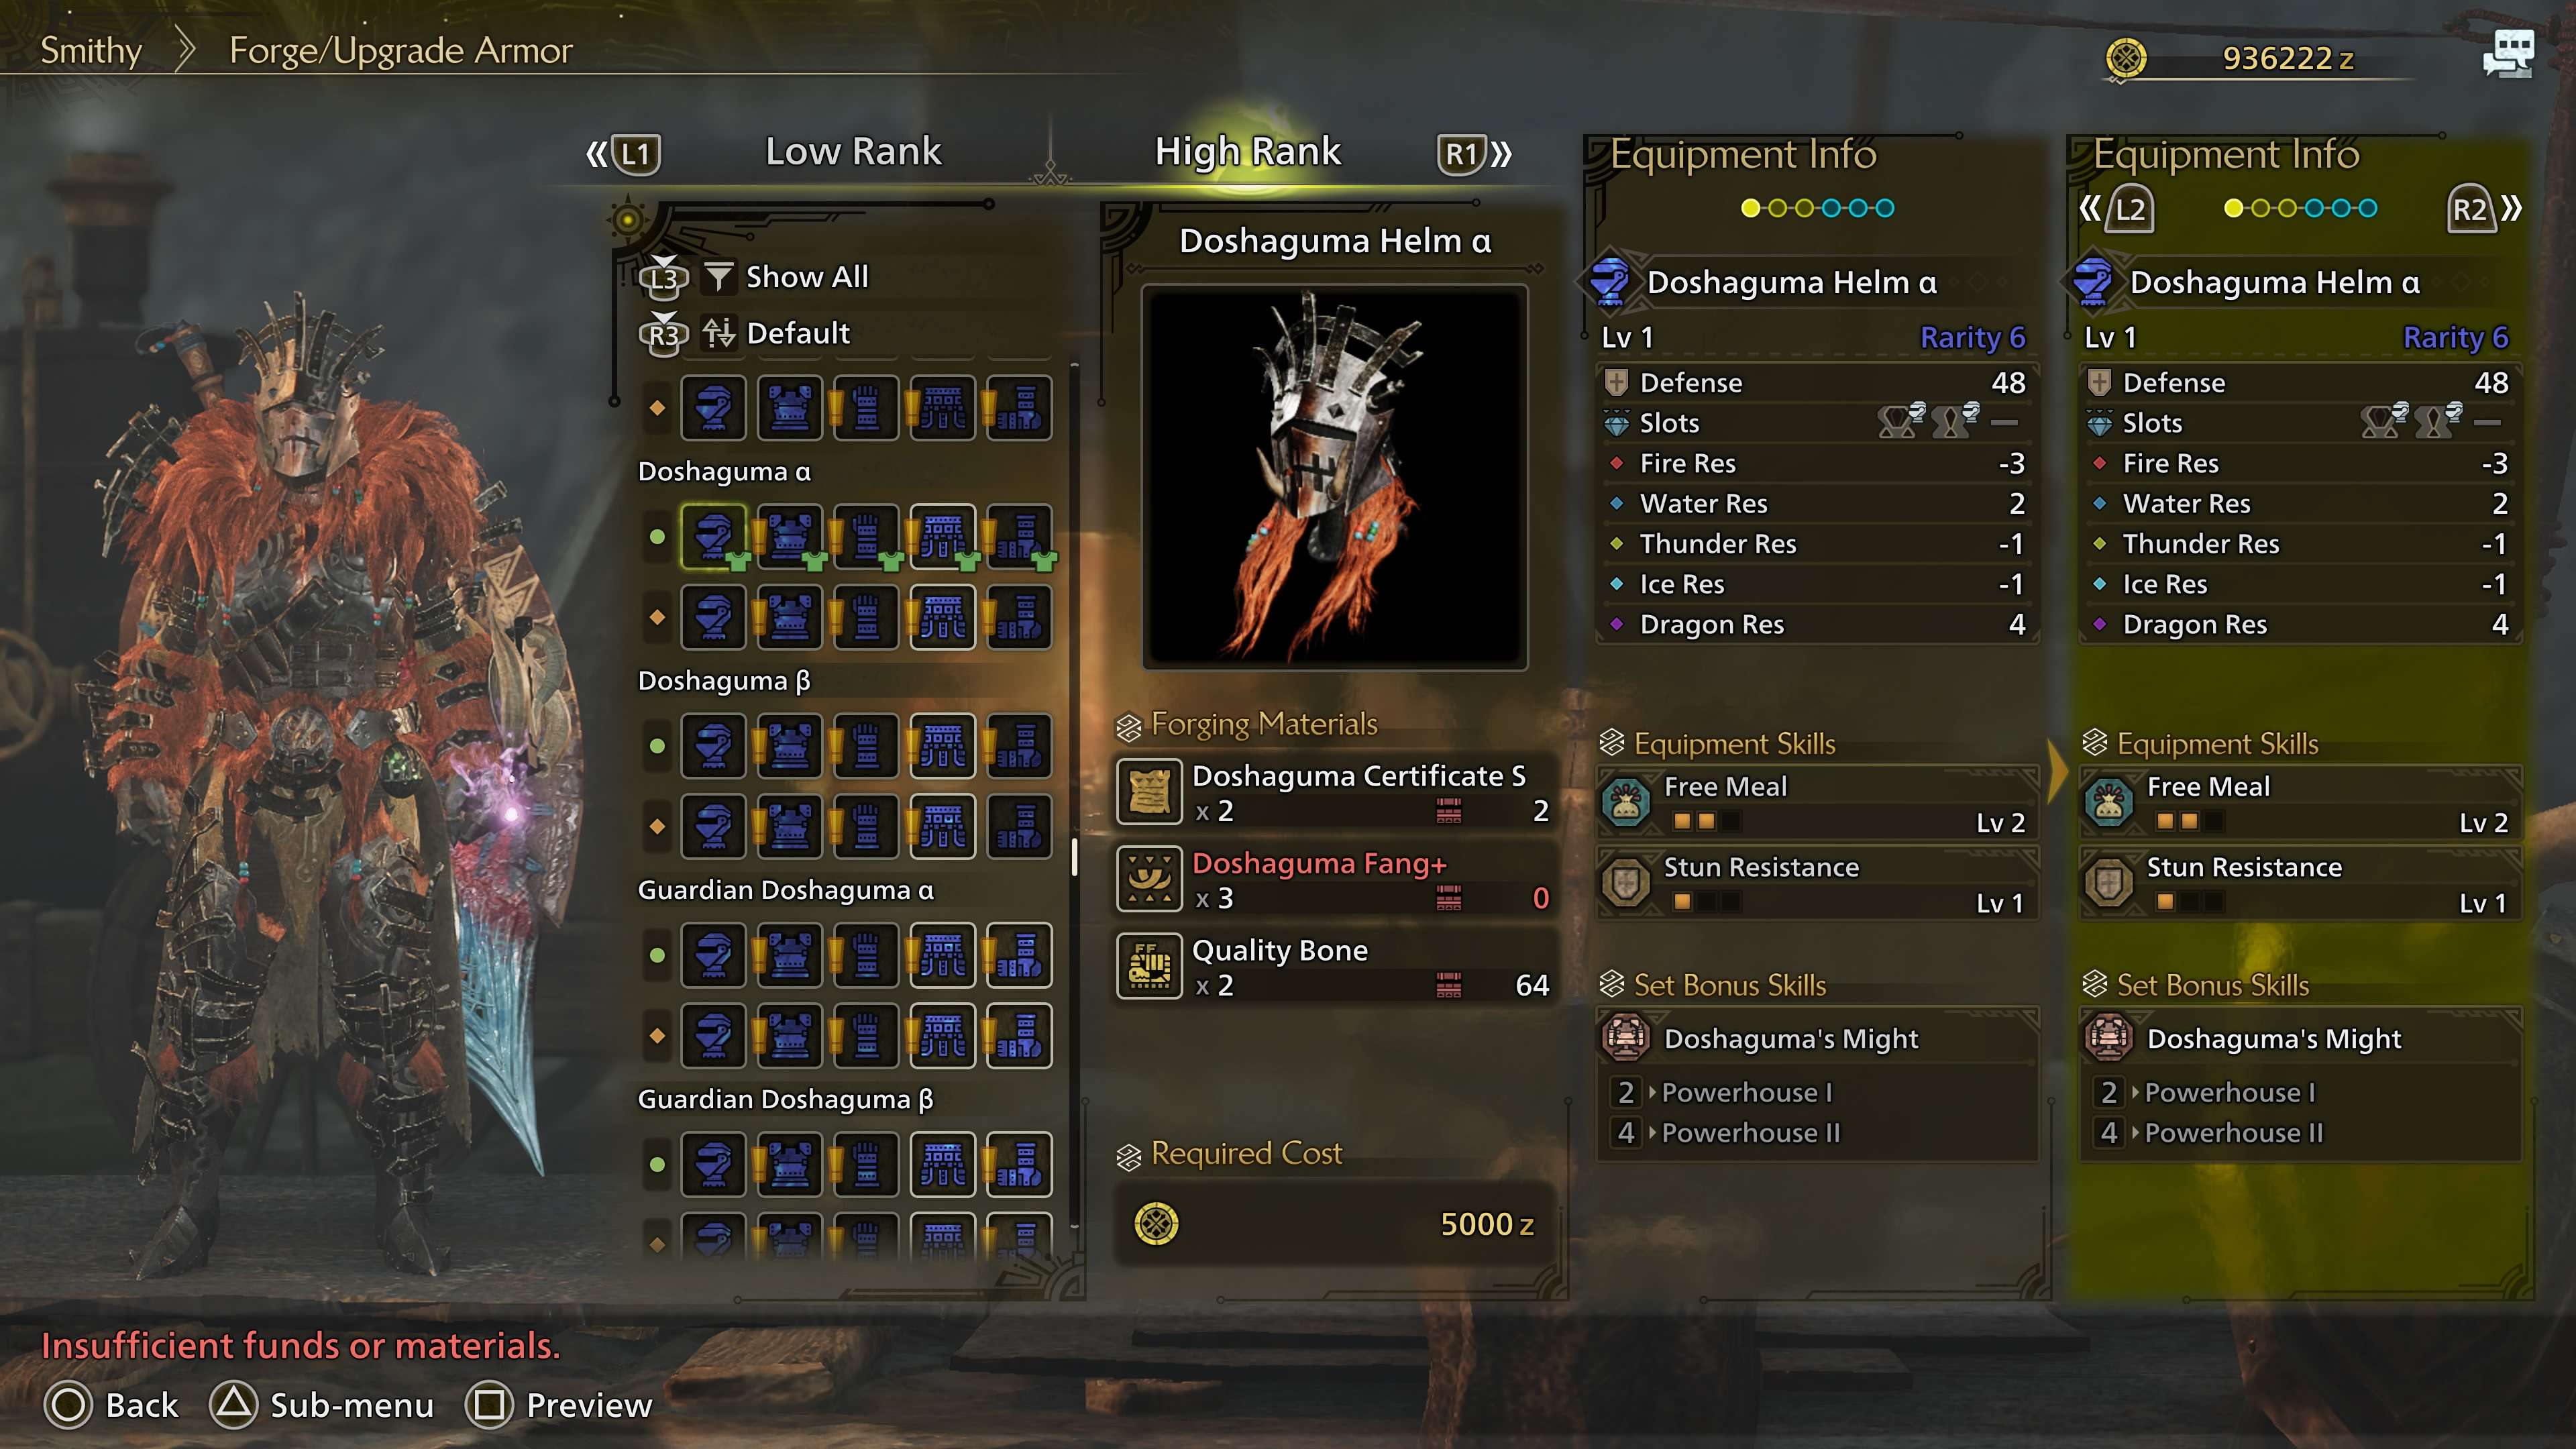
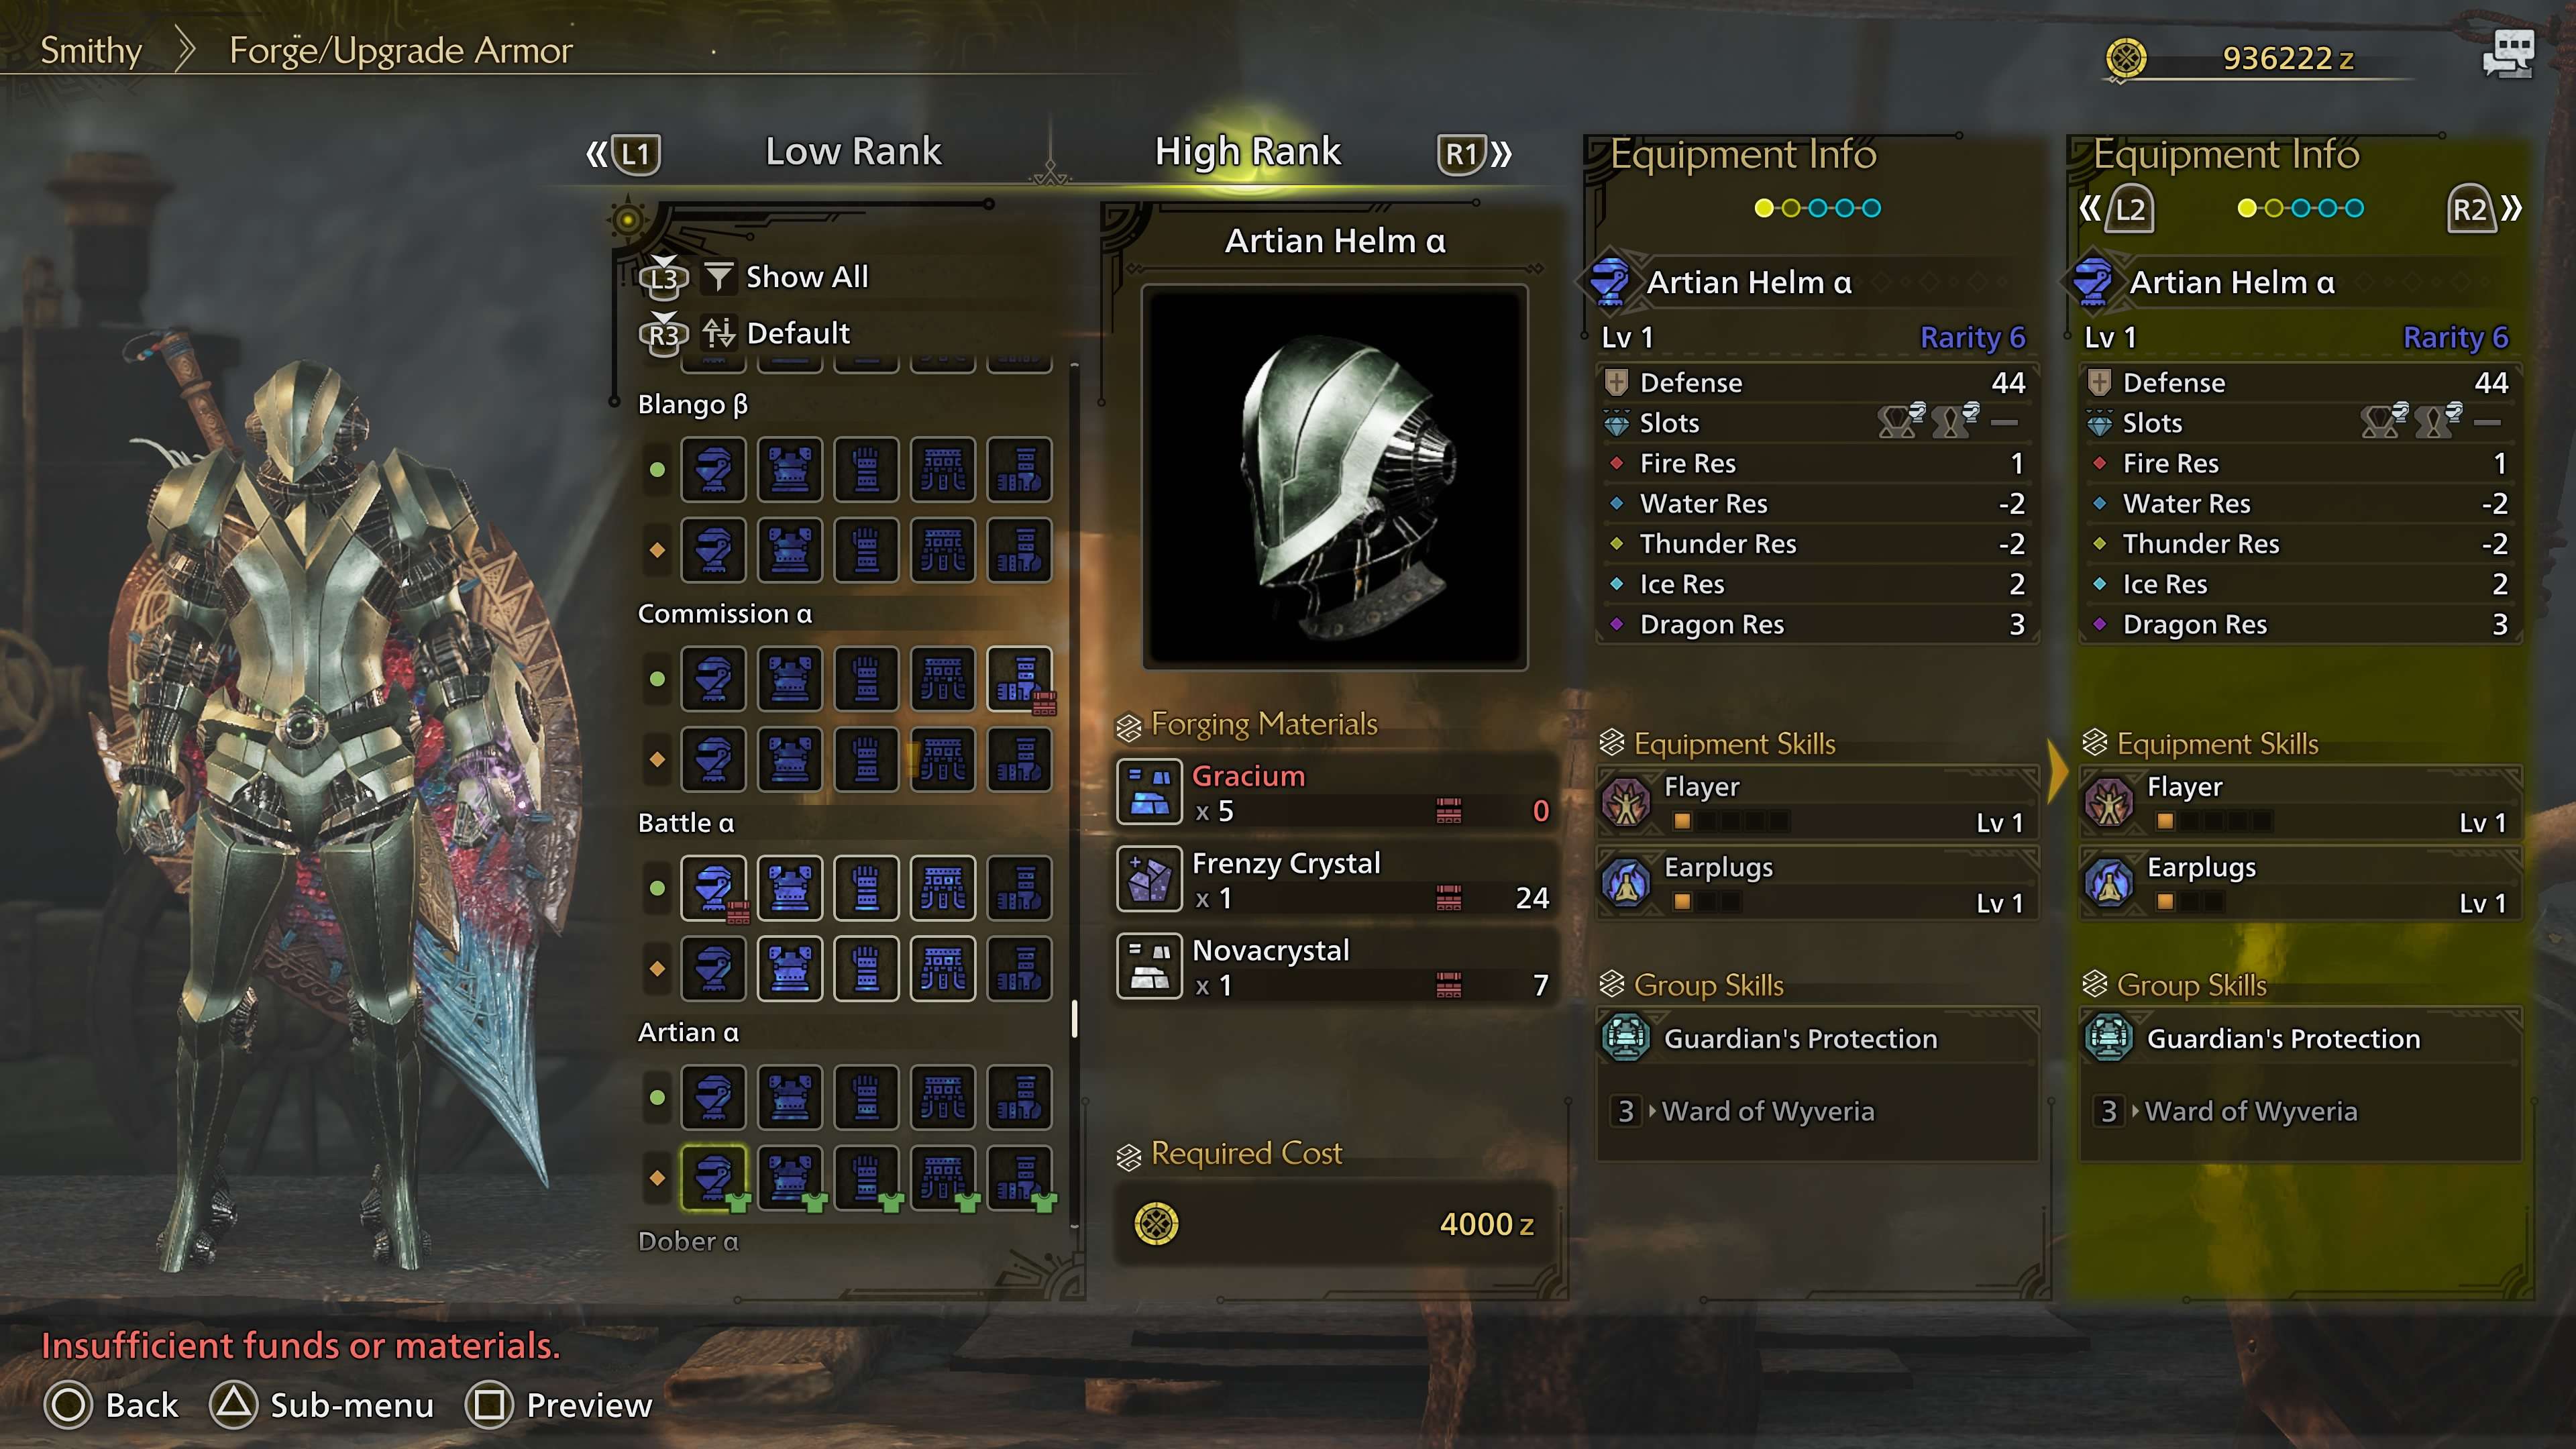
Once you get into High Rank, you’re going to want to stick with the Uth Duna weapon tree, as Power Prolonger is a highly valuable skill that’s not worth ditching. As for armor, the set I’d recommend the most is the Arkveld kit, but since you won’t face it until the very end of High Rank, here’s some other armor sets worth looking into as you steadily raise your HR.
- Doshaguma: The High Rank Doshaguma set is a good fit for Charge Blade for the exact same reasons as the Low Rank kit. Doshaguma’s Might is still a great skill for getting a solid attack boost as a reward for a perfect guard.
- Artian: The Artian armor features five helpings of the Flayer skill, which allows you to create wounds on monsters at a higher rate, and includes a flat damage buff for non-elemental damage.
These will get you through a good chunk of High Rank, but my favourite build for the Charge Blade doesn’t come until you unlock the Arkveld set.
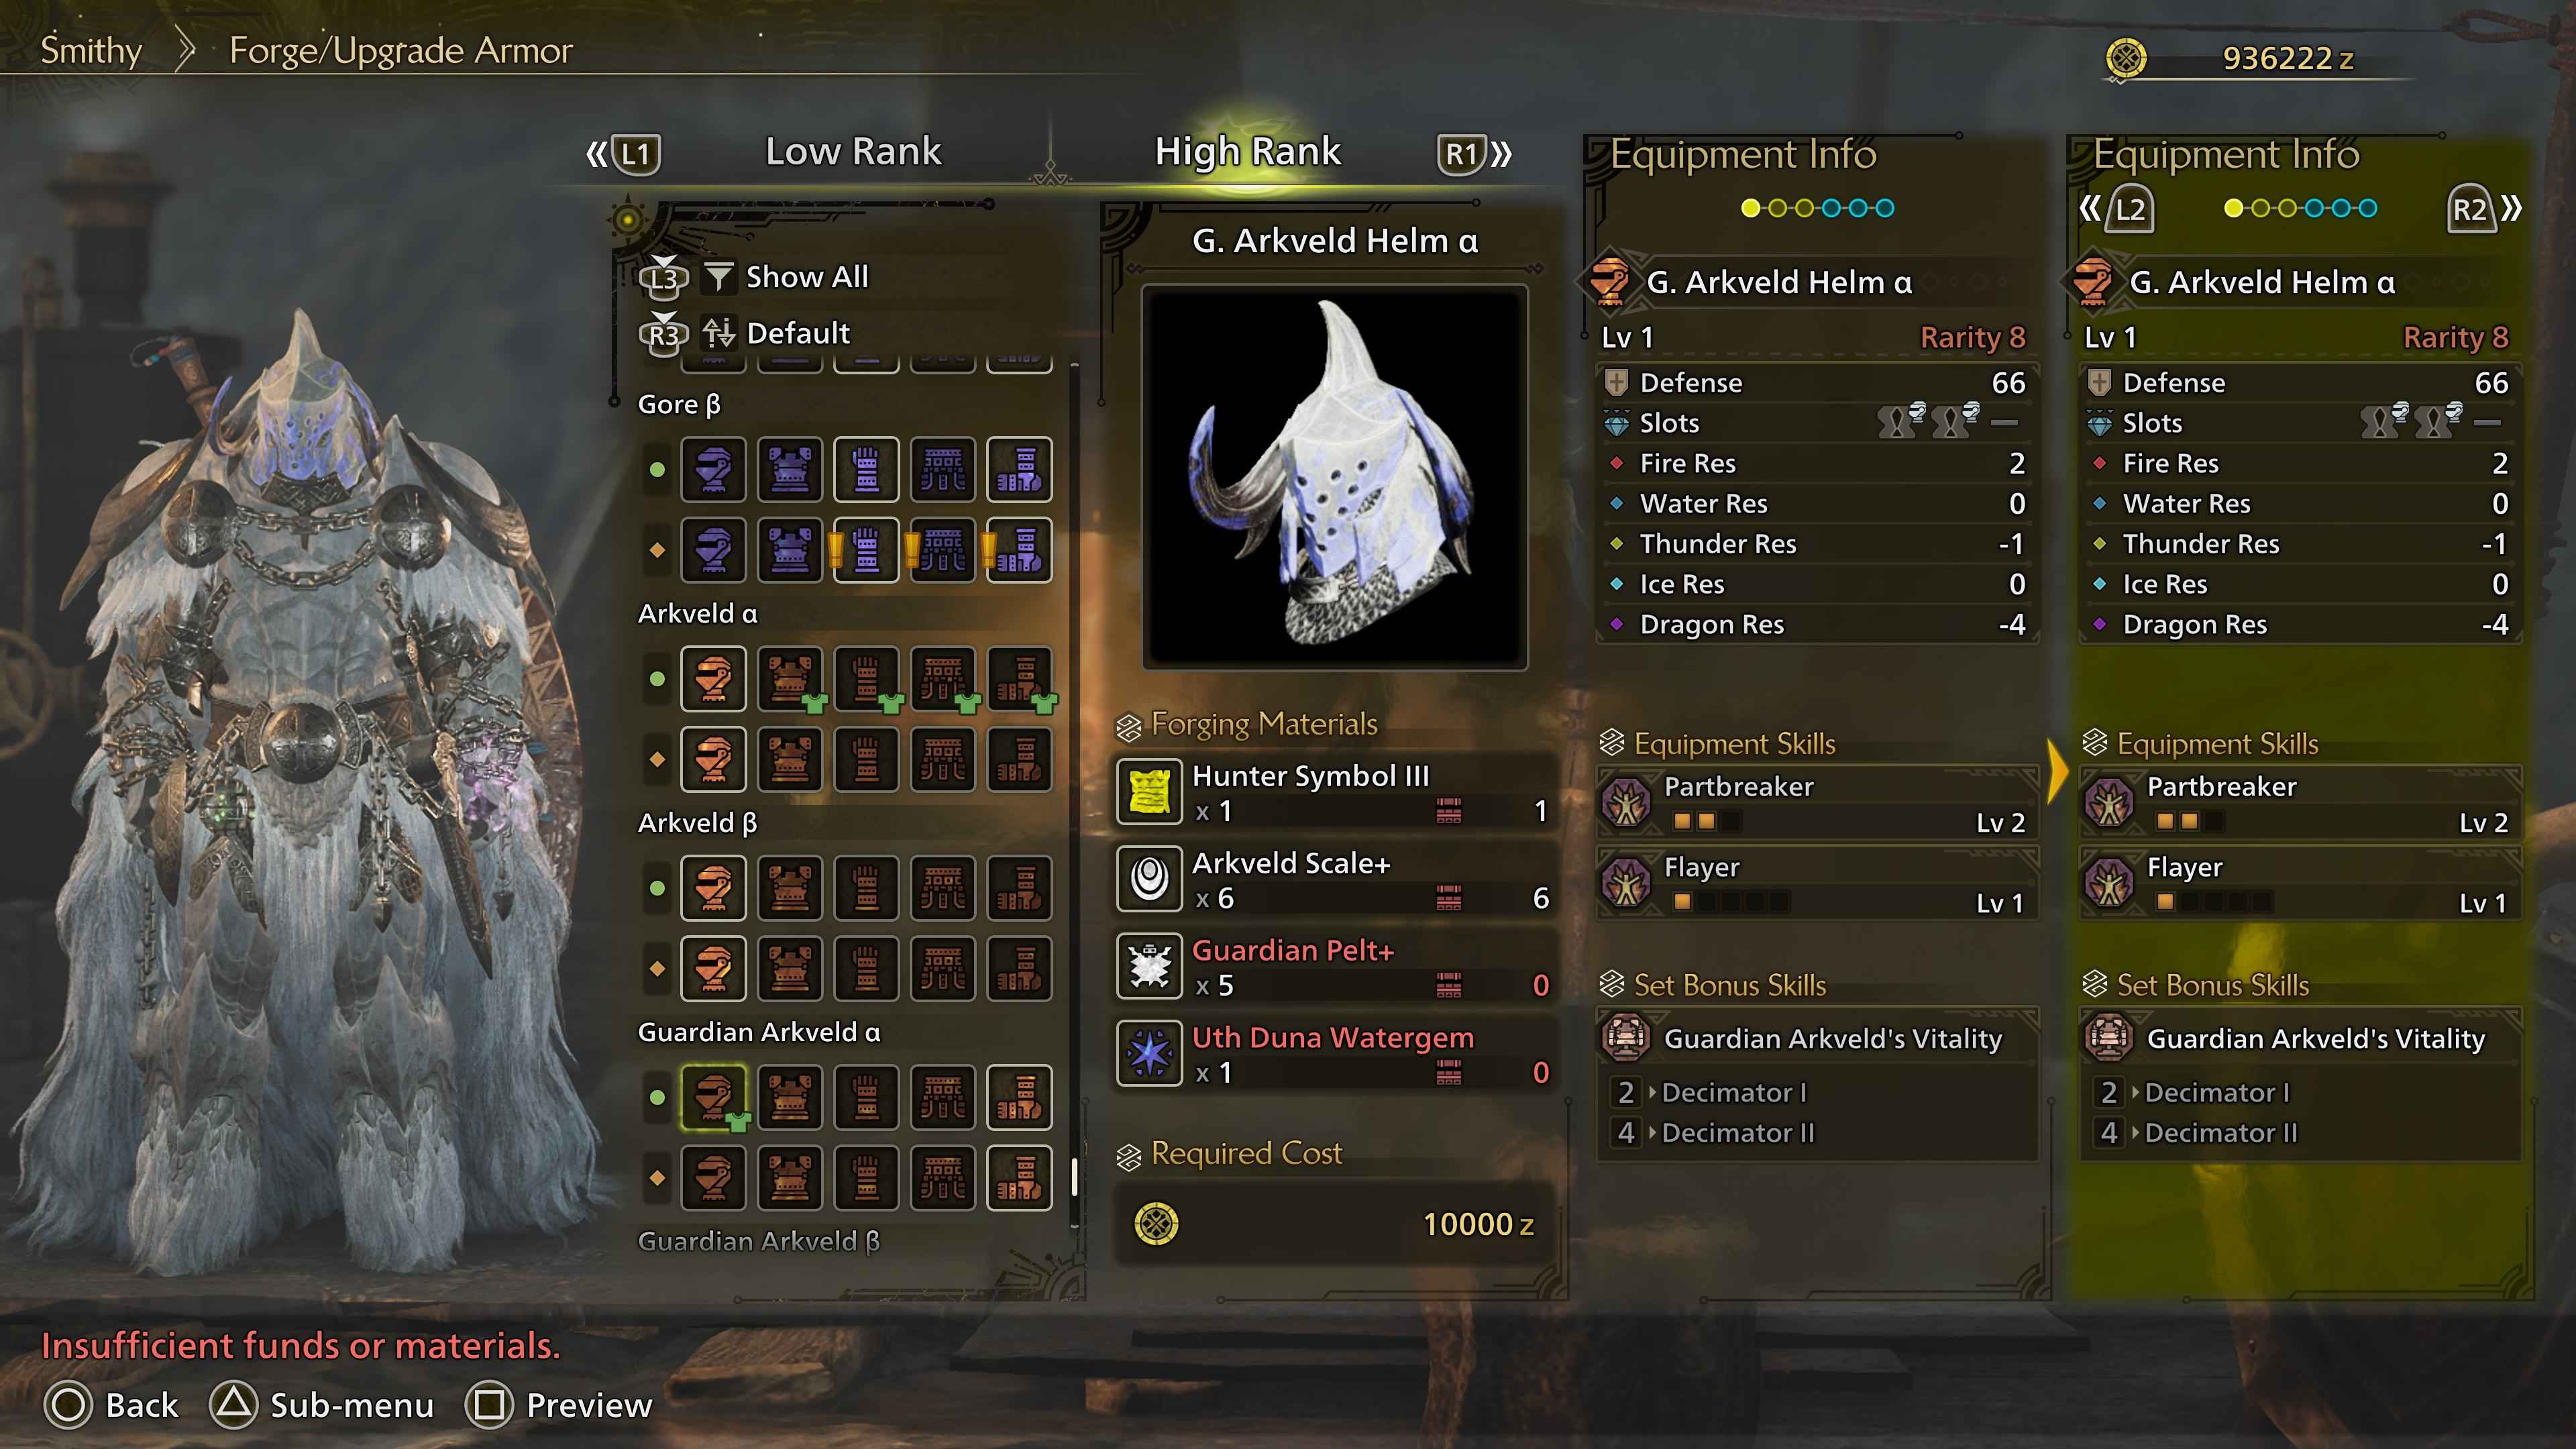
Arkveld alpha endgame build
Weapon | Helmet | Chest | Arms | Coil | Legs | Talisman |
|---|---|---|---|---|---|---|
Valeroje-Of-The-Waves | G. Arkveld Helm α | Arkvulcan Mail α | Arkvulcan Vambraces α | Arkvulcan Coil α | Arkvulcan Greaves α | Chainblade Charm II |
Weapon | Helmet | Chest | Arms | Coil | Legs |
|---|---|---|---|---|---|
Guardian/Stream Jewel [3], Artillery Jewel II [2], Focus Jewel [1] | Dragon Res Jewel [1] Brace Jewel [1] | Jumping Jewel [2] | Destroyer Jewel [2] Counter Jewel [2] | Dragon Res Jewel [1] | [2] Dragon Res Jewel [1] |
This build focuses on wounds, one of the most efficient ways to deal damage and—crucially for the Charge Blade—power up your axe form when destroyed with a focus attack. Just like with the Low Rank set, the Uth Duna tree is the one we’re going with, with the final weapon of that lineage, Valeroje-Of-The-Waves, offering up the Power Prolonger skill at its maximum level. This allows your sword, shield, and axe to remain in their elemental power forms for much longer than the base Charge Blade.
For your weapon, you’ll want to equip it with three decorations. In the level 3 jewel slot I’ve gone for Guardian/Stream Jewel [3], which gives you a +15% attack power boost following a perfect guard and a +40 water attack bonus. In the level 2 jewel slot, I’ve gone with Artillery Jewel II [2], which increases the attack power of your phial attacks, and for the level 1 slot I’ve gone with Focus Jewel [1], which increases the fill rate for your phials, allowing you to store them more quickly.
As for the armor, I’ve gone with the Arkveld α set, with the Guardian Arkveld α helmet. While the whole set has a strong lineup of skills, the reason I’ve picked this is mainly due to Weakness Exploit, which is present on the chest and waist pieces of armor. Weakness Exploit increases your weapon's affinity when you target weak points, with an extra bonus when you attack wounds. Given that the Valeroje-Of-The-Waves has poor affinity (minus 15%), the +15% given by your level 3 weakness exploit skill is enough to counteract that issue. Meanwhile, the G. Arkveld Helm α comes with Level 1 Flayer skills and Level 2 Partbreaker, which make it easier to cause wounds to appear and deal more damage when destroying them, respectively.

This set comes with eight decoration slots across its pieces. You have four level 1 slots; for three of these, you’re going to want to equip Dragon Res Jewels to get +20 Dragon Resistance, as the Arkveld set is very weak to Dragon Element attacks. (Of course, feel free to swap these out when you know you'll be fighting a monster that deals no Dragon damage). For your final level 1 slot, I’d recommend Brace Jewel, as it prevents knockback, which will work in tandem with your Guardian Jewel.
For the remaining four level 2 decoration slots, I’d recommend one Destroyer Jewel [2] to further boost the wound capabilities found in the G. Arkveld Helm, alongside a Counter Jewel [2], which gives you an attack boost when knocked back. And for the final two, I’d recommend two of Jumping Jewel [2], as these increase your evasion distance, which comes in incredibly handy when you’re using the Charge Blade’s Axe Form. Finally, I’d recommend equipping the Chainblade Charm 2, which grants you an extra two levels for the Flayer skill, making it even easier to inflict wounds on monsters.
More Monster Hunter Wilds on PC Gamer

- Monster Hunter Wilds Long Sword builds
- Monster Hunter Wilds Great Sword builds
- Monster Hunter Wilds Dual Blades builds
- Monster Hunter Wilds Insect Glaive builds
- Monster Hunter Wilds Hammer builds
- Monster Hunter Wilds Switch Axe builds
- Monster Hunter Wilds Bow builds
- Monster Hunter Wilds Light Bowgun builds
- Monster Hunter Wilds Heavy Bowgun builds
- Monster Hunter Wilds Sword and Shield builds
- Monster Hunter Wilds Lance builds
- Monster Hunter Wilds Gunlance builds
- Monster Hunter Wilds Hunting Horn builds

The biggest gaming news, reviews and hardware deals
Keep up to date with the most important stories and the best deals, as picked by the PC Gamer team.
You must confirm your public display name before commenting
Please logout and then login again, you will then be prompted to enter your display name.

