Build It: A super-storage show-stopper rig
AMD’s StoreMI offers up some enticing options for budget builders—let’s see how it performs.
Budget gaming PC
(~$750/£750) - A good entry-level system.
Mid-range gaming PC
(~$1,250/£1,250) - Our recommended build for most gamers.
High-end gaming PC
(~$2,000/£2,000) - Everything a gamer could want.
Extreme gaming PC
(>$3,000/£3,000) - You won the lotto and are going all-in on gaming.
Prefer to buy a prebuilt than building it yourself? Check out our guide to the Best Gaming PCs.
The idea behind this build is a slight departure from the norm: We wanted to find out what AMD StoreMI was capable of. However, we also wanted to extend the ethos behind the tech to the rest of the system. StoreMI, in case you missed it, pairs a spinning hard drive with an SSD to potentially offer the best of both worlds—high-speed access with large capacities. Something that would set you back a good chunk of cash if you were to simply buy a capacious SSD.
So, the general ethos is great value for money, but it’s more than simply focusing on the budget end of the spectrum—it’s the best balance between value and performance out there. To this end, we’ve set out to build a machine that offers the best value for money right now. It isn’t just that, though, because great value for money can cover a range of price points. There is something special about machines that cost around $1,000, and that’s the price we’ve had in mind when building this rig.
Length of time: 1-2 hours
Level of difficulty: Easy
So, we have a tech we want to explore and a general price point, but what of the machine’s purpose? Given the price point, it should be a mid-range machine that is capable of a wide range of tasks. The kind of general-purpose machine that is built every day, if you will. This also gives us chance to see how StoreMI works in a range of applications and situations, as well as a smattering of games.
As is always the case with these builds, you don’t have to follow this build to the letter, and this is especially true here as we’re trying to see how StoreMI performs; even so, the final build should stand on its own regardless. That said, let’s look at the components we’ve decided to use….
The search for value
It's actually quite tricky in the current market to make a call on the best value gear, simply because a lot of our go-to components have seen their prices explode, meaning they’re not as attractive as they once were. Graphics cards, in particular, have had a rocky ride recently, and while we once would have reached for a GeForce GTX 1070 for a mid-range rig such as this, these days we have to set our sights a little lower, unless we want to bump into the $1,500 price bracket instead. This is why we’ve reached for a GeForce GTX 1060 6GB, although if gaming is of no interest, you can pick up a GTX 1050 instead for around $150.
For the heart of the system, we’ve elected to give the Ryzen 5 2600 a spin, and have paired it with one of the more affordable X470 motherboards around in the shape of the Gigabyte X470 Aorus Ultra Gaming. There are combo deals to be had with these two, so it’s worth taking a look at your retailer of choice when buying—at the time of writing, Newegg has both of these together to save $20.
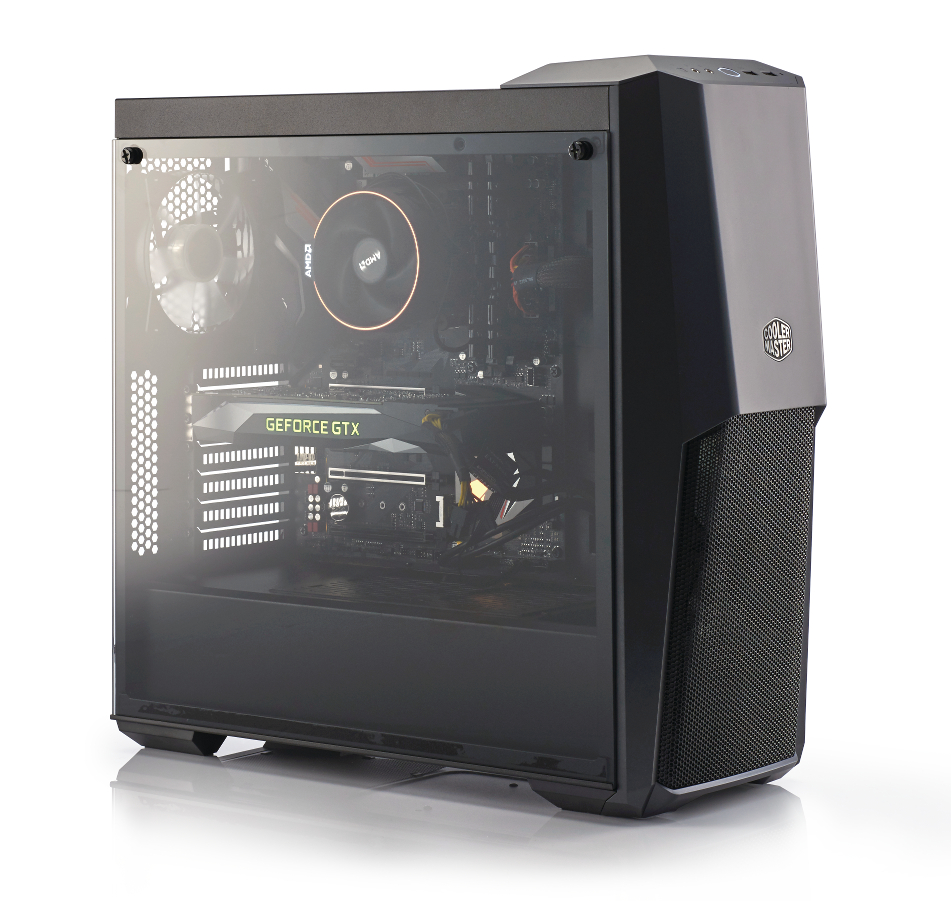
In order to test StoreMI, we’ve grabbed the recently released Samsung 970 Evo 250GB M.2 and paired it with a 1TB WD Caviar Blue hard drive. Amazingly, the new 970 Evo actually retails slightly cheaper than the older 960 Evos, so that’s one of the easiest upgrades we’ve ever made. This build also showcases Cooler Master’s newest case, the MasterBox MB500, which we’re eager to build in. Finishing off the spec list, we’ve got 16GB of DDR4-2400 G.Skill RAM, and an affordable power supply from Cooler Master as well. Now that’s all done, let’s get building.
The biggest gaming news, reviews and hardware deals
Keep up to date with the most important stories and the best deals, as picked by the PC Gamer team.
1. Switch cooling
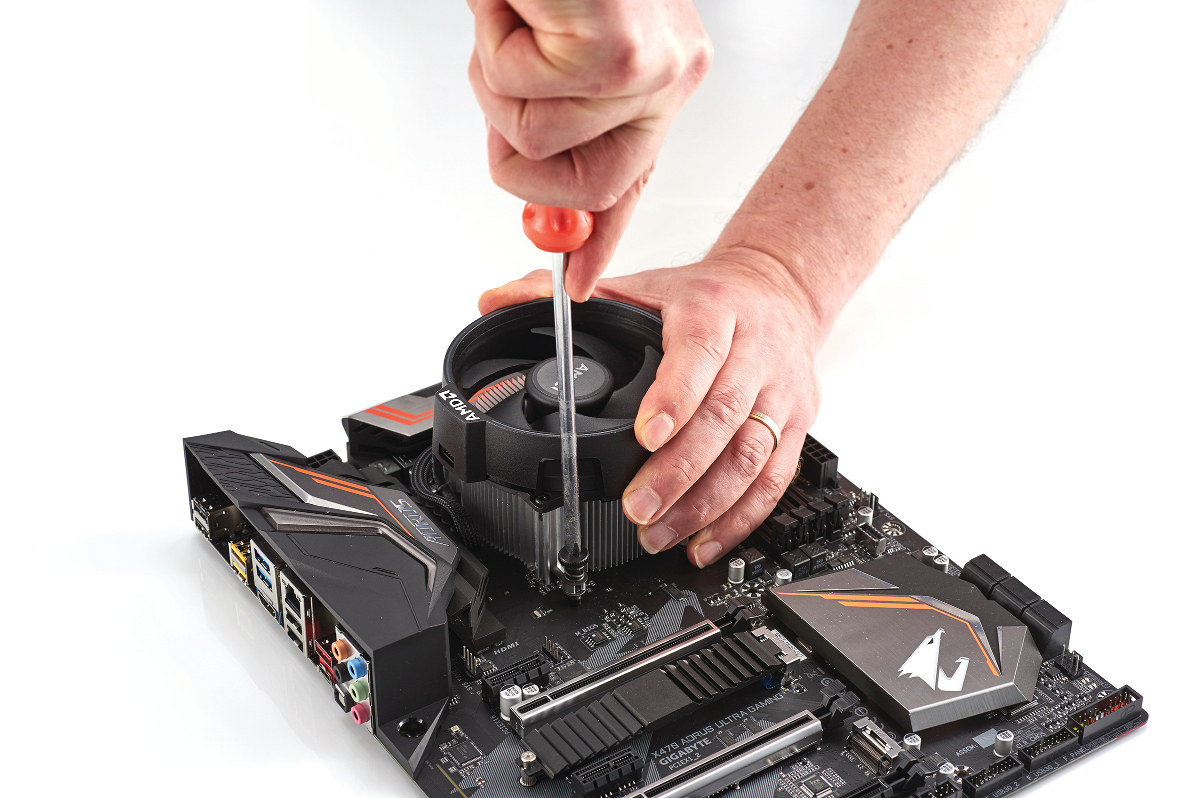
The Gigabyte X470 Aorus Ultra Gaming, like most AM4 motherboards, ships with support for clip-on coolers, but if you’re using the Wraith Stealth cooler, as we are here, you need to unscrew the default brackets first. Once out of the way, you have to hold the backing plate in place, and then screw the Wraith Stealth into position. The best way of doing this is to work in diagonals—partially screw one corner into place, move to the opposite corner and partially tighten that one, then work on the other two corners. Once they’re all in situ, you can finish off by tightening all four screws. Don’t forget to attach the fan power cable to the motherboard, and you’re done.
2. Install the M.2
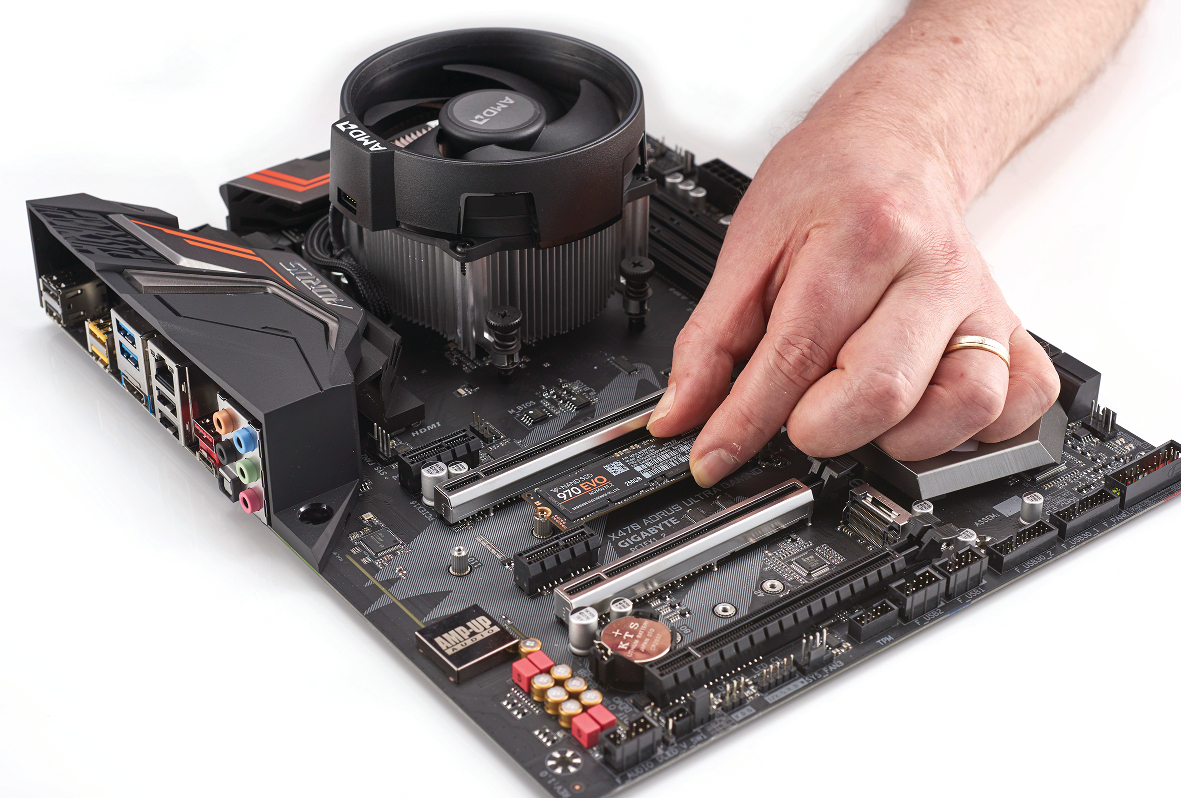
Some items are easier to install before you slide the motherboard into place, and one of those is the M.2 SSD. Grab your trusty screwdriver, and release the heatspreader above the top M.2 drive slot. You should then unscrew the post from the bottom M.2 drive slot, and screw it into place, before dropping the Samsung 970 Evo into the slot, and securing it with the post you’ve moved. You can then peel the film off the heatspreader, and ease this down on top of the drive, before screwing that in place. This drive socket is completely hidden by the graphics card when you install that, so it’s worth checking this is sorted before going any further.
3. Click into place
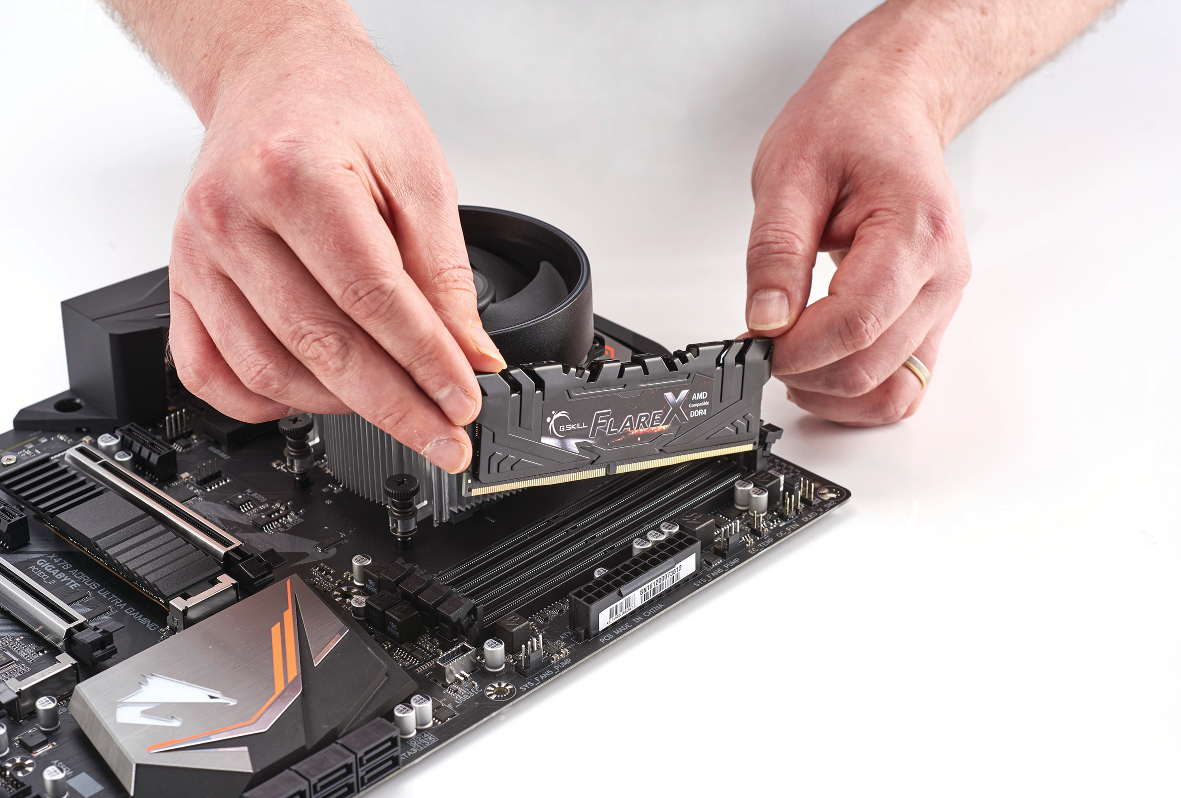
We've elected to install the memory before slotting the motherboard into place, purely because doing so outside of the box gives us a little more space to work with. Check the motherboard to see which memory slots you should use first, as this should be printed on the motherboard somewhere (and it’s rarely obvious). Once done, you should install the motherboard stand-offs into the case, then clip the IO backplate into place. You can now ease the motherboard into the chassis and screw it in place using the case’s supplied screws. Keep an eye out for any stray cables that can get trapped under the motherboard if you’re not careful—we moved the rear fan’s cabling out of the way for this very reason.
4. Graphics time
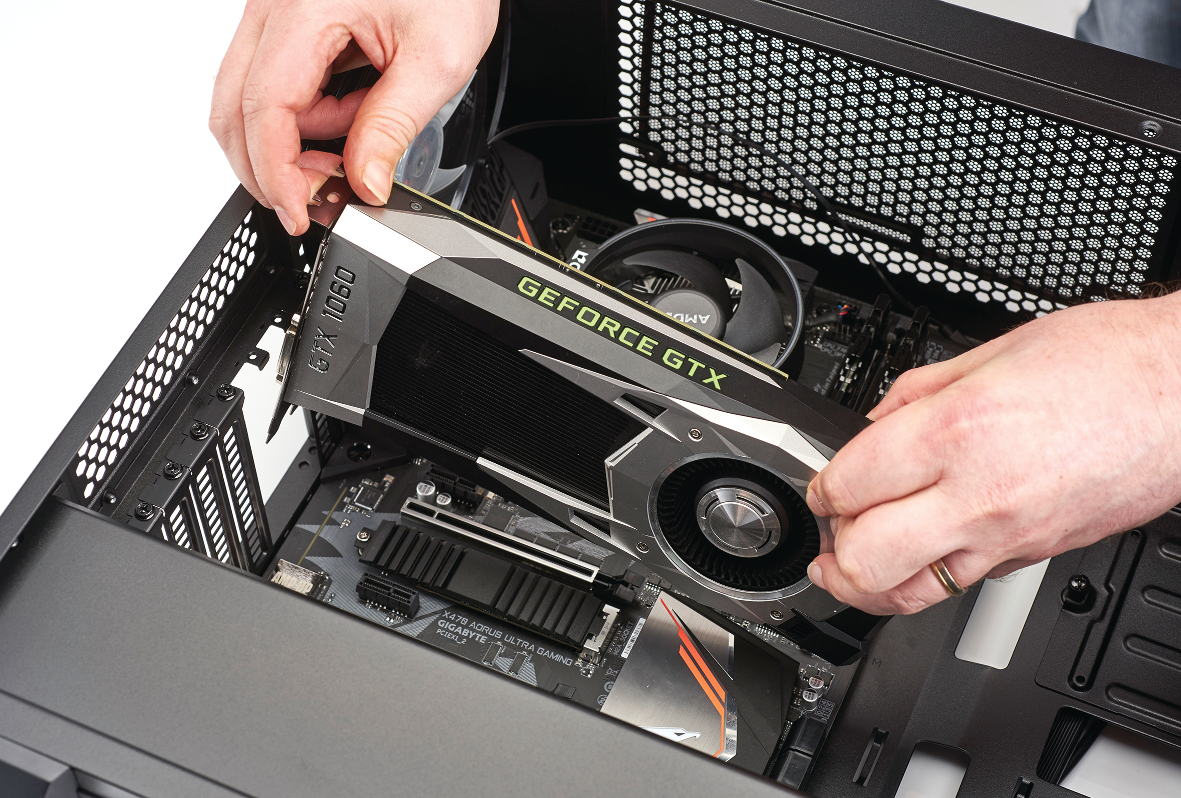
With the motherboard in place, you can now add the other components. When it comes to adding your graphics card, you need to remove the two PCI blanking plates before dropping the card into position. The MasterBox MB500 is a little odd here because there aren’t any guides either side of the blanks, but you still can’t go wrong. Once the graphics card is installed, hold it in place with the two screws. Next up, we installed the hard drive in the top of the hard drive cage, which can be found in front of the PSU at the bottom of the machine. The brackets for this are toolless, and really easy to use—just make sure you have the drive the right way around.
5. Power up
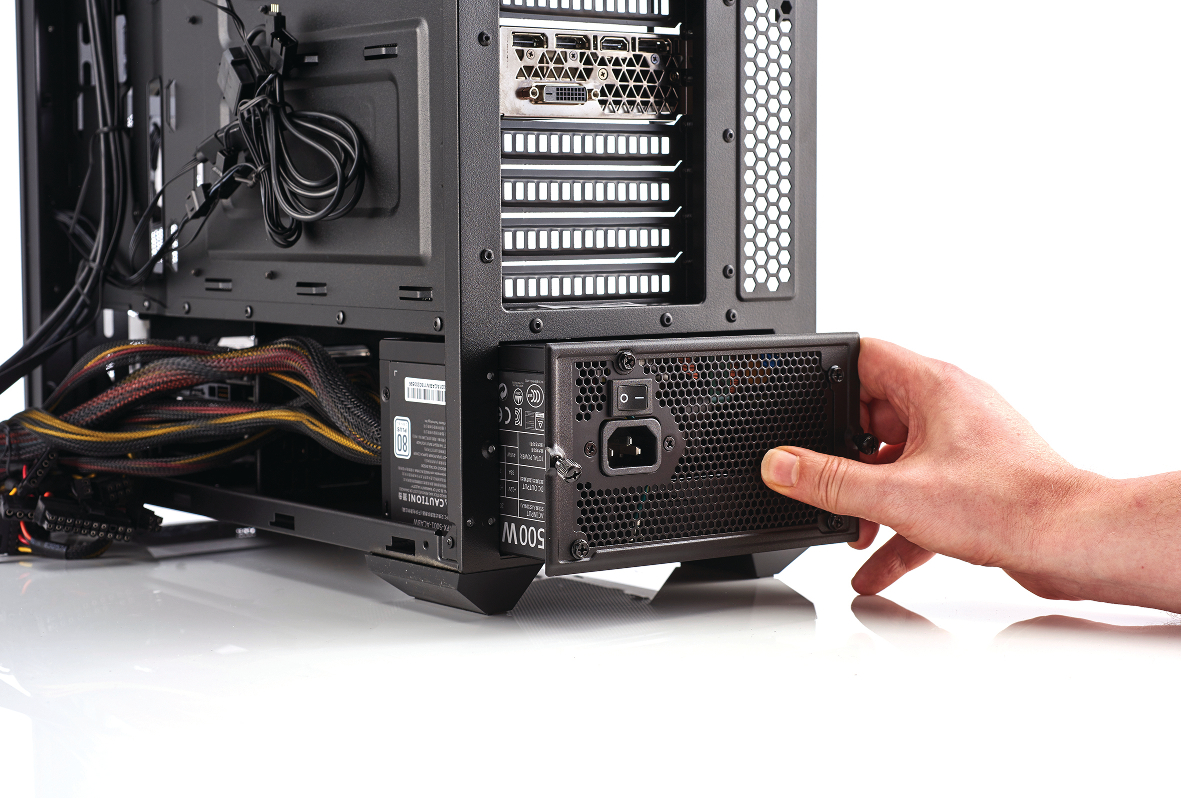
We're so used to modular power supplies here, that we’re always a little shocked when handling a normally cabled PSU, but it really doesn’t make that much difference (other than to your wallet). Release the two thumbscrews holding the PSU bracket in place, then attach this to your PSU, making sure that you’ve got it the right way so that the fan is pointing down. Thread the cables through the hole, then push the PSU into place, screwing the plate into position once you’ve made sure you haven’t trapped any cables in the process. You can now attach the motherboard, graphics card, and drive power cables, while trying to keep good airflow in mind.
6. Lights, camera, action!
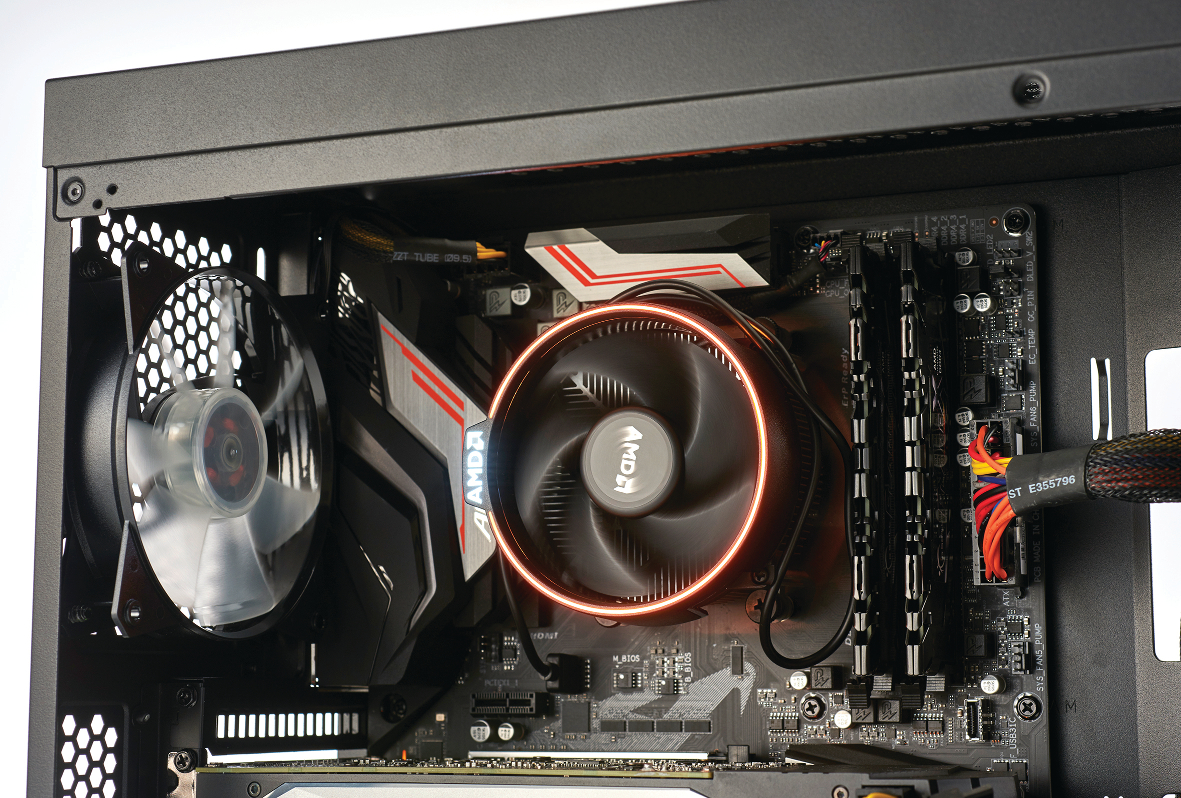
RGB lighting isn't something we usually get too excited about—in fact, we found the RGB-lit fans of the MasterBox MB500 overpowering—but there is a bit of lighting we do like, and that’s the pairing of the motherboard lighting with the Wraith Stealth CPU cooler. Connecting the (incredibly long) cable that comes with the Wraith cooler to the LED CPU header, which can be found next to the top PCIe x1, lights up the ring on the cooler. You can change the color of the motherboard LEDs and the Wraith in the BIOS, or by using Gigabyte’s Windows app later on if you wish. After a final check of your cabling, the hardware side of your build is finished.
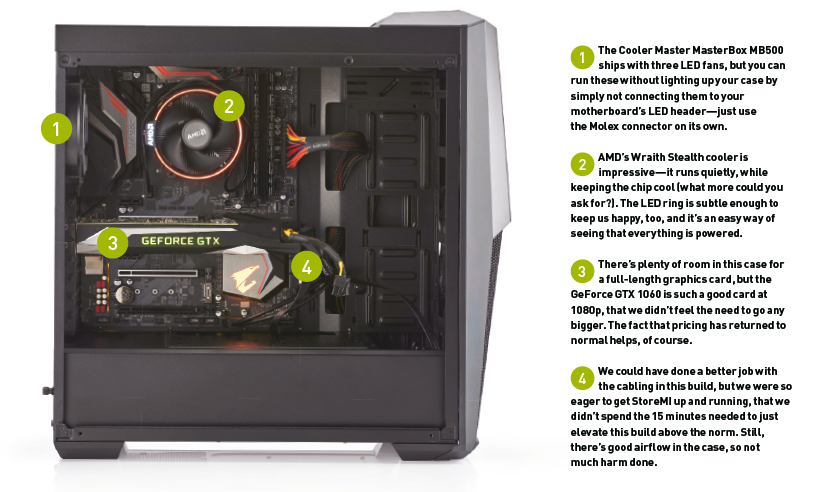
Built for storage
There weren't any nasty surprises for us here, and the build process went without a hitch. We were momentarily confused by the lack of a securing post on the main M.2 slot, but realizing we could borrow the one from the unused bottom slot, it didn’t hold us back for long. You could argue that you don’t need it at all, as the heatspreader holds it securely, but as our machines get couriered from the photo studio back to the office for testing, we prefer to overprovision, as opposed to finding our components rattling around later on.
Getting up and running with StoreMI wasn’t as straightforward. After installing Win 10 on the Samsung 970 Evo, and downloading the drivers, we proceeded to completely mess up the install of StoreMI. We clicked the wrong checkbox, and instead of producing a superfast hard drive, we ended up with a machine that wouldn’t boot. Frustration set in as we couldn’t then get Windows to see any drives, but after checking out the FAQ here, we managed to grab the drivers, and wipe the drives with DiskPart.
On the second attempt, we installed Win 10 to the hard drive, then installed StoreMI so the SSD was used to speed up that installation. This time it worked without a problem, so we could get on with testing the performance of the drive tech and the rest of the machine. The performance garnered from this build was exactly what we expected in terms of the games suite and Cinebench score—this is a decent mainstream machine and no mistake. The fact that the zero-point we use for Build It is a previous-generation Ryzen 5 1600 means that the figures really speak for themselves.
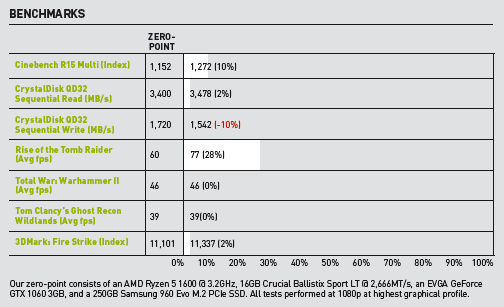
How about StoreMI? It’s worth noting that a tiered drive system like this takes a while to kick in, and our performance metrics initially showed read performance more akin to what we’d expect from a spinning hard drive (around 180MB/s for sequential reads), albeit with PCIe NVMe write speeds. A few tests down the line, though, and the same benchmark produced the Samsung 970 Evo’s normal read performance—the incredible read figures that you can see in the benchmarks above.
While it would be easy to see this as a problem for StoreMI as a technology, it’s not as simple as that, especially when it comes to applications you use a lot. It performs exactly as you need it to where it counts. Essentially, if you use a lot of different apps, but rarely, a dedicated, large NVMe is definitely a better deal, but for a more focused selection of apps and games, StoreMI works well.
This article was originally published in Maximum PC's July issue. For more quality articles about all things PC hardware, you can subscribe to Maximum PC now.
Alan has been writing about PC tech since before 3D graphics cards existed, and still vividly recalls having to fight with MS-DOS just to get games to load. He fondly remembers the killer combo of a Matrox Millenium and 3dfx Voodoo, and seeing Lara Croft in 3D for the first time. He's very glad hardware has advanced as much as it has though, and is particularly happy when putting the latest M.2 NVMe SSDs, AMD processors, and laptops through their paces. He has a long-lasting Magic: The Gathering obsession but limits this to MTG Arena these days.

