New World leveling guide
Speed up your leveling journey through Aeternum.


New World crafting: How it works
New World servers: Find the one for you
New World petalcap: Where to find them
New World hemp: How to get it
Looking for a New World leveling guide to help you get ahead? Amazon's new MMO is now out in the wild, so it's time to plunge into a chaotic world of PvP fort assaults, expeditions, and monster-infested wilds.
You're going to need to be strong to conquer everything New World has to throw at you. With that in mind, as well as general leveling pointers, this guide features a leveling build to give you a good idea of what will help you progress at a decent speed.
There are also plenty of beginner tips in this New World guide to get you started on the right track. As with any MMO, it never hurts to smooth your road a little, and this New World leveling guide will hopefully do just that.
Leveling tips
New World leveling guide: How to level fast
Prioritise the main story quests (but don't forget the others)
There are many different sources of XP in New World, but you should concentrate on keeping up with the main story quests. Not only do these net you a relatively big chunk of XP, but it also works as a guide to which areas are relevant for your level.
Of course, you can—and should—supplement these with Town Projects, faction missions, and other available side quests. But sticking with the main story quest ensures you have access to essential items, such as the Azoth Staff, which is required to unlock expeditions (dungeons) later on.
Look out for lore pages
The biggest gaming news, reviews and hardware deals
Keep up to date with the most important stories and the best deals, as picked by the PC Gamer team.
As soon as you begin exploring Aeternum, you'll start to notice lore notes pretty much wherever you go. They're hard to miss, thanks to their blue glow and interacting with them gives you a small amount of XP.
It's not worth going out of your way to look for them, but even that tiny amount of XP adds up over time. You'll see plenty of these notes when you're carrying out quest objectives or searching for resources to gather, so it's worth clicking on them whenever you find them.
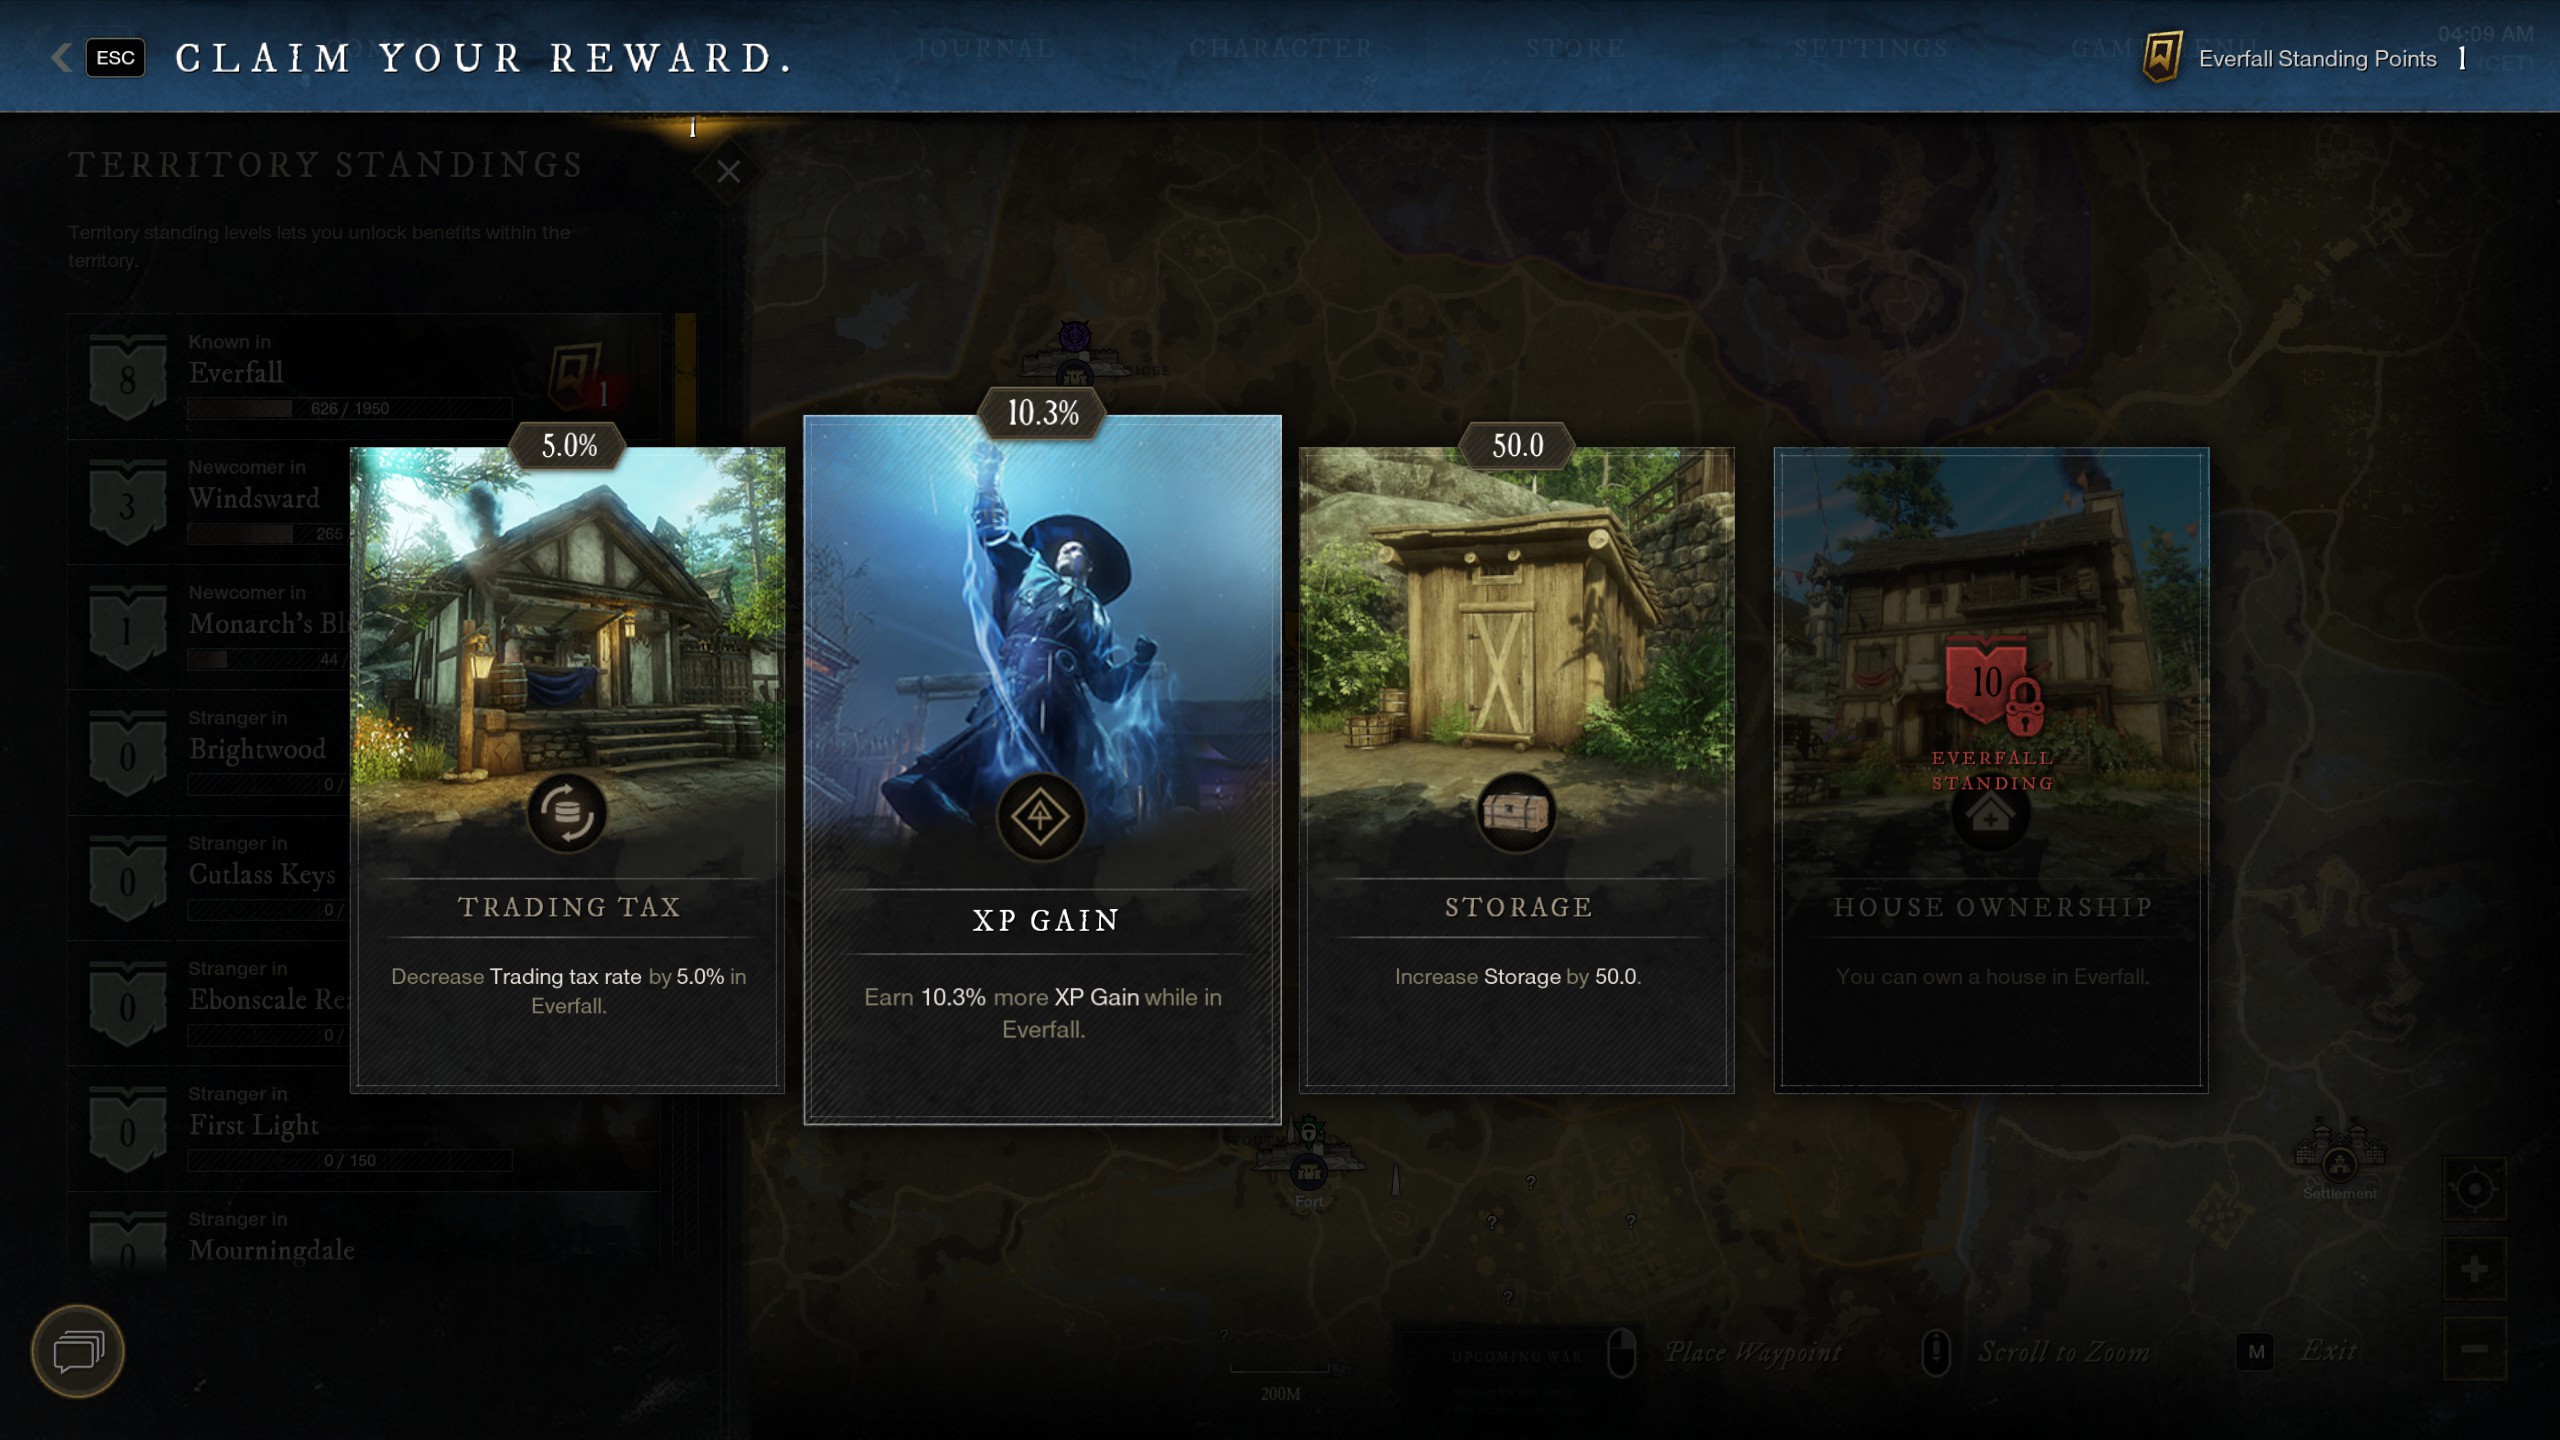
Pick the Territory standing XP bonus
Aeternum's map is broken up into territories which are governed by a settlement, such as First Light, Windward and so on. As you carry out quests and other activities in these areas, you'll increase your standing with them. Each time you level that up, you can choose one of several perks to activate in that region. If the XP Boost option is there, grab it to gain that bonus for all quests and activities you do in that territory.
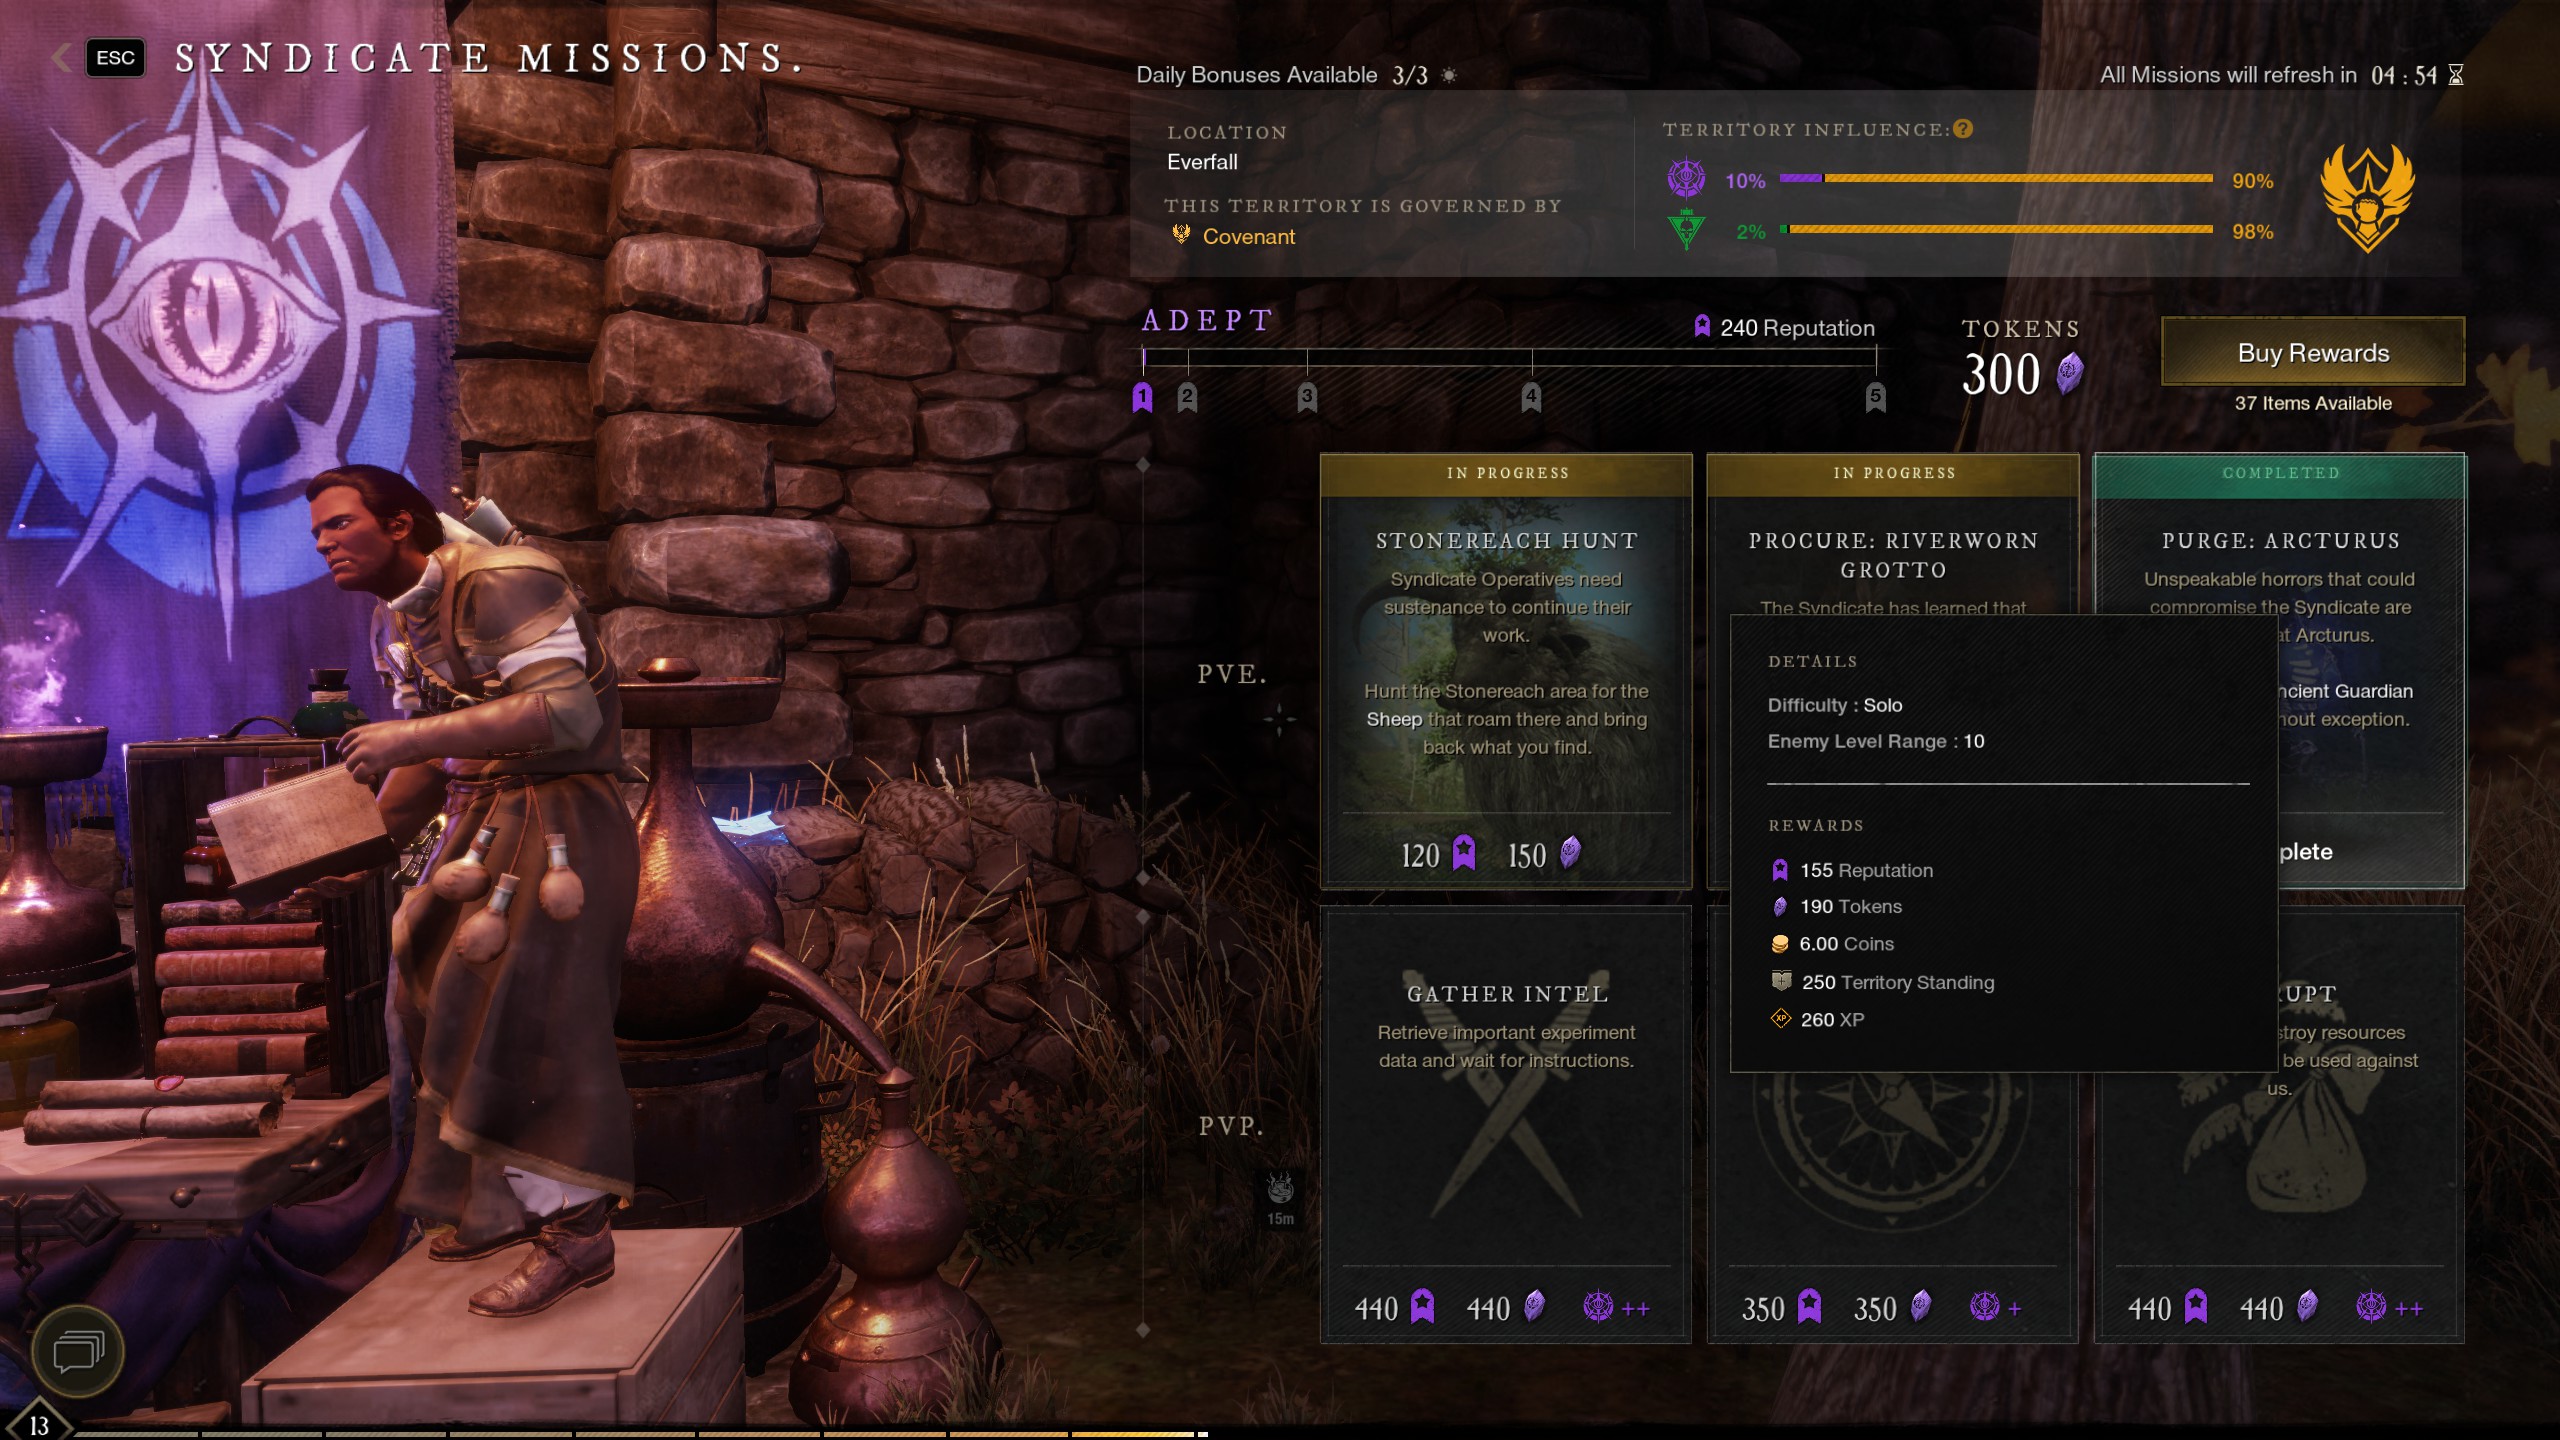
Do at least three faction missions each day
The first three faction quests you do each day give you a significant XP bonus, so it's worth picking them up before heading out. You can check your daily bonus allowance at the top of the faction board when you pick up and hand in these quests.
Hit enemies that others are fighting
There are a few faction quests and Town Projects that task you with killing a certain number of sheep, wolves, or other animals, but it's not always easy to find them when there are so many other players vying for the same targets.
If another player hits an enemy first, there's no reason you can't help them kill it, as you'll still get character and weapon XP for your contribution. It's not a huge amount, but it does add up, especially if the alternative is just to run around waiting to get the first hit on something.
Level up your gathering skills
Gathering nets you XP, but you should make sure you've levelled harvesting and mining to at least 30. Some of the main story quests require you to gather specific resources, and you don't want to be caught off-guard when the time comes.
Even if you have no use for the resources you gather now, you can either pop them into storage for later or sell them at the Trading Post for a bit of extra cash.
Make use of fast travel shrines
You'll generally find a couple of fast travel shrines in each territory, in addition to the main settlement. It's well worth exploring when you're out and about to unlock these to cut down on travel time later.
Question marks indicate points of interest on the map, so if a quest happens to take you near one, check it out while you're in the area, just in case it's a shrine. While fast travelling uses Azoth, you can cut down the cost by emptying your bags before you set out as your weight is one of the factors taken into account.
Stock up on food
Make sure you're stocked up on food before you head out. Rations work well to heal you back up in a pinch, but they also give you a buff that continues to heal you for a small amount for the next 20 minutes.
This might not seem like much, but it can help reduce downtime between enemies as you won't passively regenerate health otherwise unless you're resting at a camp or inside a settlement.
Leveling build
New World levelling build: Weapon combinations
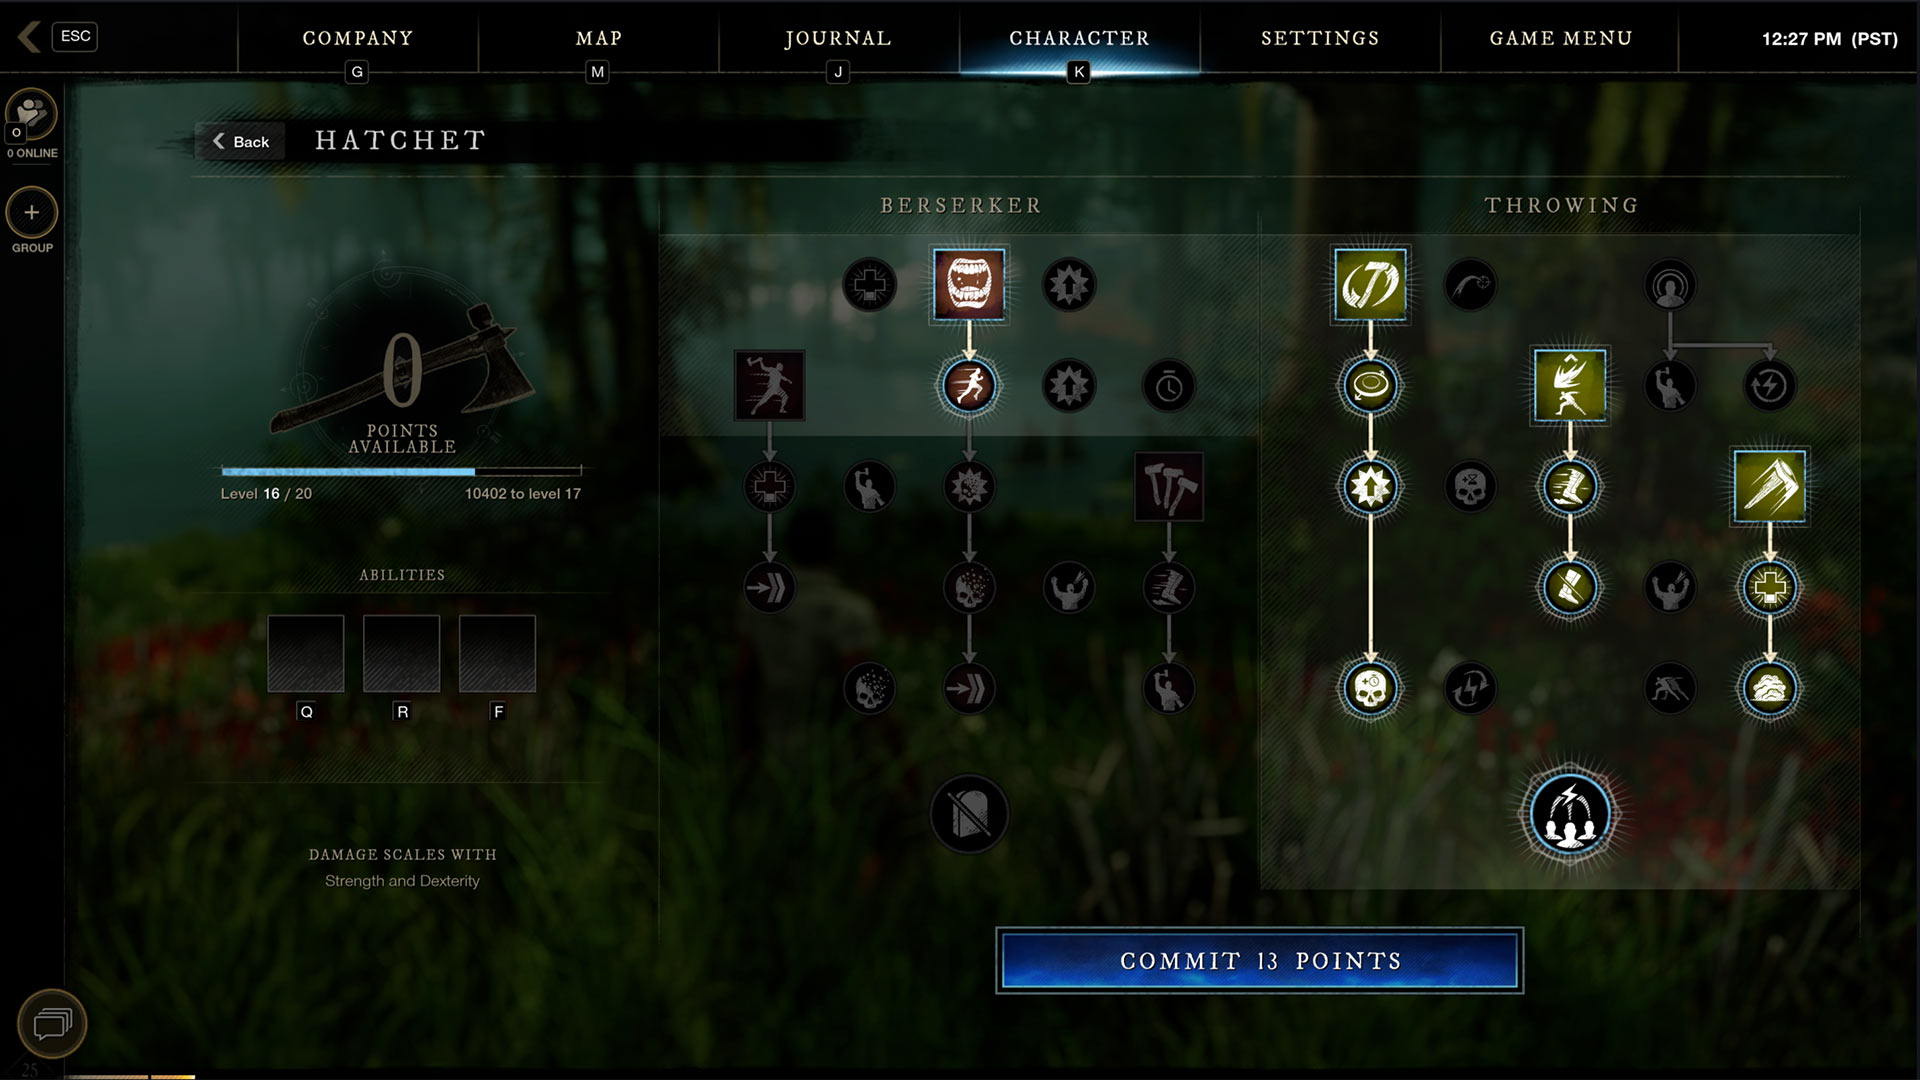
You have two weapon slots and you should make use of both of them. Not only does this mean you can get the best of both worlds by combining melee and ranged weapons, but you can also make use of the abilities and bonuses from each weapon's skill tree as you level them up.
The hatchet is a solid choice, thanks to its Berserk Mode, which increases your damage and movement speed and grants a passive healing effect. The second weapon you choose will come down to personal preference, but the suggestions below are good starting points.
Hatchet and life staff
This build will give you tonnes of survivability, so you don't have to spend time healing between enemies. It combines the hatchet's Berserk Mode passive healing with the life staff's healing abilities, though this doesn't mean you'll need to spend a lot of time casting either. The Sacred Ground ability from the staff's healing skill tree will heal for a decent amount of time after being placed. It's also on a reasonably short 20-second cooldown.
Hatchet and bow
If you want to concentrate on getting through fights quickly, pairing the hatchet with a bow is a solid choice. This build adds to hatchet's Berserk Mode speed increase with the bow's passive movement bonuses, such as Archer's Speed in the Skirmisher skill tree. It's also worth noting that you'll need to craft arrows for the bow before you can use it.
Having said that, the best levelling build is always going to be what you enjoy playing. If you'd rather switch out the life staff for a spear, or the hatchet for a great axe, then go for it. Play around with different weapon combinations and abilities and see what works for you.
There's no point sticking with a build if you're not enjoying it, and it will only hamper your levelling speed in the long run if you have to force yourself to play.
Which attributes to target
Each time you gain a level in New World, you'll have an attribute point to spend. The weapons you choose will determine where you'll want to put a lot of your points, but the weapons in the examples above use different stats, so what should you do?
Your choice will come down to which weapon you primarily use, and you should get a good idea of this after the first few levels. It's unlikely that you're going to use them both equally, so concentrate more on the attributes used by the weapon you favour. You can always respec for a small price—though respeccing is free up to level 20, so you can play around with stats during lower levels.
What about armour?
The weight of your armour affects your mobility and how well you can dodge, so it's essential to consider your playstyle when choosing. There's no right or wrong answer here, but if you're going for a mobile build, the lighter the armour, the better.
Light armour gives you the least amount of protection but offers a damage bonus—as well as making you much better at dodging. Medium armour still lets you dodge—but not as far—but offers more protection, whereas heavy armour is more suited to tanky characters going for a defensive build.
Leveling rewards
New World leveling rewards
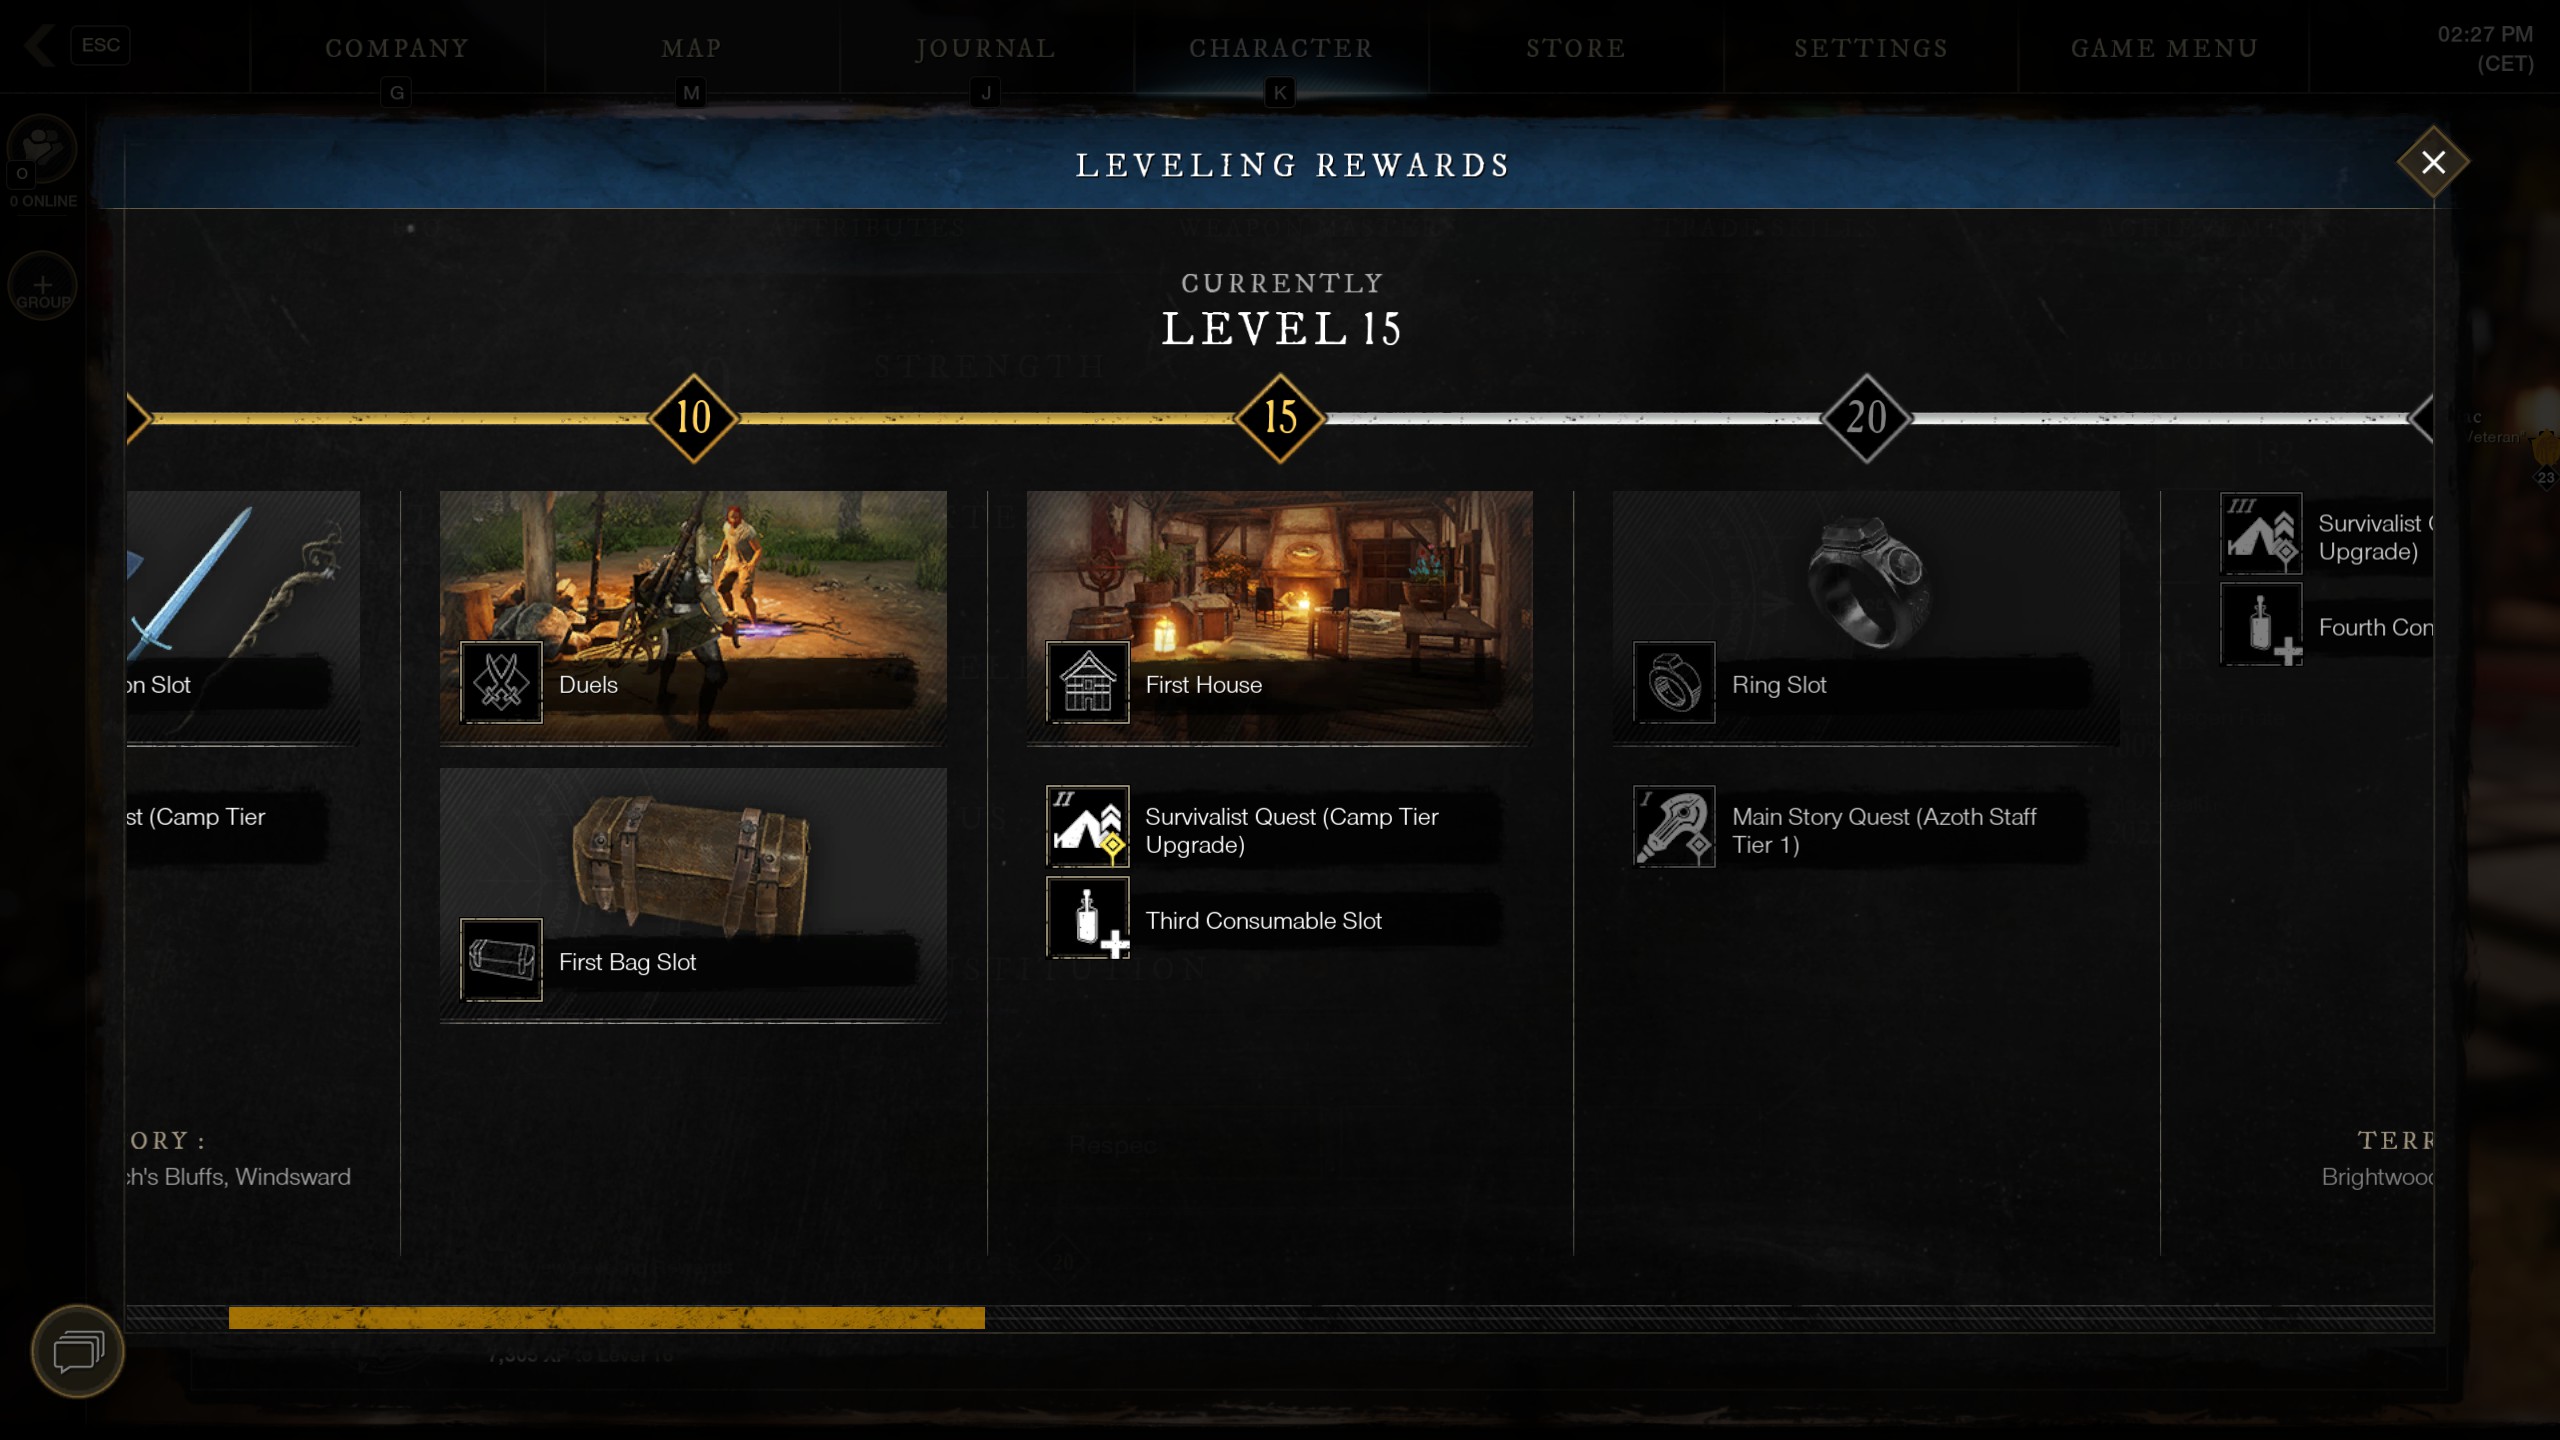
When you hit certain level milestones, you'll receive certain rewards. Here's what your character will unlock, and when:
- Level 5: Second weapon slot, Survivalist quest (Camp tier 1)
- Level 10: Duels, first bag slot
- Level 15: First house, camp tier 2, third consumable slot
- Level 20: Ring slot, main story quest for Azoth Staff tier 1
- Level 25: Fourth consumable slot, camp tier 3
- Level 30: Second bag slot, main story quest for Azoth Staff tier 2
- Level 35: Second house
- Level 40: Earring slot, camp tier 4, main story quest for Azoth Staff tier 3
- Level 45: Third bag slot
- Level 50: Invasions
- Level 55: Third house, camp tier 5
- Level 60: Outpost Rush

Sarah started as a freelance writer in 2018, writing for PCGamesN, TechRadar, GamingBible, Red Bull Gaming and more. In 2021, she was offered a full-time position on the PC Gamer team where she takes every possible opportunity to talk about World of Warcraft and Elden Ring. When not writing guides, most of her spare time is spent in Azeroth—though she's quite partial to JRPGs too. One of her fondest hopes is to one day play through the ending of Final Fantasy X without breaking down into a sobbing heap. She probably has more wolves in Valheim than you.

